Vendor Basics Tab
Important
Information and features vary according to the roles to which you belong and the permissions associated with those roles. For more information, contact your module manager or your campus support team.
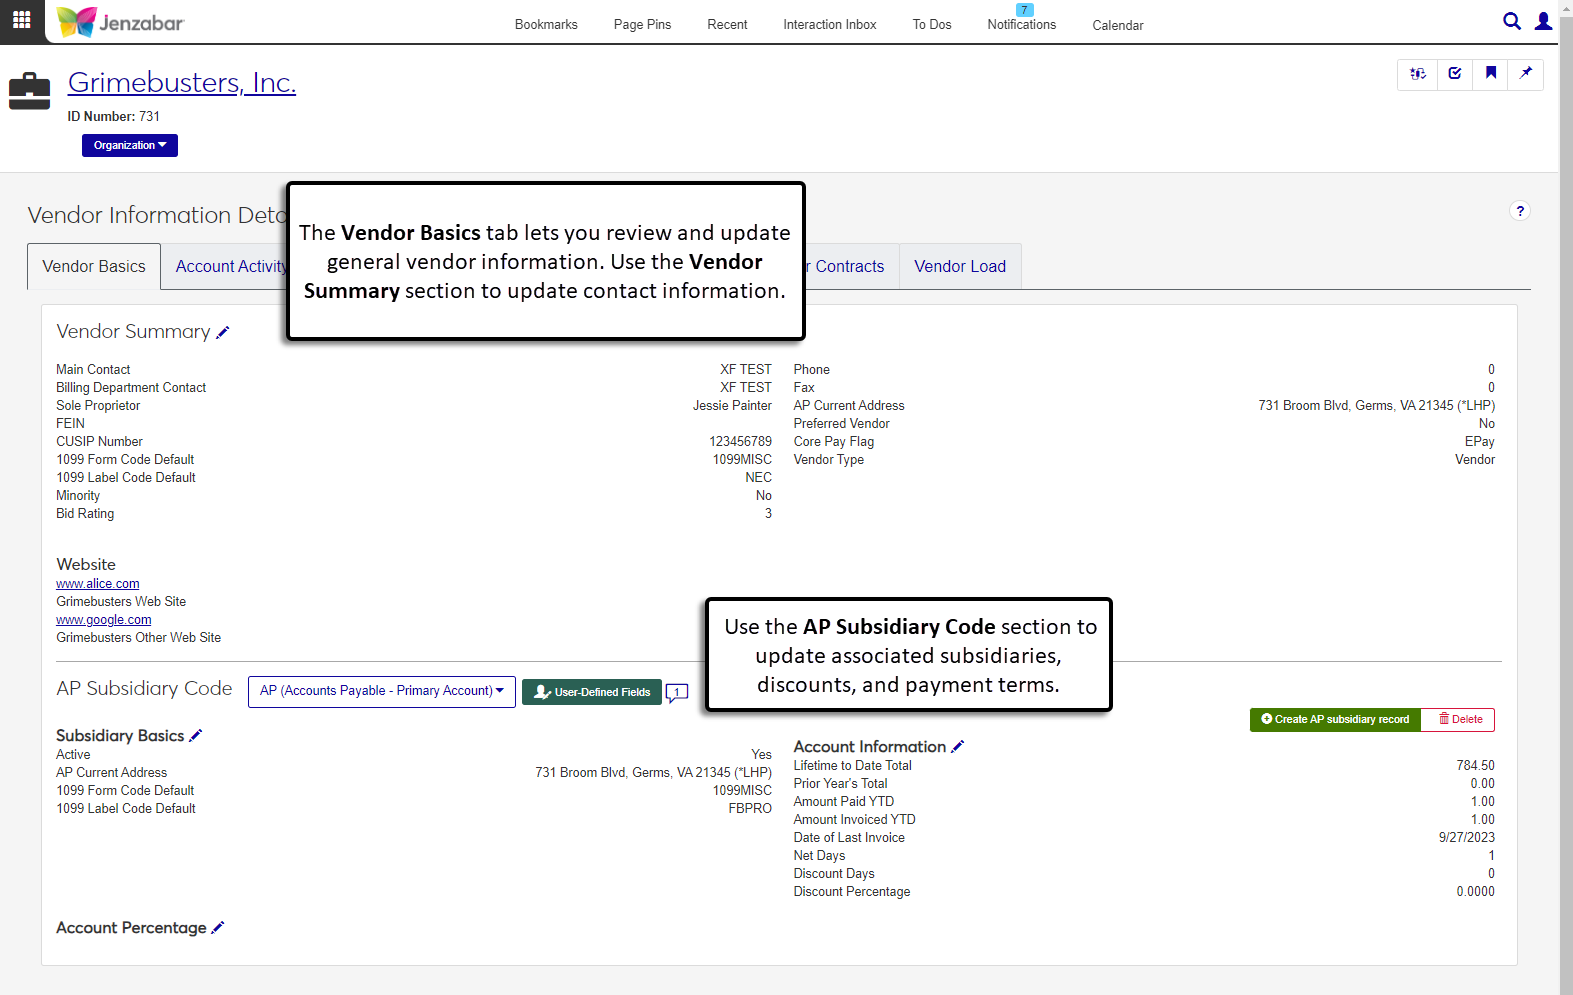
The Vendor Basics tab has two sections that let you manage general vendor information. In the Vendor Summary section, you can review and update contact information. In the AP Subsidiary Code section, you can update the 1099 form defaults for each subsidiary code, review vendor terms and discounts, and update user-defined fields.
Permissions Required
To update vendor summary and subsidiary information, you must be in a Procurement - Accounts Payable role with the following permissions:
Can edit vendor summary
Can manage vendor subsidiaries
To work with UDEFs, you must have either the "Can view UDEF data" or "Can edit UDEF data" permission for the Vendor Account Basics User-defined fields, which is granted from the User-Defined Fields tab.
To work with GL accounts associated with subsidiaries, you must be in one of the following General Ledger Accounting roles:
User-Defined Fields
You can capture additional information about vendors with user-defined fields (UDEFs). User-defined fields are managed by your System Administrator and can be useful for internal reporting. Click the User-Defined Fields button to review or add more details to an AP subsidiary code.
Commenting
You can view and add comments to the subsidiary codes with the Comment icon in the AP Subsidiary Code section. Anyone who can view the vendor's subsidiary information can see the comments, but only the user who made the comment can edit or delete it.
Tip
For more information about the fields that can be edited in each section, see the Fields section of Create Vendor: Vendor Basics.
On the Vendor Basics tab of the Vendor Information Details page, click the Vendor Summary Edit icon. The Edit Vendor Summary pop-up opens.
Make updates as needed.
Click Update.
On the Vendor Basics tab of the Vendor Information Details page, click the AP Subsidiary Code drop-down to select the code you want to work with.
Click the Subsidiary Basics Edit icon. The Edit Subsidiary Basics pop-up opens.
Make updates as needed.
Click Update.
On the Vendor Basics tab of the Vendor Information Details page, Vendor Basics tab, click the AP Subsidiary Code drop-down to select the code you want to work with.
Click User-Defined Fields. The User-Defined Fields pop-up opens.
Make updates as needed to editable fields.
Click Save.
On the Vendor Basics tab of the Vendor Information Details page, Vendor Basics tab, click the AP Subsidiary Code drop-down to select the code you want to work with.
Click the Comments icon. The comment pop-up opens.
To add a comment:
Click New comment.
Enter your comment text.
Click the
 Attach button to add an attachment.
Click Add.
Note
The Amount YTD, Amount Invoiced YTD, and Date of Last Invoice fields are autofilled by the system and cannot be updated from the edit pop-up.
On the Vendor Basics tab of the Vendor Information Details page, Vendor Basics tab, click the AP Subsidiary Code drop-down to select the code you want to work with.
Click the Account Information Edit icon. The Edit Account Information pop-up opens.
Make updates as needed.
Click Update.
Note
These fields let you determine the percentage of the invoice that gets allocated to the specified GL account. If multiple accounts are added, the total percentage across accounts must be 100%.
On the Vendor Basics tab of the Vendor Information Details page, Vendor Basics tab, click the AP Subsidiary Code drop-down to select the code you want to work with.
Click the Account Percentage Edit icon. The Edit Accounts and Percentages pop-up opens.
Make updates to the GL Account Number or Percentage as needed.
To add another GL account and percentage to the subsidiary:
Click Add another account (or Add account if there aren't any accounts associated yet).
Enter and select a GL Account Number. Required.
Enter the Percentage of the vendor invoice that will be allocated to the account. Required.
Click Update.
On the Vendor Information Details page, Vendor Basics tab, click the Create AP subsidiary record button. The Create AP Subsidiary Record pop-up opens.
Click the Select AP Subsidiary Code field and select an option from the drop-down. Required.
The Active checkbox is selected by default. Deselect the checkbox if you don't want transactions for the subsidiary code to be included in the recalculation process.
The AP Current Address is prepoulated with the address code defined in the Vendor Summary section. You can change it if needed.
Select an optional 1099 Form Code Default from the drop-down.
Select an optional 1099 Label Code Default from the drop-down.
If known, enter an optional Lifetime to Date Total to indicate the amount that has been paid to the vendor up to today's date.
If known, enter an optional Prior Year's Total to indicate the amount paid to the vendor during the previous fiscal year.
Enter the Net Days to define the vendor's payment terms.
If the vendor offers a discounted rate for payments made within a certain number of days, enter that number in Discount Days.
Enter an optional Discount Percentage to be applied when invoices are paid within the number of discount days.
To associate the subsidiary with a GL account:
In the Account and Percentage section, click Add account.
Enter and select a GL Account Number from the drop-down. Required.
Enter the Percentage of the vendor invoice that will be allocated to the account. Required.
To add additional accounts and percentages, click Add another account and repeat the steps above.
Click Create. The page updates to show the new subsidiary code's details.
Note
Subsidiary records cannot be deleted if there are invoices associated with the subsidiary code.
On the Vendor Basics tab of the Vendor Information Details page, Vendor Basics tab, click the AP Subsidiary Code drop-down to select the code you want to work with.
Click the Delete button.
In the Delete Selected Subsidiary Code? pop-up, click Yes, delete. The subsidiary code and all associated comments and attachments are deleted from the system.