Manage Digital Signature Configurations
Important
Information and features vary according to the roles to which you belong and the permissions associated with those roles. For more information, contact your module manager or your campus support team.
J1 Web Workflow lets workflow participants officially sign documents using digital signatures. This digital signature verifies the signee's identity, certifies the authenticity of the signature, and generates an audit trail.
This feature utilizes DocuSign, Jenzabar’s integrated digital signature provider. For the DocuSign integration to work correctly:
Ensure J1 Web is exposed to the internet and DocuSign can communicate with J1 Web by connecting to Port 443 over a typical SSL connection. If your school is using Communication Management, these configurations are already in place.
Create a DocuSign Account, add Jenzabar as an APP, and generate the integration credentials and key.
Enter the DocuSign integration credentials and key into J1 Web.
Configure J1 Web webhooks in DocuSign.
Note
A DocuSign API Usage Plan is required for this feature.
If you already have a DocuSign account, log in. If you don't have a DocuSign account yet, create one and then log in.
To create a DocuSign account:
Access docusign.com.
Click the Plans & Pricing link and select API Usage Plans. The Choose your plan page appears. Plan prices are based on usage.
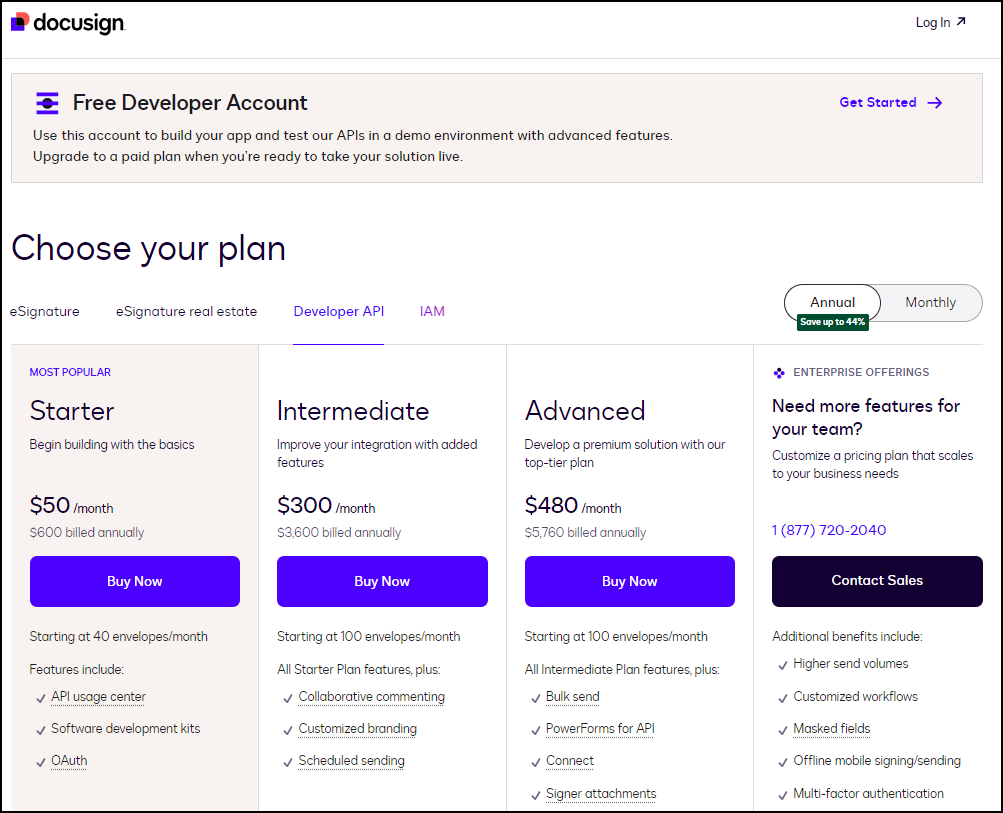
Select your plan and click the Buy Now button. An Ordering page appears where you can enter your email address and billing information.
Plan needs vary by school and depend on the number of digital signatures you anticipate requesting. Digital signatures are requested using DocuSign envelopes, which serve as digital containers allowing you to send documents for electronic signature via DocuSign eSignature. Envelopes can contain one or more documents, recipients, and signature fields.
Click the Continue button. Once you have purchased your account, you'll be able to log in and access the DocuSign dashboard.
From the top menu, click the Settings link. The Settings page appears.
From the left-hand menu, locate the Integrations settings section and click the Apps and Keys link. The Apps and Keys page appears.
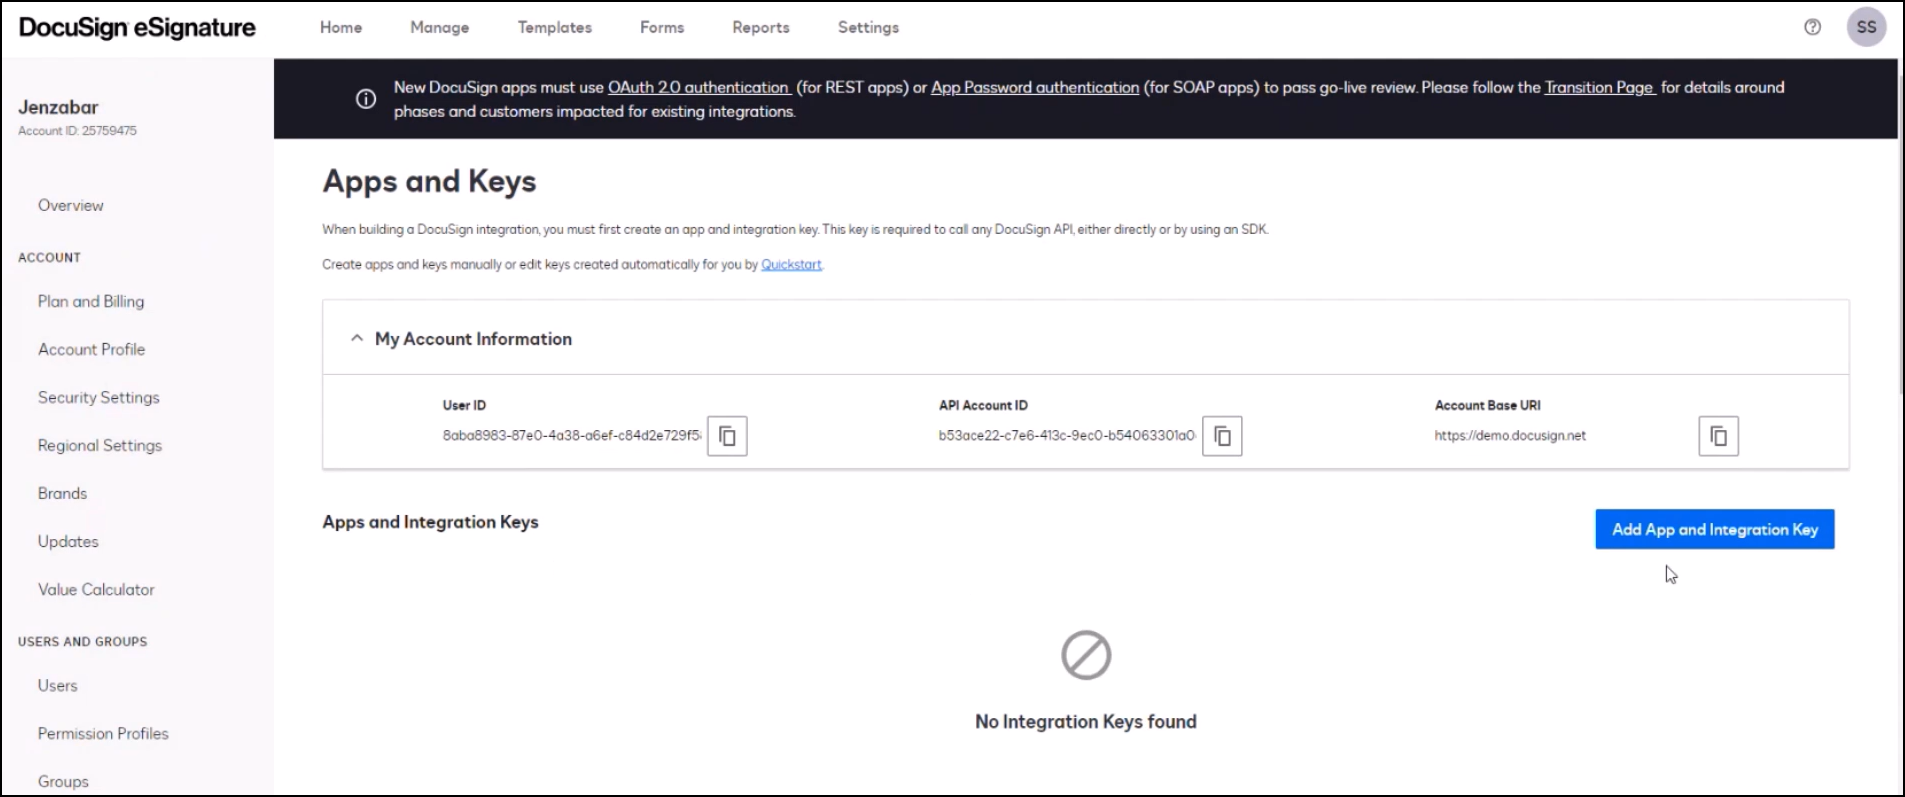
Click the Add App and Integration Key button. The Add Integration Key pop-up window appears.
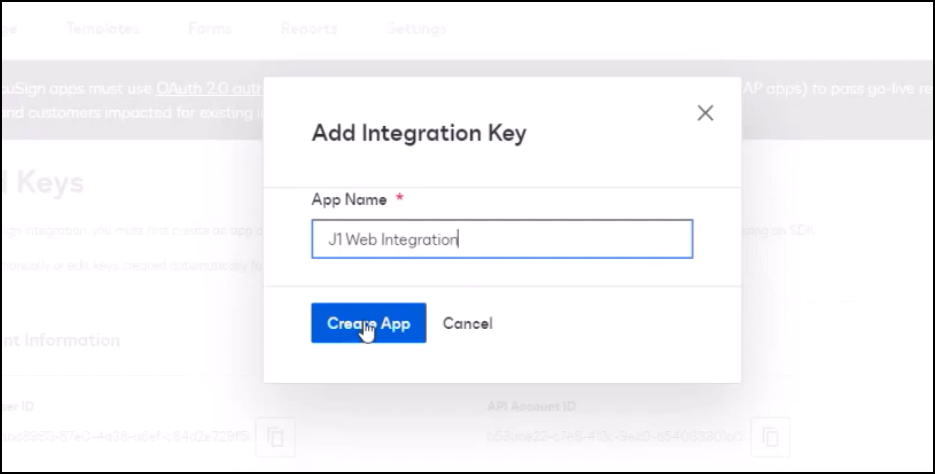
In the App Name field, enter the name of your J1 Web application.
Click the Create App button. The pop-up window closes and the Apps and Keys page reappears.
Scroll down to the Service Integration section.
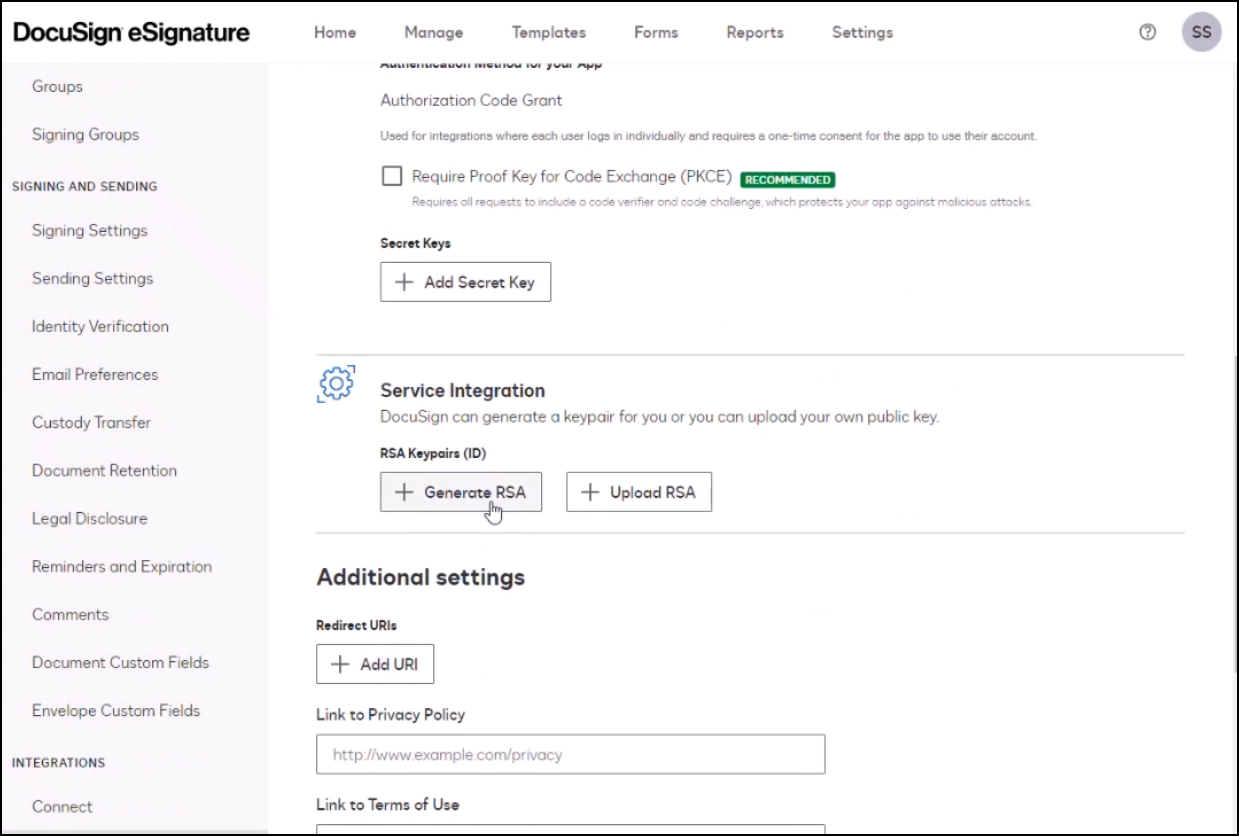
Click the Generate RSA button. The RSA Keypair pop-up window appears.
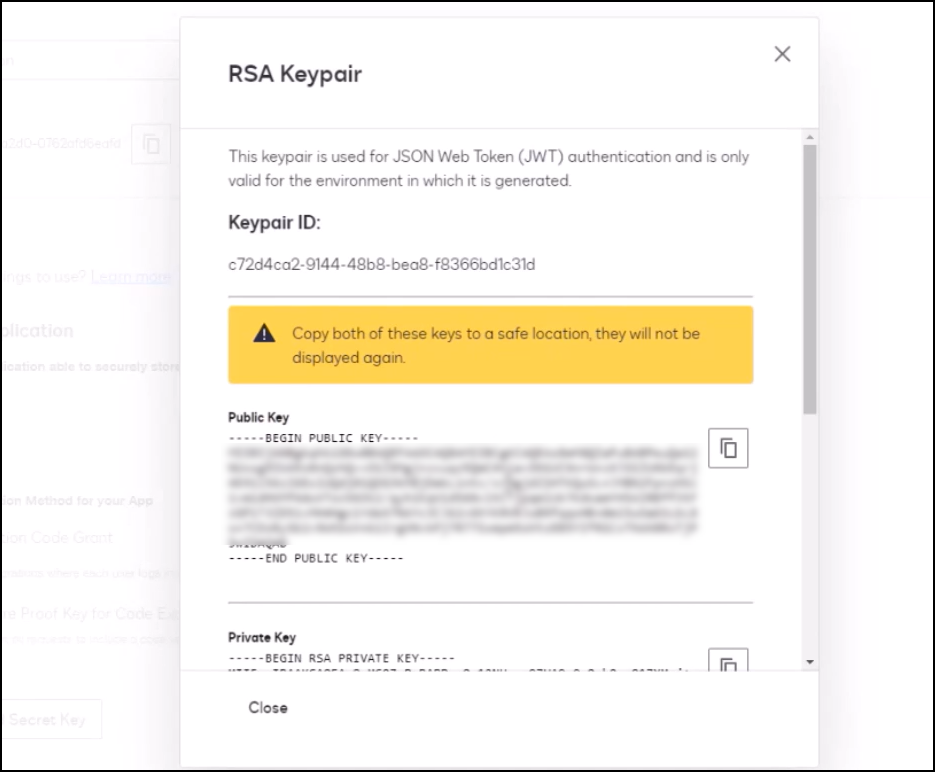
Copy the Keypair ID, Public Key, and Private Key and paste them in a secure file (e.g., .txt or .dotx) where they can be accessed later for adding to J1 Web. This information sets up the authentication between J1 Web and DocuSign.
Caution
This information is only shown once and Jenzabar highly recommends copying and pasting it into a file that can be accessed later.
Click the Close button. The pop-up window closes and the Apps and Keys page reappears.
Scroll down to the Additional settings section.
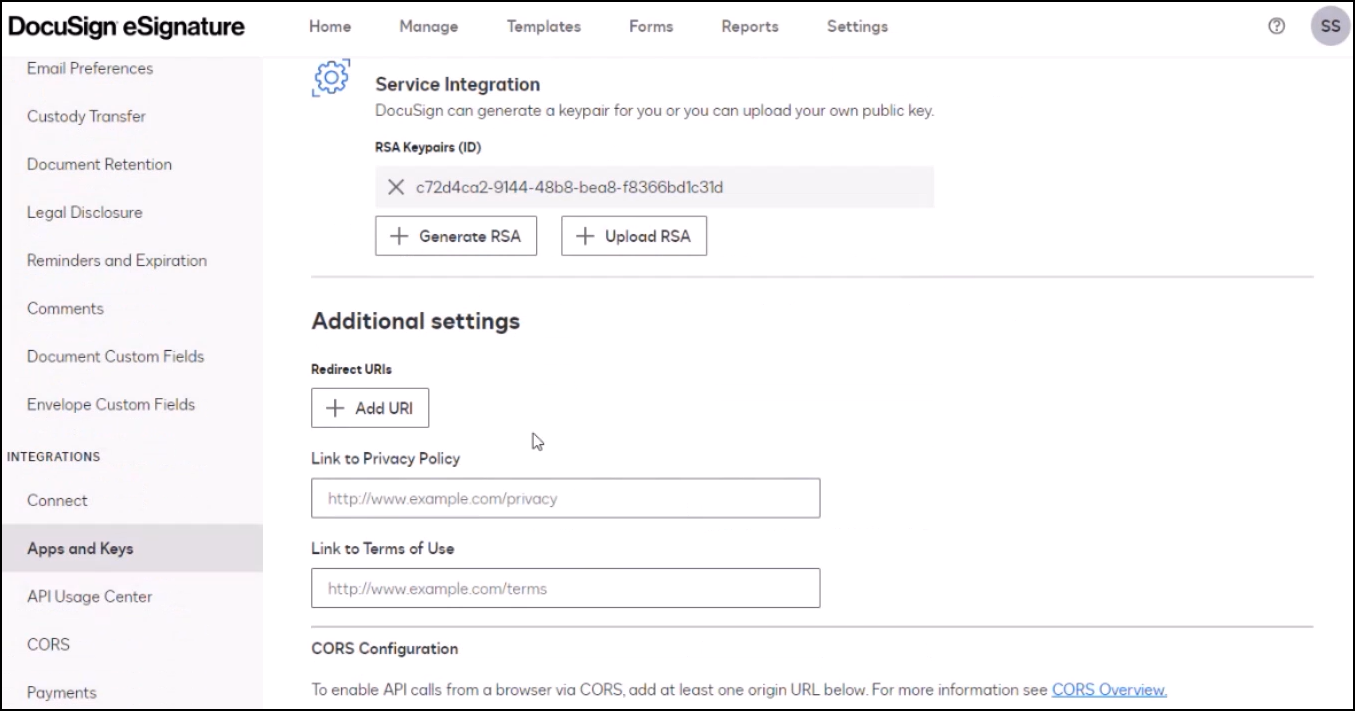
Click the Add URI button. Redirect URL options appear.
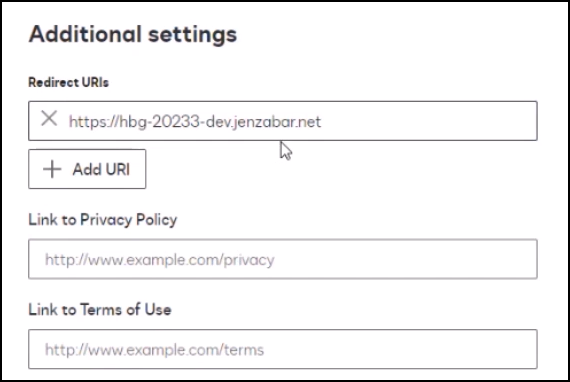
Enter the domain for your J1 Web server. If you have a Jenzabar Cloud domain, you may want to include that as well as your .edu domain.
Click the Save button at the bottom of the page. The Apps and Keys page reappears.
Copy the User ID, API Account ID, and Account Base URI and paste them in a secure file (e.g., .txt or .dotx) where they can be accessed later for adding to J1 Web.
Log in to J1 Web with System Administrator permissions.
Access the System Administration hub, System Settings, Product Installs and Sign In page.
From the Product Installs, DocuSign setting, click Edit settings. The DocuSign Settings pop-up window appears.
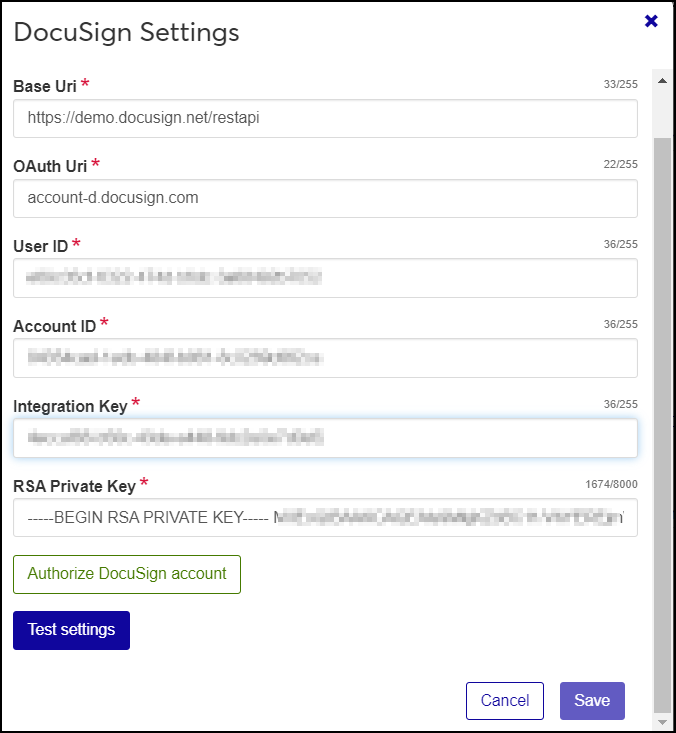
Copy the DocuSign integration information and credentials created during the Manage DocuSign Configurations steps and paste them into the DocuSign Settings window.
Base Uri: After entering the Base URI you copied from DocuSign, add a forward slash and restapi to the end. For example your base Uri might look like this: https://demo.docusign.net/restapi
OAuth Uri:
For your test or play environment, enter the following: accountd.docusign.com
For your live or production environment, enter the following: account.docusign.com
User ID is found on the DocuSign dashboard under My Apps and Keys.
Account ID is found on the DocuSign dashboard under API Account ID.
Integration Key was created when you generated the RSA Keypair. This should have been copied and saved in a file.
RSA Private Key was created when you generated the RSA Keypair. This should have been copied and saved in a file.
Click the Authorize DocuSign account button. DocuSign opens in a new web browser tab indicating J1 Web is requesting access. Grant access from your DocuSign account.
Click the Test settings button.
Click the Save button.
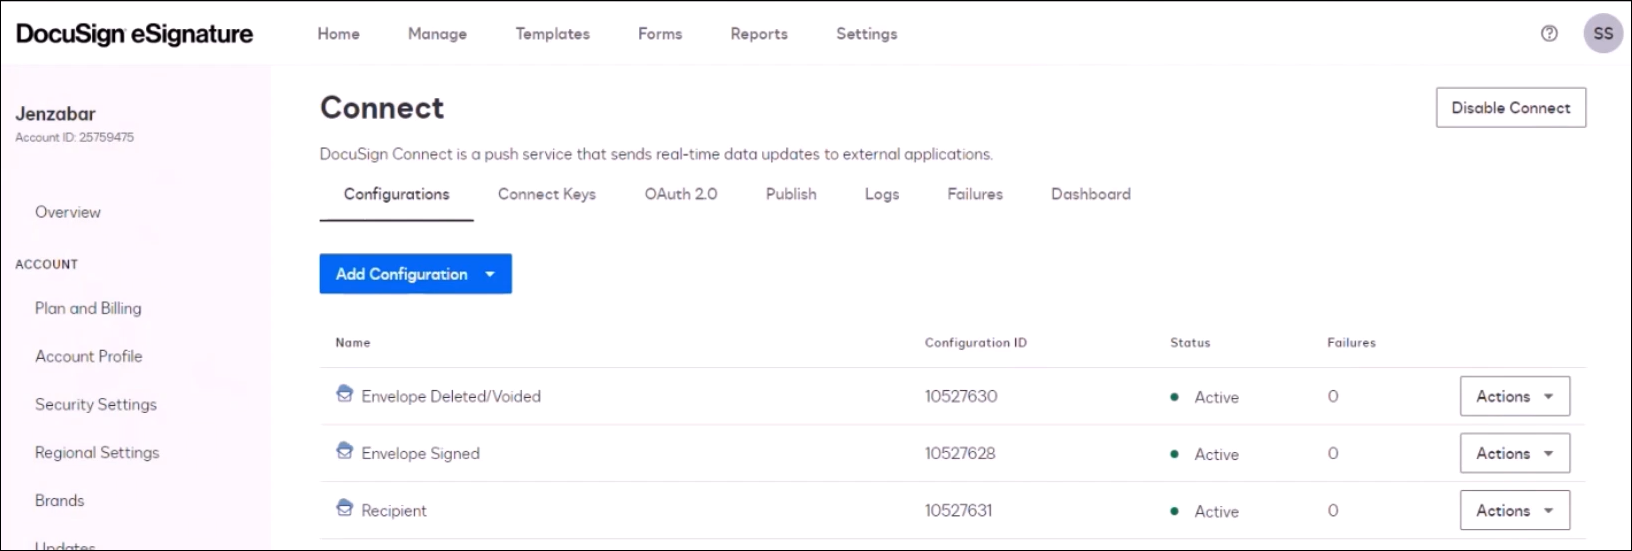
This step adds in three separate webhooks that DocuSign can use to communicate with J1 Web when certain events occur in their system.
Log in to DocuSign.
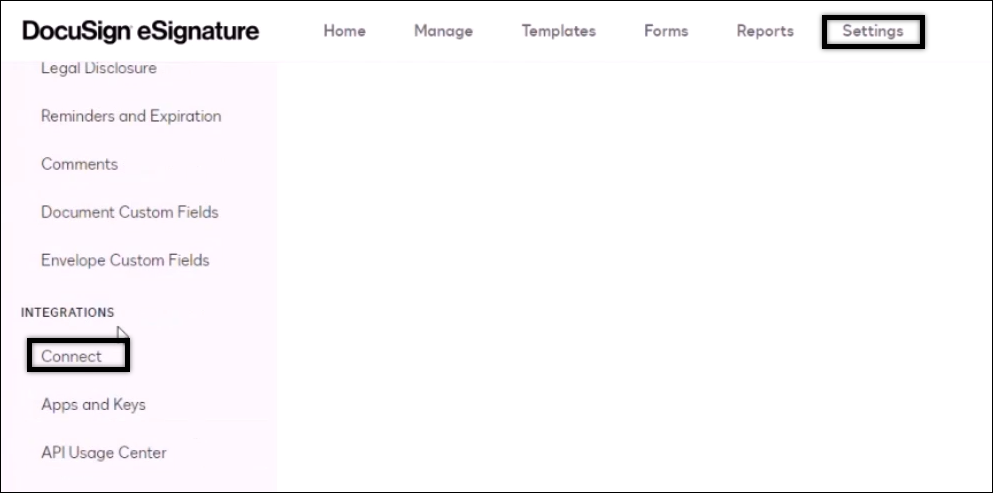
From the DocuSign Dashboard, click Settings.
From the left-hand navigation, find Integrations and click Connect.
Click Add a Configuration.
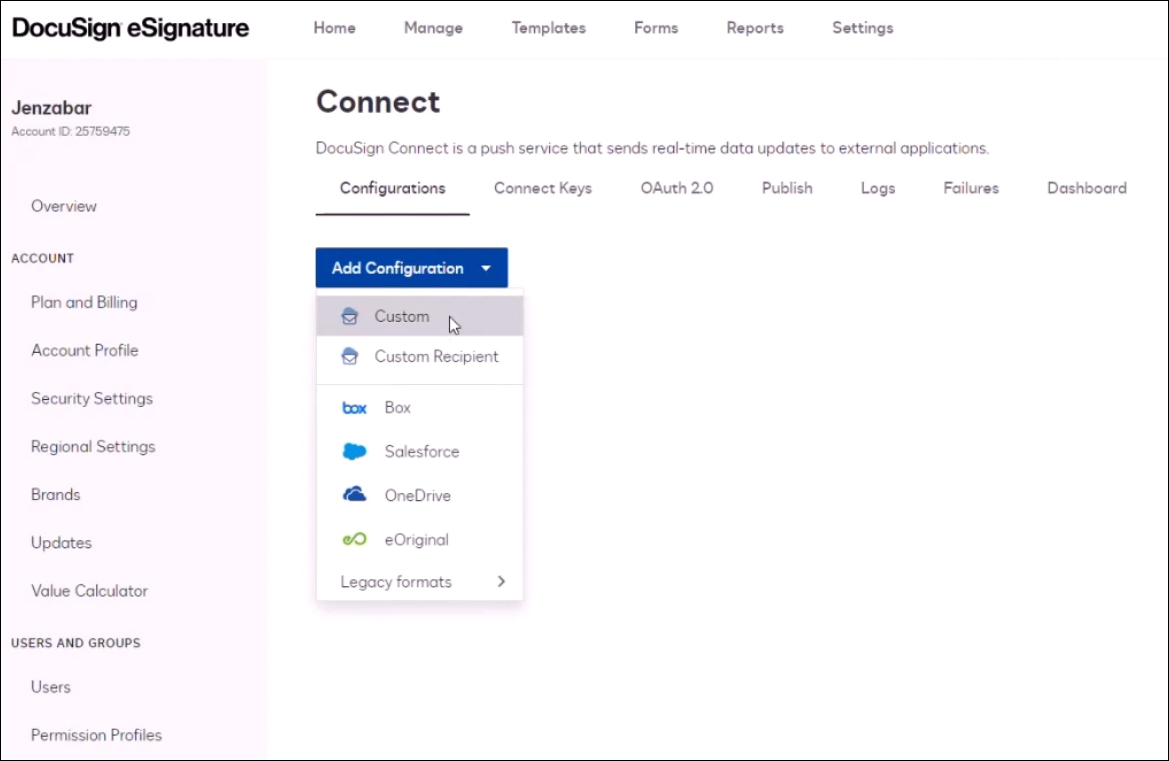
Select Custom. from the drop-down The Add Custom Configuration options appear.

From the Status drop-down in Listener Settings, select Active Connection.
In the Name field, enter Envelope Signed. This will capture events that occur any time a document or envelope is signed.
In the URL to Publish field, enter your J1 Web URL followed by /api/rest/docusign/envelope. For example, https://www.yourschool.edu/j1web/api/rest/docusign/envelope
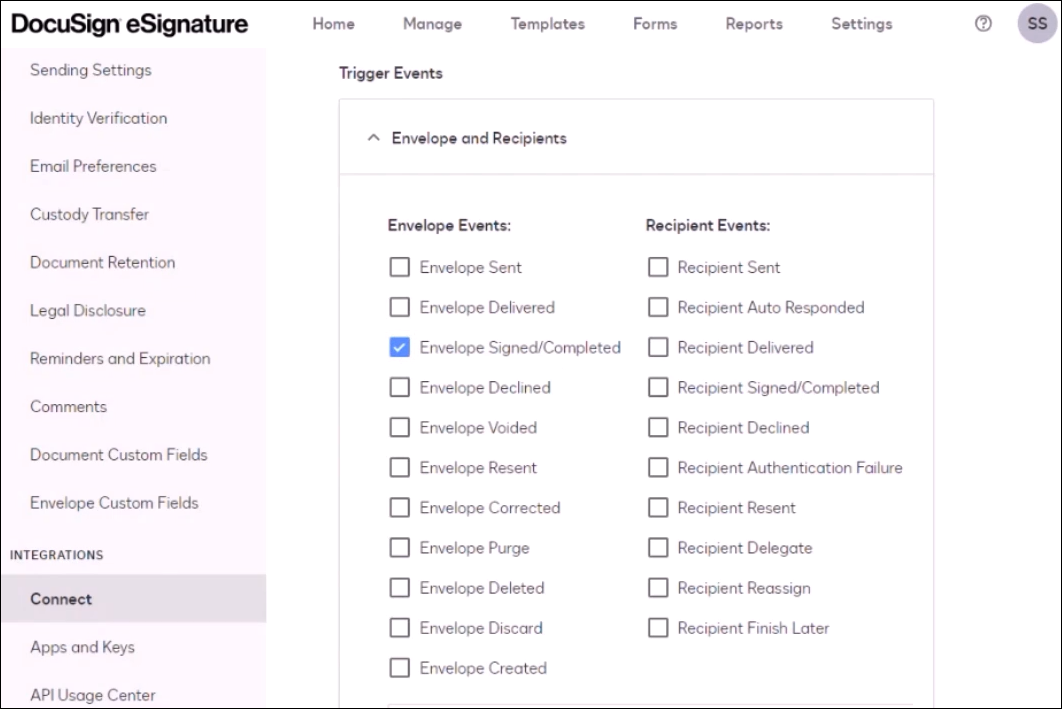
Scroll down to the Event Settings, Trigger Events, Envelope and Recipients section.
Select the Envelope Signed/Completed checkbox.
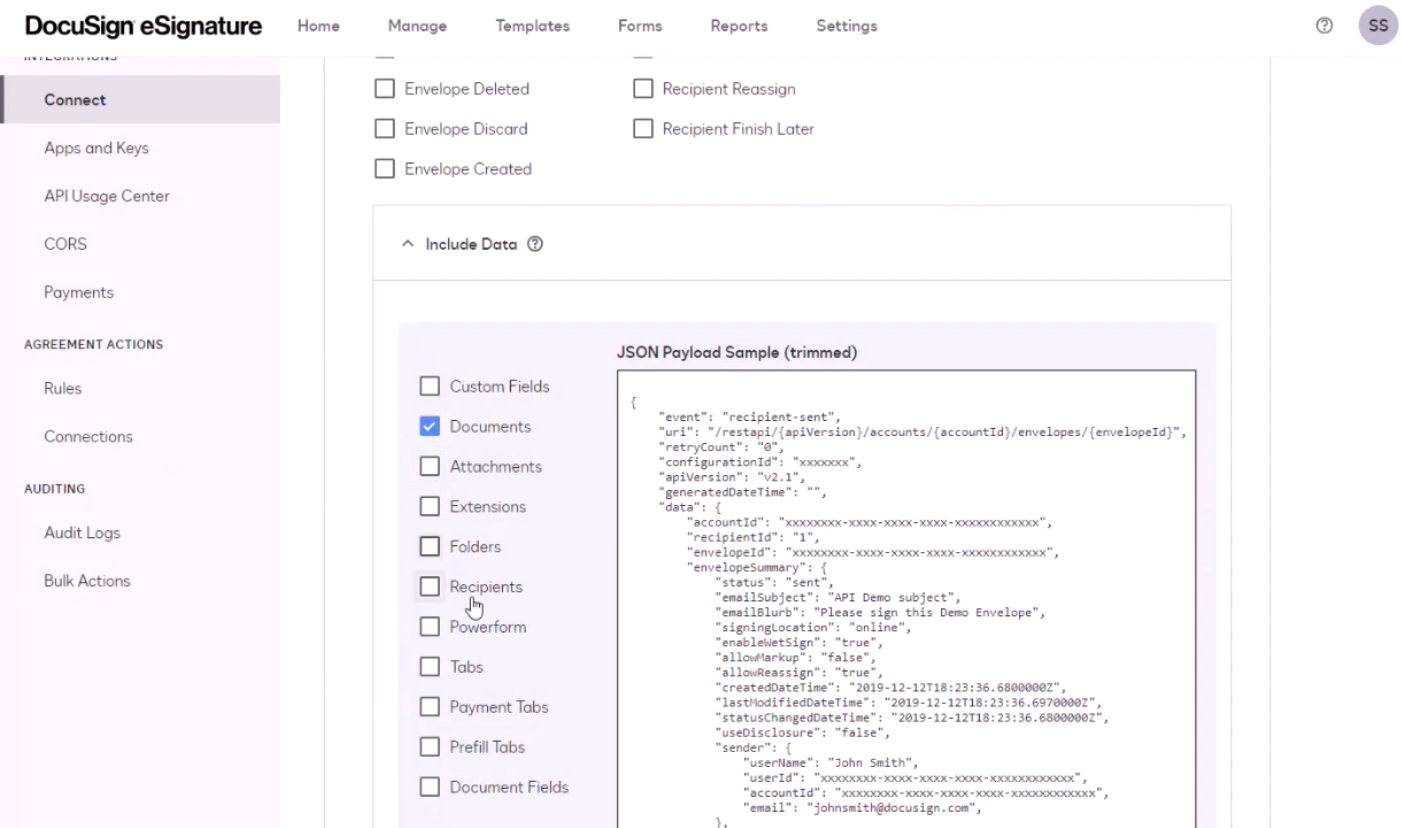
Click Include Data.
Select the Documents checkbox. This sends the documents associated with the envelope or document.
Click the Add Configuration button.
Click Custom. The Add Custom Configuration options appear.
From the Status drop-down, select Active Connection.
In the Name field, enter Envelope Deleted. This will capture events that occur any time a document or envelope is deleted.
In the URL to Publish field, enter your J1 Web URL followed by /api/rest/docusign/envelope. For example, https://www.yourschool.edu/j1web/api/rest/docusign/envelope
Scroll down to the Event Settings, Trigger Events, Envelope and Recipients section.
Select the Envelope Declined, Envelope Voided, Envelope Purge, Envelope Deleted and Envelope Discard checkboxes.
Click Include Data and verify no additional checkboxes are selected to ensure unneeded information isn't sent in the payload.
Click the Add Configuration button.
Click Custom. The Add Custom Configuration options appear.
From the Status drop-down, select Active Connection.
In the Name field, enter Recipient. This will capture events that occur any time a document or envelope is deleted.
In the URL to Publish field, enter your J1 Web URL followed by /api/rest/docusign/recipient. For example, https://www.yourschool.edu/j1web/api/rest/docusign/recipient
Scroll down to the Event Settings, Trigger Events, Envelope and Recipients section.
Select the Recipient Sent, Recipient Delivered, and Recipient Signed/Completed, and Recipient Declined checkboxes. These options report statistics to J1 Web related to documents and envelopes sent to DocuSign.
Click Include Data and verify no additional checkboxes are selected to ensure unneeded information isn't sent in the payload.
Click Add Configuration. The Connect page appears with the added webhooks shown.