Recurring Payment Details
Important
Information and features vary according to the roles to which you belong and the permissions associated with those roles. For more information, contact your module manager or your campus support team.
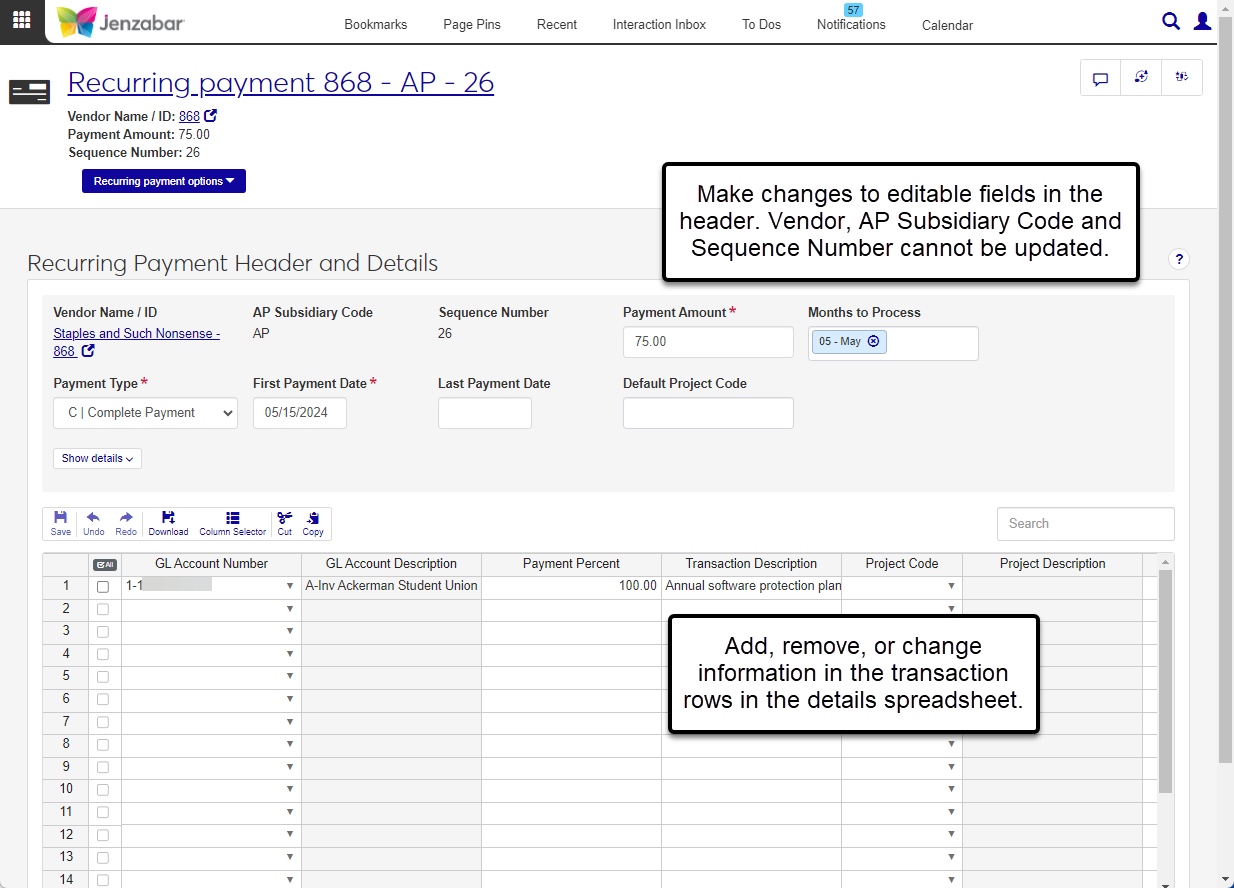
The Recurring Payment Details page displays the vendor, payment, and transaction information for payments that are made on a recurring basis. From this page, you can make updates to the payment amounts, dates, and transaction details.
Permission Required
To access and update the Recurring Payment Details page, you must be in a Procurement - Accounts Payable role with the "Can view & edit recurring payments" permission. You'll also need to be in a General Ledger Accounting GL Account access role to view GL accounts associated with transactions. For more details about permissions, see Roles and Permissions to Work with Recurring Payments.
Desktop Location
In Desktop, recurring payment details can be accessed from the Select/Create Regular Payments window by clicking selecting a row and clicking Open.
On the Recurring Payments tab of the Recurring Payments page, click the Sequence Number link for the recurring payment you want to update. To view multiple recurring payments, select their checkboxes and click Open in the list toolbar. The Recurring Payment Details page opens.
Make updates to header fields as needed. The Vendor Name / ID, AP Subsidiary Code, and Sequence Number cannot be updated.
Make updates to the details spreadsheet. Use the toolbar options to cut, copy, redo, and undo your changes. Click the Column Selector option to add or remove columns from the spreadsheet view.
Click Save in the spreadsheet toolbar to save your changes.
On the Recurring Payment Details page, click the Recurring payment options and select Delete from the drop-down. The Delete Recurring Payment? pop-up opens.
Click Yes, delete to permanently remove the record from the system.
On the Recurring Payment Details page, click the Download icon on the toolbar above the spreadsheet. The Download to Excel pop-up opens.
Select options for the Excel format and data columns.
Click Download. Your .xlsx or .zip file is saved in the file location that you have set in your browser settings.