Month Close Report
Important
Information and features vary according to the roles to which you belong and the permissions associated with those roles. For more information, contact your module manager or your campus support team.
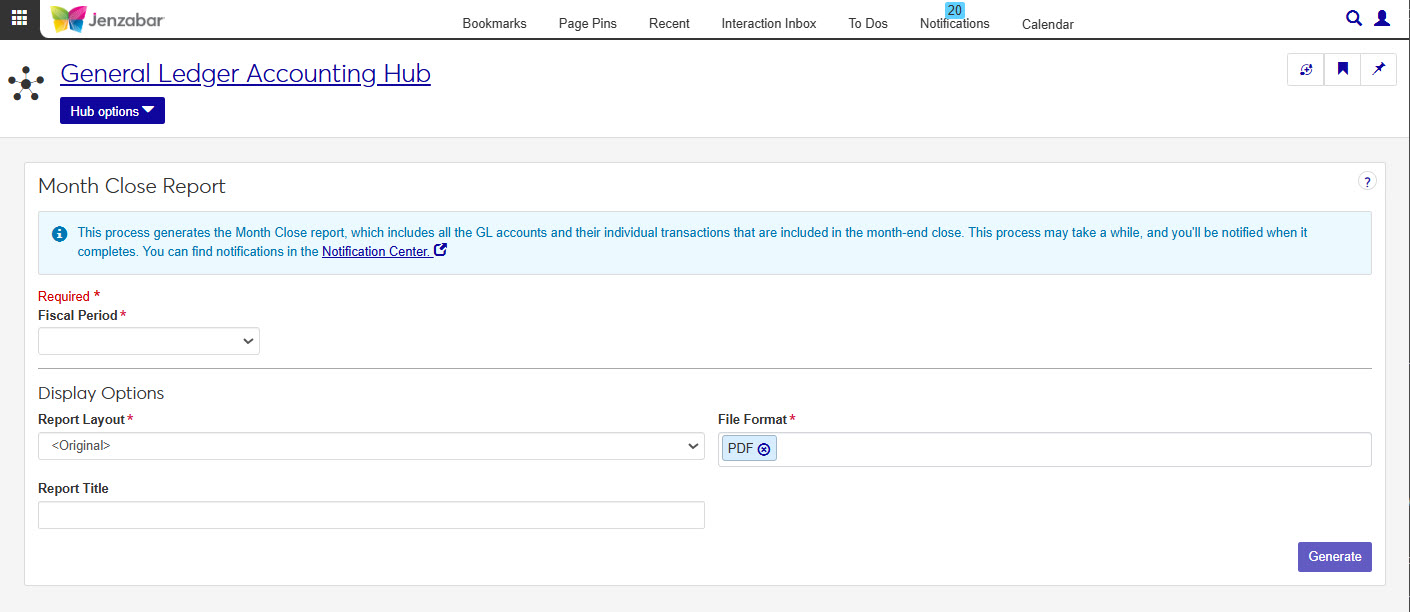
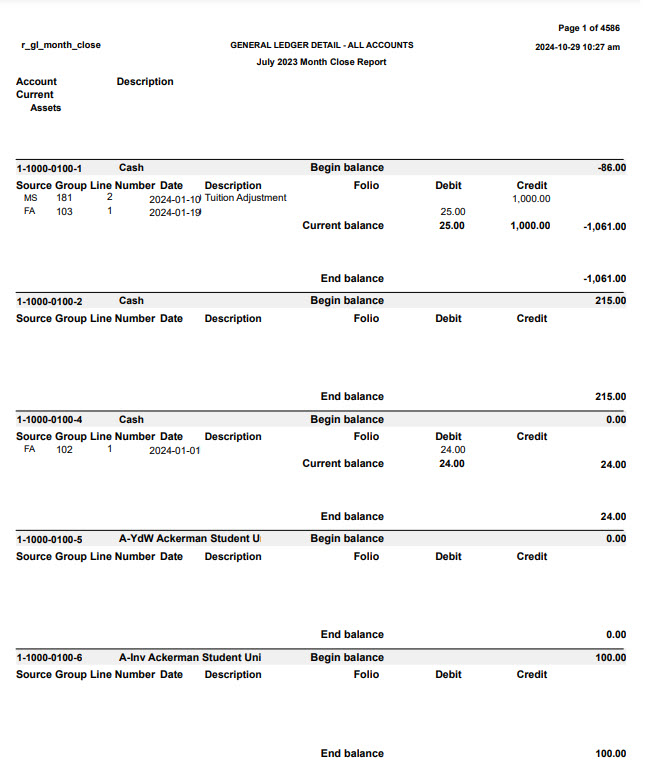
This process generates the Month Close report, which includes all the GL accounts and their individual transactions that are included in the month-end close. The report details all GL accounts including the beginning balance, current balance, transactions, encumbrances and any variance information within the month for each account. The transactions selected are determined by the Month Close Selection window. The fiscal month should be the same as the month you are closing.
Tip
This report is informational only allowing you to see accounts and transactions that will be included in your month close process.
In the General Ledger Accounting Reporting role, select "Can generate Month Close report" in the Reports section. If this permission is not selected, users won't be able to access the Month Close Report page.
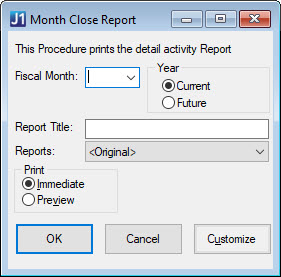
This report is generated on the Month Close Report window in Desktop.
Tip
The Fiscal Month and Year fields on the Desktop window correspond to the Fiscal Period field in Jenzabar One Web.
The Reports field on the Desktop window corresponds to the Report Layout field in Jenzabar One Web.
Note
Fiscal Period and Report Layout are required fields.
Choose a Fiscal Period from the drop-down. Options include months in the current and future fiscal year.
Choose a Report Layout from the drop-down. The original layout is the default, and other options include any customized versions created in Desktop.
Enter a Report Title (maximum of 30 characters).
Select one or more File Format options. You can select from:
PDF
CSV
DIF
HTML
PSR
SQL
TXT
XLSX
XML
Click Generate. This process may take a while, and you'll be notified when it completes. You can find notifications in the Notification Center.
Important
Access to the folders where Jenzabar-provided original reports are stored is controlled by your institution. For more information, contact your campus support team or see Working with Reports in J1 Web.
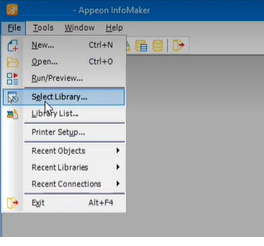
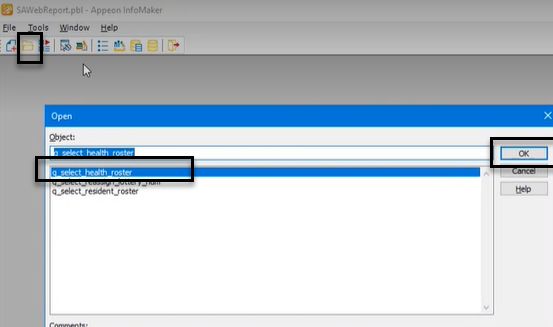
Open InfoMaker.
Click File > Select Library.
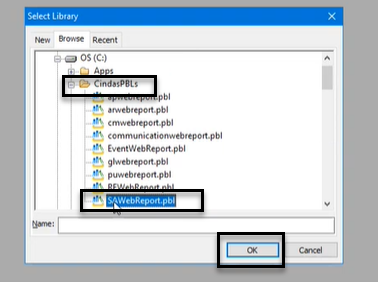
On the Select Library pop-up, navigate to the shared folder where Jenzabar-provided original reports and queries are stored.
Select the PBL (PowerBuilder Library) file that contains the report or query you want to customize.
Click OK.
Click the Open icon.
On the Open pop-up, in the Object section, select the report or query you want to customize.
Click OK.
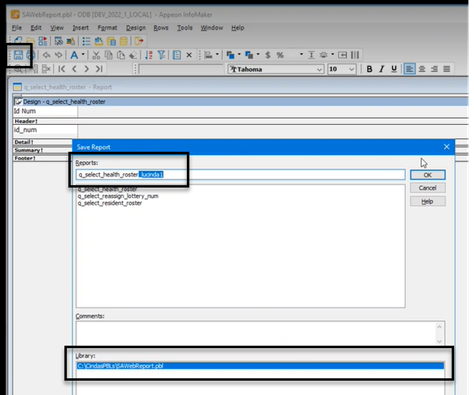
Customize the report or query as needed.
Save the customized version in the shared folder by adding a unique, easily identifiable extension to the file name.
Tip
By default, InfoMaker saves the customized version in the same folder that you opened the original version from. Confirm the file path is correct in the Library section.
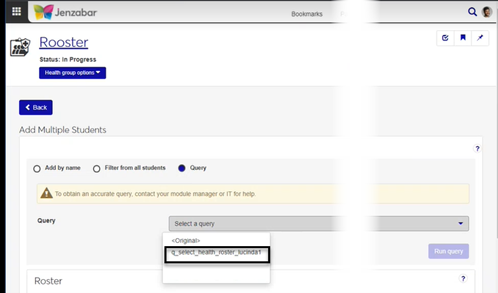
On the corresponding report page in J1 Web:
Customized versions of queries will display in the Query or Data Set drop-down.
Customized versions of reports will display in the Report Layout drop-down.
When the report has finished generating, you will receive a notification. You can click on the notification or go to the Notification Center to access the report.
Tip
Completed reports appear as Information Notifications. If the report process fails, it appears as an Error Notification.
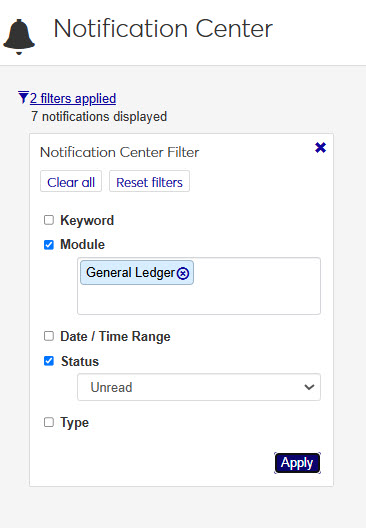
If your notification is not visible at the top of your Notification Center, use the Notification Center Filter to search for report.
When you locate your report notification, you can view the Type and Module by expanding
 and closing
  the notification.
 Tip
Unread notifications will have a blue dot icon
 at the start of the row. You can select one or more checkboxes in your Notification Center and use the Options drop-down to change notification statuses between read and unread.
Click the View Details icon
 to see more details about the creation of the report, and access the report.
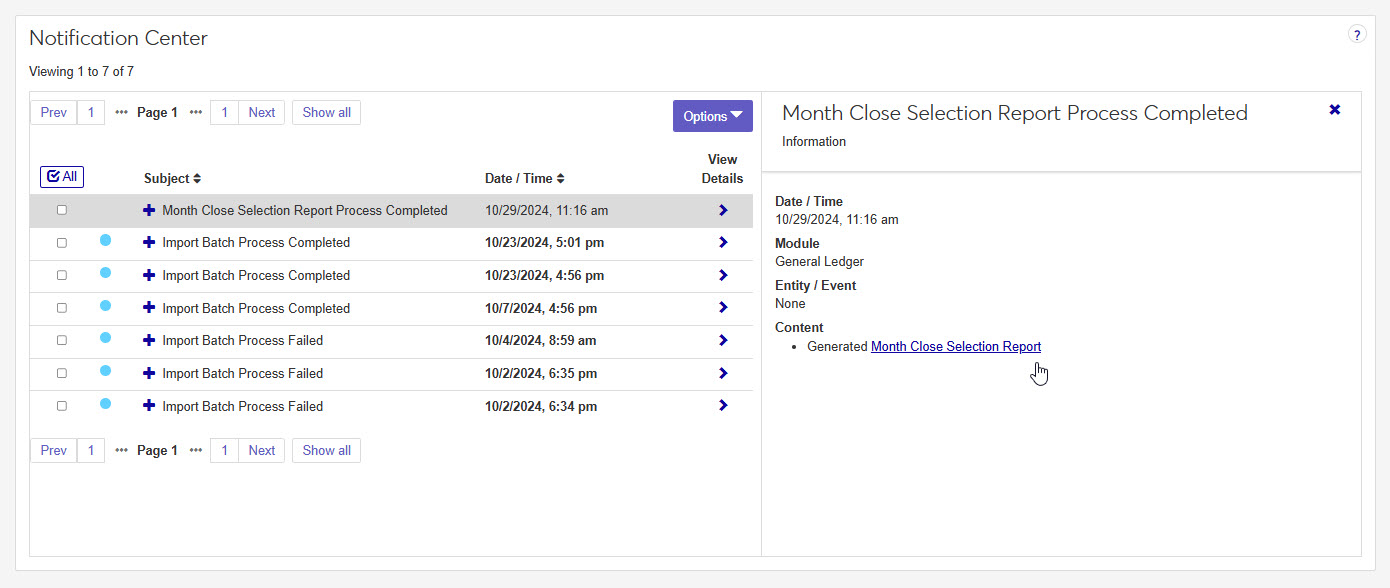
Click the report link under the Content section.
If a single file format of PDF was selected for the generated report, clicking the report link will open the report in a new tab of your browser. You can use the PDF browser options to save the file.
If more than one file type is selected, or if the file type is not a PDF, when you click the link, the Save As window pops up, allowing you to name the file and select where you want to save it.
Tip
All downloaded files, regardless of the number of file formats, are in a ZIP folder.
Once the file has downloaded, extract the ZIP file. The report appears in the folder in any file formats you selected when generating.
View and save file versions as needed.

r_gl_month_close
In the General Ledger Accounting Reporting role, select "Can generate Month Close report" in the Reports section. If this permission is not selected, users won't be able to access the Month Close Report page.
On the Month Close Report window.
Many finance reports are created using long running processes. This means that when you generate a report, you won't see an immediate result. However, you can continue working in J1 Web while your report generates. When it's ready, you will receive a notification that you can access in the Notification Center.
Month Close Selection Report: This report is run BEFORE the Month Close report, and will determine which transactions will be part of close process. When this report is generated, the process will also update GL selected flag to 'Y' on posted transactions.
Month Close Report: This report details all GL accounts including the beginning balance, current balance, transactions, encumbrances and any variance information within the month for each account. The transactions selected are determined by the Month Close Selection report. The fiscal month should be the same as the month you are closing.