Vehicle Permit Definitions
Important
Information and features vary according to the roles to which you belong and the permissions associated with those roles. For more information, contact your module manager or your campus support team.
On the Vehicle Permit Definitions page, you can define the type of permit (e.g., Commuter, Resident, or Faculty and Staff), whether or not it is active, and more. You can also edit permits and download the permit list to Excel.
To access the Vehicle Permit Definitions page, select Student > Vehicle Administration > Manage definitions > Vehicle permit definitions from the main navigation menu.
To create and edit vehicle permits, users must have the permission Can manage vehicle permit definitions assigned in the Vehicle Administrator role.
You can also manage these definitions in Desktop on the Vehicle Permit Definitions window. Definitions edited in J1 Web are changed in Desktop and vice versa.
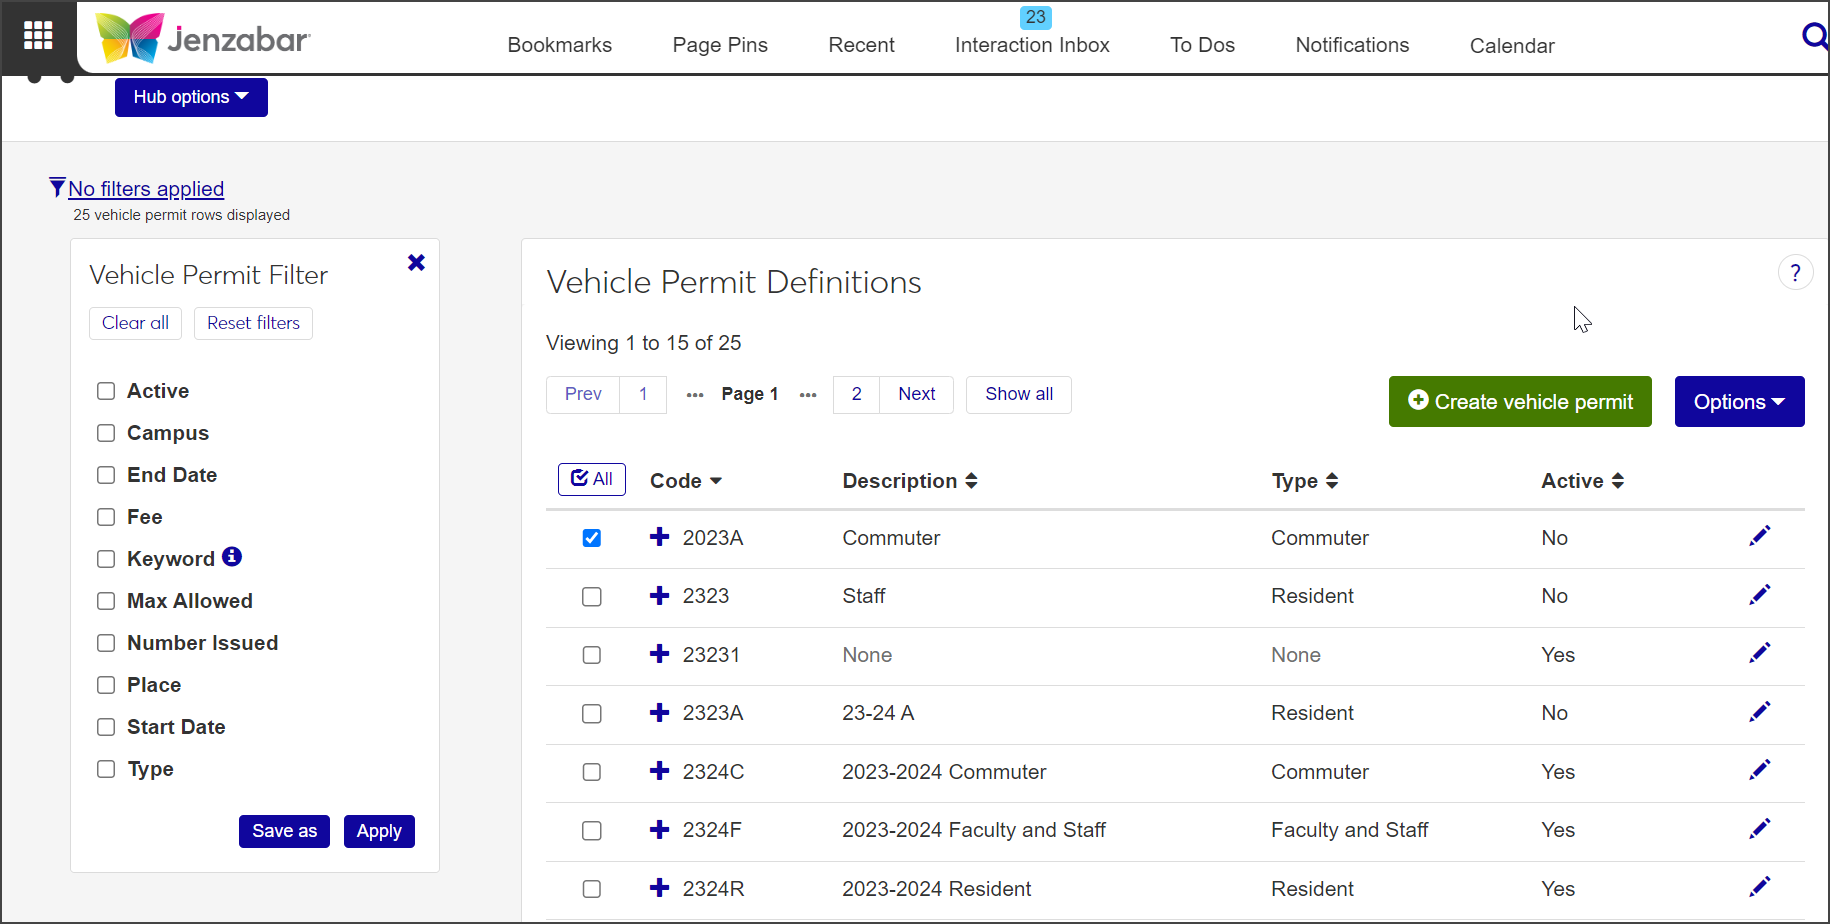
From the Hub options drop-down menu on the Vehicle Administration Hub page, select Manage Definitions > Vehicle Permit Definitions. The Vehicle Permit Definitions page opens.
The list displays basic information about each permit: a unique code, a brief description, the type of permit, and whether it is active or not.
Click the plus sign next to a definition to expand the row and see more information, such as the start and end dates for the permit, the permit fee, and how many permits with this code have been issued.
To narrow the list of definitions displayed, check one or more options under Vehicle Permit Filter. When you select an option, a new field relevant to your selection appears beneath that option. Enter or select criteria for the filter in this field and click Apply.
For example, if you only want to see permits issued on a particular campus, select the Campus checkbox in the filter, click in the field to see a list of campuses, and select the relevant option.
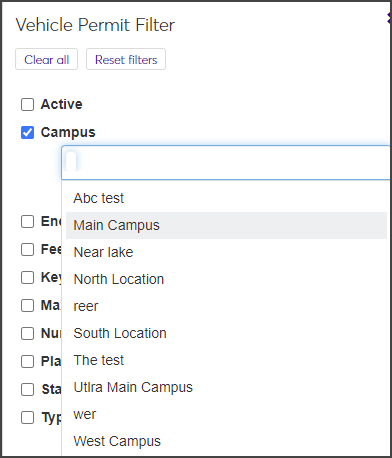
To save a filter that you use often, select the criteria, click Save As, and enter a name for the filter at the prompt. Check Set as default if you would like this to be the default filter. When you are done, click Save.
Click a column heading in the list to sort the definitions by that heading.
Click the Create vehicle permit button on the Vehicle Permit Definitions page. The Create Vehicle Permit window opens.
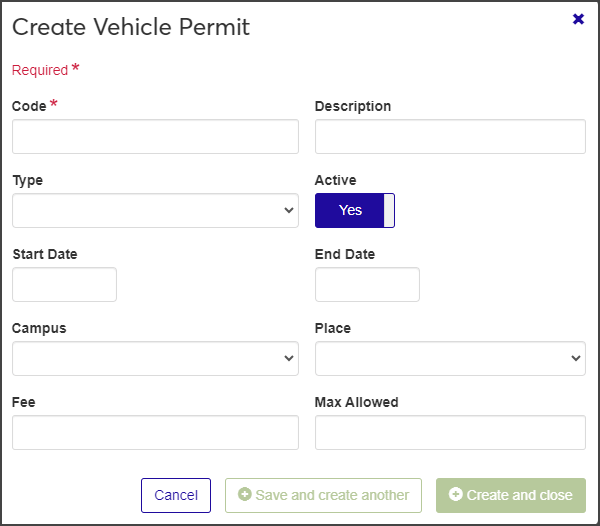
Enter a unique Code to identify the permit. The code can have a maximum of 5 characters. Code is the only required field.
The permit code is used to identify a group of vehicle permits that have similar characteristics, such as location, building, or type of person to which the permits are issued. The codes that are defined in this window are stored in the CM Vehicle Permit Master table. You cannot edit the code after the permit has been saved.
Enter an optional Description to further define the permit. You can enter up to 60 characters. The description should be something that will be easily understood by those entering an incident. It is displayed when users select a Vehicle Permit Type from a drop-down list; it will also appear on relevant reports.
Select the permit type from the Type drop-down menu.
If you want the permit to be inactive, click the Active option to set it to No. The field defaults to Yes.
Set start and end dates for the permit by clicking in the date field and selecting a date from the pop-up calendar.
Select a Campus option from the drop-down menu. The list includes all active locations.
Select a Place option from the drop-down menu. The list displays all active places within the location.
Enter the permit Fee, if applicable.
Enter the Max Allowed number of permits of this type. Only positive integers are allowed.
When you are done, click Create and close or Save and create another. The new permit is added to the list.
To edit a permit, click the Edit icon next to the permit you need to edit. The Edit Vehicle Permit pop-up opens.
Edit the fields as needed. All fields can be edited except the code.
When you are done, click Update to save your changes.
On the Vehicle Permit Definitions page, select the checkbox next to each permit you want to delete. To select everything on the list, click ✓ All at the top of the table.
Select Delete from the Options drop-down menu. The Delete Vehicle Permits? window opens, asking you to confirm that you want to delete the selected permits.
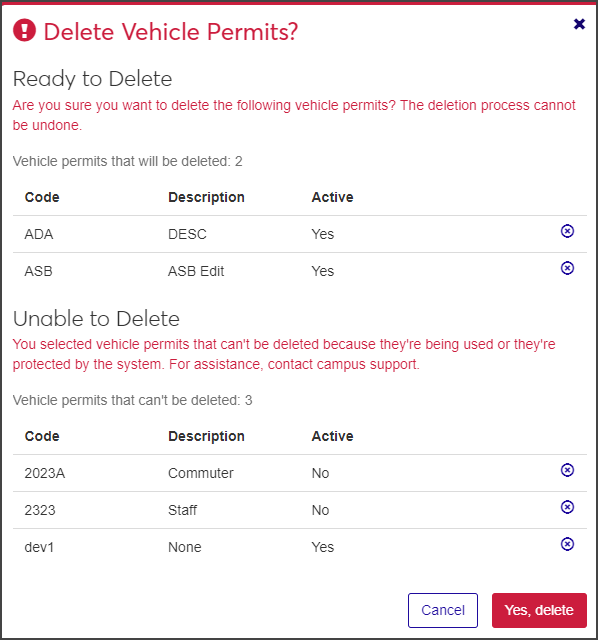
The window might include two categories:
Ready to Delete: Permits that can be deleted.
Unable to Delete: Permits that can't be deleted because they're in use or are otherwise protected by the system. If all selected permits can be deleted, this category does not appear.
If you decide you no longer want to delete a permit listed under Ready to Delete, click the X icon to remove it from the delete list. (The X icon only appears when more than one permit is listed.)
When you are sure you want to delete the permits listed under Ready to Delete, click Yes, delete.