Division Definitions
Important
Information and features vary according to the roles to which you belong and the permissions associated with those roles. For more information, contact your module manager or your campus support team.
Use this page to manage division definitions. Divisions (for example, Undergraduate and Graduate) are important for many purposes in student records, and in these definitions you can map them to IPEDS Divisions for IPEDS reporting.
Desktop Location
You can manage the definitions in Desktop, too, on the Division Definition window.
Database Location
The definitions are stored on the Division Definition table (division_def).
When they're selected on the Student Information Details page, Division tab, they're saved in the Student Division Master table (student_div_mast).
Permissions Required
The permission required is "Can manage division definitions". This permission is available in these roles:
Registrar
Registration Module Manager
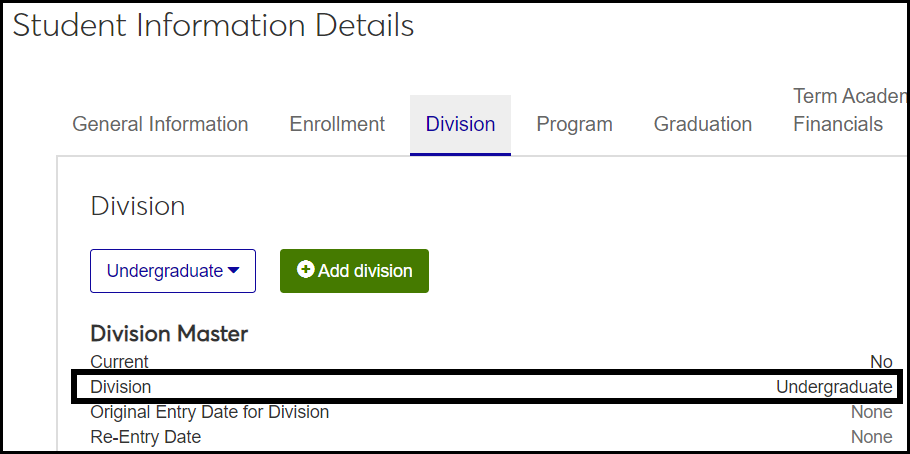
The definitions are used on the Manage Student Division page and the Student Information Details page, Division tab, under the Division Master heading.
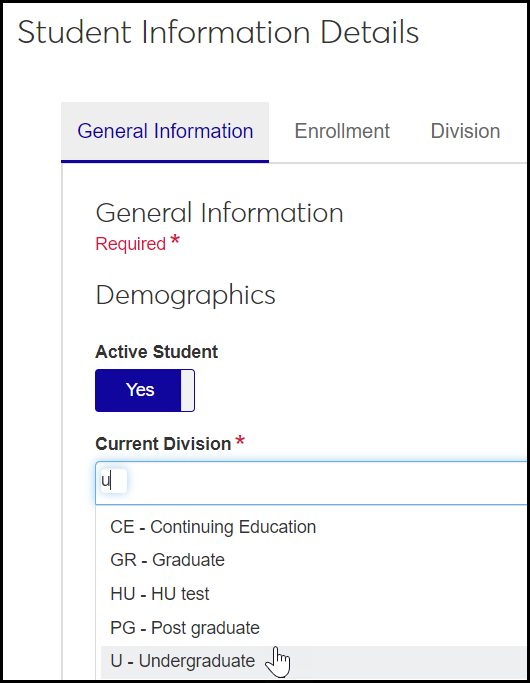
The Current Division is selected for each student on the Student Information Details page, General Information tab.
In Desktop, the definitions appear on the Student Information window, Student Division tab. The Current Division is selected on the Student tab, Student Master subtab.
Code: Up to 2 characters. Appears in drop-downs with Description, but doesn't appear in the field after it's selected. Required. Must be unique.
Tip
Some schools have multiple divisions of the same kind, such as several undergraduate divisions. This way, when a student returns for a 2nd or 3rd undergraduate degree, they're tracked in a different undergraduate division. Schools codes such as U1, U2, and U3 to make them easy to work with in database tools like InfoMaker.
Description: Up to 30 characters. Appears in drop-downs with Code, and appears in fields after it's selected. Required.
Active: Default is Yes. If set to No, the division is available to select in drop-downs but is labeled as inactive.
IPEDS Division: For Integrated Postsecondary Education Data System (IPEDS) reporting, the IPEDS-defined division that maps to your school's division. Options are U - Undergraduate and G - Graduate. Empty by default.
CE Division: Default is No. Yes indicates a Continuing Education division. (Some states use this in state reporting.)
Apply Repeat Limit: Default is No. Editable if the Use registration repeat limits checkbox is selected in Desktop on the Registration Configuration window, Configuration Table tab.
Apply Withdrawal Limit: Default is No. Editable if the Use Course Withdrawal Limit checkbox is selected in Desktop on the Registration Configuration window, Configuration Table tab.
Show in Campus Portal: Indicates whether the definitions are available for selection for users and/or faculty in the Campus Portal. Default is Yes.
Traditional Undergraduate: Used for state reporting in some states. Default is No.
PESC Academic Summary Level: Maps the division to a Postsecondary Electronic Standards Council (PESC) academic summary level.
PESC Course Credit Level: Maps the division to a PESC credit level.
Academic Credit Level: A customized label for the division's academic credit on screen and in reports. Up to 15 characters. Required if it appears, but it appears only if the the Academic Credit Varies by Division checkbox is selected on the Registration Configuration Window, Registration Configuration tab, Miscellaneous group. If the field doesn't appear, then the label is "Hours".
Notice
You could enter "Hours" for your Graduate division definition and "Units" for your Undergraduate division definition. Thus, labels in your Graduate division would be Hours, Credit Hours, Default Hours, etc. Labels in your Undergraduate division would be Units, Credit Units, Default Units, etc.
Ratio: (Academic Credit Ratio) This is used to translate academic credit when a student registers across divisions. 0–9.99. Up to 2 decimal places. Required if it appears, but it appears only if the the Academic Credit Varies by Division checkbox is selected on the Registration Configuration Window, Registration Configuration tab, Miscellaneous group.
Tip
To make the calculation use the ratio correctly, make sure Student is selected in Desktop on the Registration Configuration Window, Registration Configuration tab, Registration Control Group: Transcript Division Based on.
From the Registration Administration hub, click Hub options.
Click Manage Definitions, and select Division definitions. The Division Definitions page opens.
To filter the definitions, enter a phrase in the Quick Filters field. To remove a filter, click its Remove icon
 .
.To sort the definitions, click the arrows at the head of the column you want to sort on.
To see all the fields for a definition, click the Expand icon
 .
.
Click the Edit Display Order button. The Edit Display Order options appear.
Use the following options to determine code display order:
Tip
To drag and drop an item, hover the cursor over the up and down arrow icon for the item being moved until it turns into a hand icon. Then click and hold the left mouse button down and drag the item to where you want it.
From the Sort By drop-down, select Code and then select Ascending or Descending from the Order By drop-down. You can further refine the order by dragging and dropping codes to where you want them in the list.
From the Sort By drop-down, select Description and then select Ascending or Descending from the Order By drop-down. You can further refine the order by dragging and dropping codes to where you want them in the list.
Click the Update button. The Edit Display Order options close and the options will appear in the new order.the Edit Display Order button. The Edit Display Order options appear.
Click the Edit Report Order button. The Edit Report Order options appear.
Use the following options to order the codes according to priority:
Tip
To drag and drop an item, hover the cursor over the up and down arrow icon for the item being moved until it turns into a hand icon. Then click and hold the left mouse button down and drag the item to where want it.
From the Sort By drop-down, select Code and then select Ascending or Descending from the Order By drop-down. You can further refine the order by dragging and dropping codes to where you want them in the list.
From the Sort By drop-down, select Description and then select Ascending or Descending from the Order By drop-down. You can further refine the order by dragging and dropping codes to where you want them in the list.
Click the Update button. The Edit Report Order options close and the definitions appear in the new order.
On the Division Definitions page, click the Create definitions button. The Create Division Definitions pop-up opens.
Enter a unique Code. Up to 2 characters. Appears in drop-downs with Description, but doesn't appear in the field after it's selected. Required.
Enter a Description. Up to 30 characters. Appears in drop-downs with Code, and appears in fields after it's selected.
Active: Default is Yes. If you set it to No, the division is available to select in drop-downs but is labeled Inactive.
IPEDS Division: Select the IPEDS-defined division that maps to your school's division. Options are U - Undergraduate and G - Graduate. Empty by default.
CE Division: Default is No. Select Yes to indicate a Continuing Education division. (Some states use this in state reporting.)
Apply Repeat Limit: Default is No. Editable if the Use registration repeat limits checkbox is selected in Desktop on the Registration Configuration window, Configuration Table tab.
Apply Withdrawal Limit: Default is No. Editable if the Use Course Withdrawal Limit checkbox is selected in Desktop on the Registration Configuration window, Configuration Table tab.
Show in Campus Portal: Indicates whether the definitions are available for selection for users and/or faculty in the Campus Portal. Default is Yes.
Traditional Undergraduate: Used for state reporting in some states. Default is No.
PESC Academic Summary Level: Select a level to map to the division to a PESC academic summary level.
PESC Course Credit Level: Select a level to map the division to a PESC credit level.
Academic Credit Level: You can enter a customized label for the division's academic credit on screen and in reports. Required if it appears, but it appears only if the the Academic Credit Varies by Division checkbox is selected on the Registration Configuration Window, Registration Configuration tab, Miscellaneous group. If the field doesn't appear, then the label is "Hours".
Ratio: (Academic Credit Ratio) Enter a number to translate academic credit when a student registers across divisions. 0–9.99. Up to 2 decimal places. Required if it appears, but it appears only if the the Academic Credit Varies by Division checkbox is selected on the Registration Configuration Window, Registration Configuration tab, Miscellaneous group.
Click either Save and create another or Create and close.
Click the Edit icon
 on the row of a definition. The edit pop-up opens.
Edit the available fields as needed. For descriptions of each field, see the Fields section and the Create Certification Definitions section of this topic. Code can't be edited.
Click the Update button.
Select the checkboxes next to the rows you want to export.
From the Options drop-down, select Download to Excel. The Download to Excel pop-up opens.
Select options for the Excel format and data columns.
Click Download. Your .xlsx or .zip file is saved in the file location that you have set in your browser settings.