Vendors
Important
Information and features vary according to the roles to which you belong and the permissions associated with those roles. For more information, contact your module manager or your campus support team.
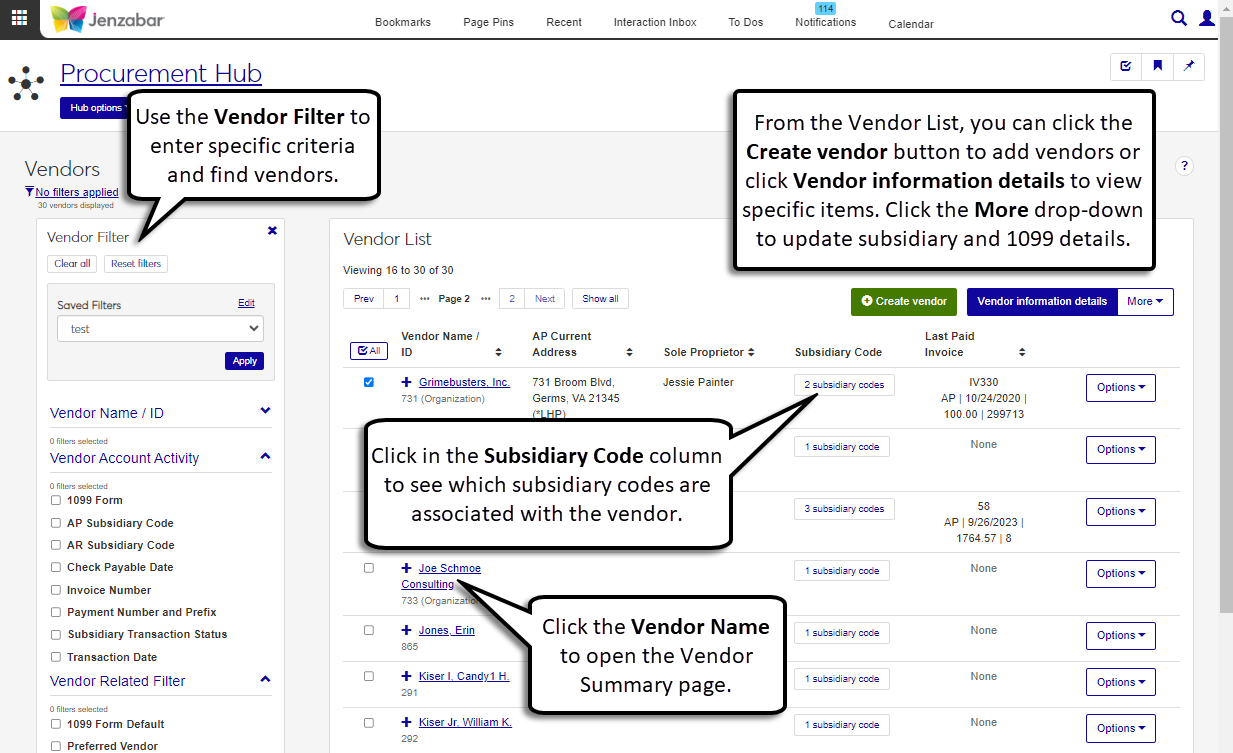
The Vendor List page lets you search for vendors based on different criteria. From here, you can also create new vendors, navigate to vendor detail pages, manage subsidiaries associated with vendors, and update 1099 form defaults.
Desktop Location
You can also view the vendor list from the Desktop Vendor Inquiry window.
Permissions Required
To access the vendor list page, you must be in a Procurement - Accounts Payable role with the "Can view vendors" permission. Additional permissions are needed to access the vendor details and create vendors. For more information about permissions to work with vendors, see Roles and Permissions to Work with Vendors.
To access person and organization details for vendors, you'll also need to be in one or more of the following Common roles with the appropriate permissions.
Person Management role with the applicable permissions in the "Person Information Individual Details" and "Person Information Contact Details" sections (see Person Management Permissions).
External Person Management role with the applicable permissions in the "External Person General Information" and "External Person Contact Details" sections (see External Person Management Permissions).
Organization Management role with the applicable permissions in the "Organization Information Details" and "Organization Contact Details" sections (see Organization Management Permissions).
External Organization Management role with the applicable permissions in the "External Organization General Information" and "External Organization Contact Details" sections (see External Organization Permissions).
From the Finance, Procurement Hub options, select Vendors. The Vendor List page opens.
Use the Vendor Filter to specify criteria to find vendors.
Tip
The system updates the ID Number / Name field when you enter a full ID number and press Tab to move to the next field.
Click the Expand icon
 to display additional vendor information.
To access details for an individual vendor:
Click the Vendor Name / ID link to open the Vendor Summary page.
To view person/organization/vendor information details:
Click the Options button to the right of a vendor row.
Select Person information details to access the page for vendors that are not identified as organizations. Select Organization information details to access the page for organizations.
Select Vendor information details to access general vendor information as well as account activity, electronic payment details, and 1099 information.
To access vendor information for multiple vendors:
Select one or more rows in the Vendor List.
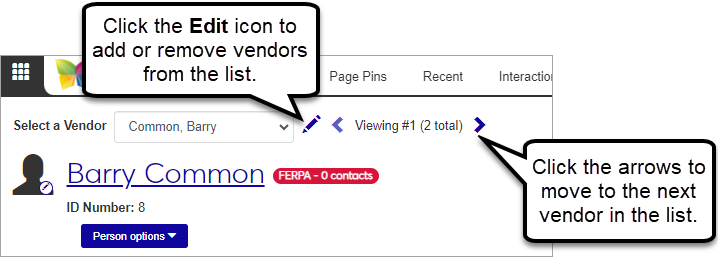
Click the Vendor information details button. The Vendor Information Details page opens for the first vendor in the list. To switch between vendors:
Click the left and right arrows next to the vendor name.
Click the Edit icon
 to remove or add vendors to the list.
Warning
At this time, this functionality is available only for person or organization vendors and cannot be used for a combination of person and organization vendors.
To access person or organization information for multiple vendors:
Select one or more vendors in the list.
Click the More drop-down and select Person / organization information details to open the page. Use the drop-down at the top of the page to switch views between vendors.
From the Vendor List, click the [Number] subsidiary codes button in the Subsidiary Code column. (You may need to click the Expand icon
to see the column if you're in a smaller browser window.)In the AP Subsidiary Codes pop-up, you can review the "Amount Paid YTD" and "Amount Invoiced YTD" for each of the vendor's subsidiary codes.
Click the View link to open the Vendor Information Details page and see account activity for the selected vendor.
Click the Comment icon to view or add comments for the subsidiary code.
From the Vendor List, click the Expand icon
for a vendor row.Next to the Most Recent Invoices label, click the [number] invoices in last 30 days button. The Most Recent Invoices pop-up opens.
Use the Quick Filters to find specific invoices and view the invoice number, Payable Date, Amount, Check Number, and Subsidiary Code.
From the Vendor List, select one or more vendors.
Click the More button at the top and select Activate / deactivate subsidiary. The Activate / Deactivate Subsidiary pop-up opens.
Review the selected vendors. Click the Remove icon for a vendor if needed.
Make a selection from the Select a Subsidiary Code to Update drop-down.
Select Activate or Deactivate from the Activate / Deactivate Subsidiary drop-down.
Click Update.
From the Vendor List, select one or more vendors.
Click the More button at the top and select Update 1099 Form Defaults. The Update 1099 Form Defaults pop-up opens.
Review the selected vendors. Click the Remove icon for a vendor if needed.
Select the 1099 Form Code Default from the drop-down. Required. Options include the Jenzabar-provided 1099 forms:
1099R|Form 1099-R
1099Q|Form 1099-Q
1099NEC|Form 1099-NEC
1099MISC|Form 1099-MISC
1099INT|Form 1099-INT
Select an optional 1099 Label Code Default from the drop-down list. Available options vary based on the selected 1099 form code.
The Apply to All Subsidiary Records checkbox is selected by default. Deselect it if you want the selected 1099 form code to be the default for specific subsidiary records.
If the "Apply to All subsidiary Records" checkbox is deselected, optionally select one or more options from the Apply to Selected AP Subsidiary Records field.
Click Update.
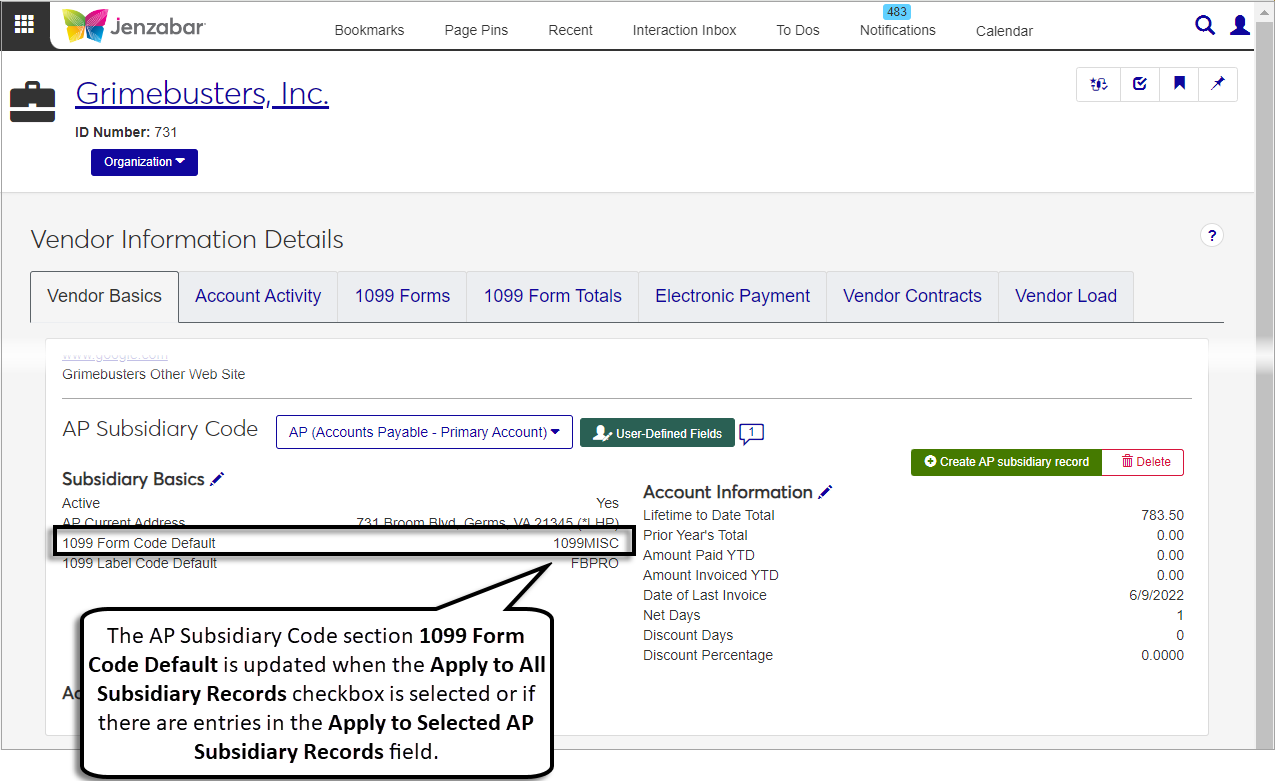
The 1099 Form Code Default is updated when the Apply to All Subsidiary Records checkbox is selected or if there are entries in the Apply to Selected AP Subsidiary Records field. This update is visible in the "AP Subsidiary Code" section of the Vendor Information Details page, Vendor Basics tab.
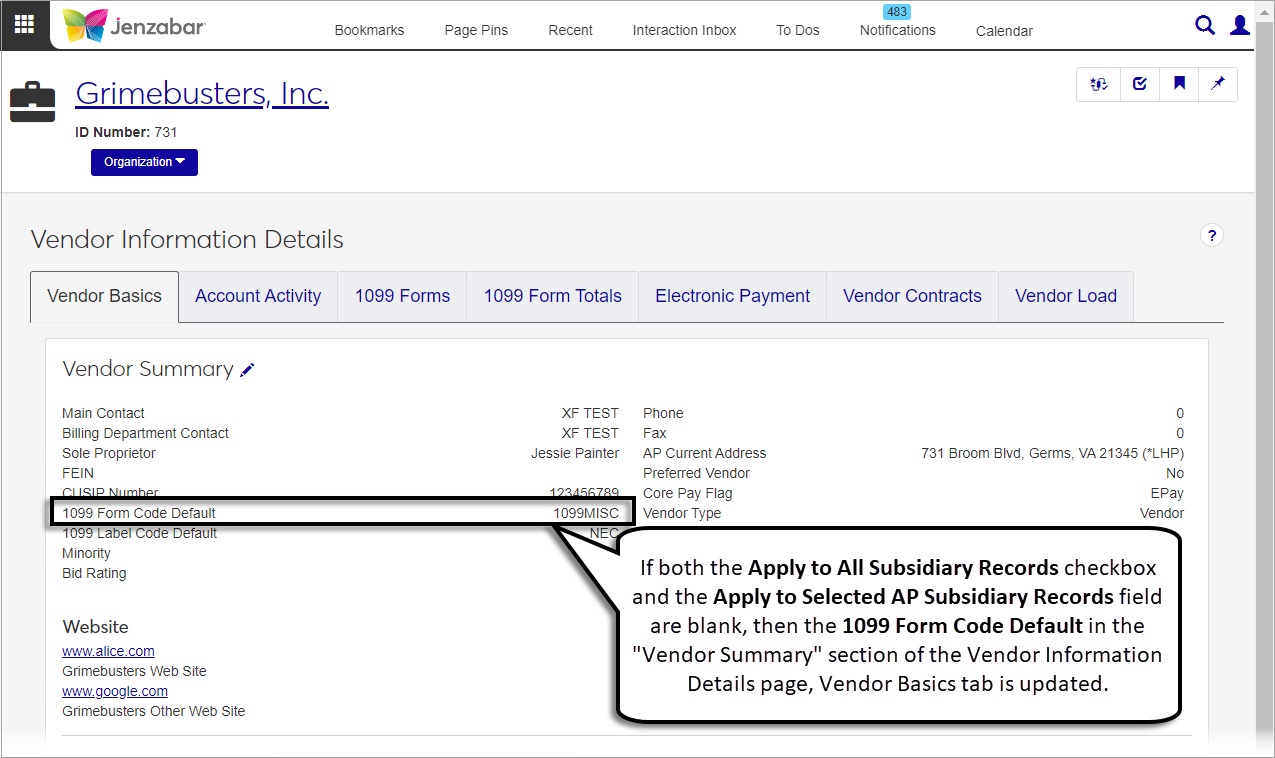
If both the Apply to All Subsidiary Records checkbox and the Apply to Selected AP Subsidiary Records field are blank, then the 1099 Form Code Default in the "Vendor Summary" section of the Vendor Information Details page, Vendor Basics tab is updated.
Select the rows you want to export to enable the More button.
From the More drop-down menu, select Download to Excel.
Select options for the Excel format and data columns.
Click Download. Your .xlsx or .zip file is saved in the file location that you have set in your browser settings.
You may not be in a role with the appropriate permissions. For additional information about the permissions required to perform certain actions on the Vendor List page, see Roles and Permissions to Work with Vendors.