Maintain Student Insurance Information
Important
Information and features vary according to the roles to which you belong and the permissions associated with those roles. For more information, contact your module manager or your campus support team.
From the Student Insurance Information page, you can add, edit, or delete student health insurance information.
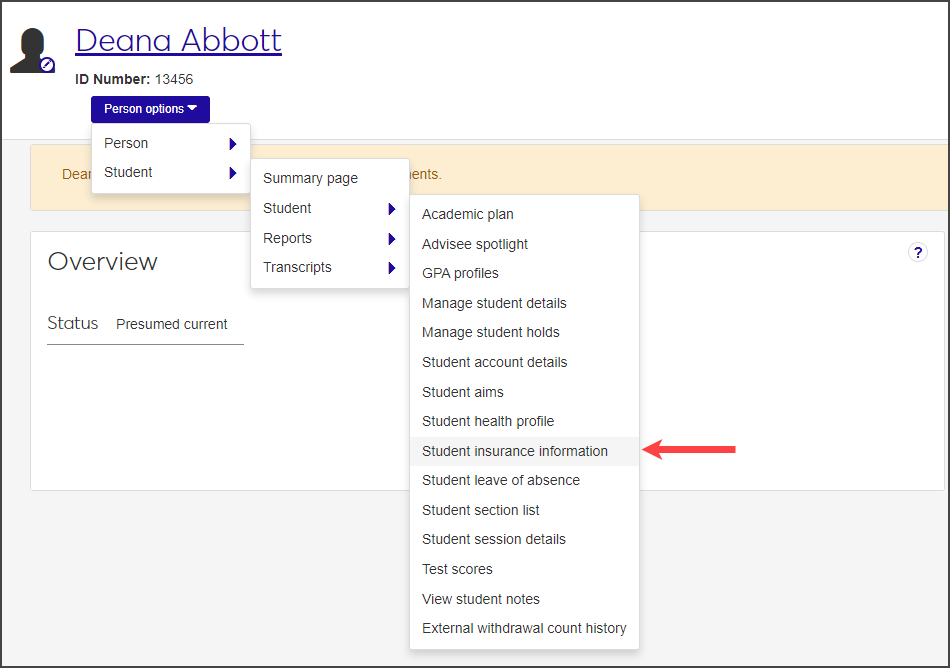
Access this page by navigating to the student's Summary page. From there, click the Person options drop-down and select Student > Student > Student insurance information.
The Student Health Summary block also includes two links to insurance information.

Click the Student health profile link to open the Student Health Profile page. Click the arrow on the Student Insurance Information row to expand the row and view a summary of the student's health information.
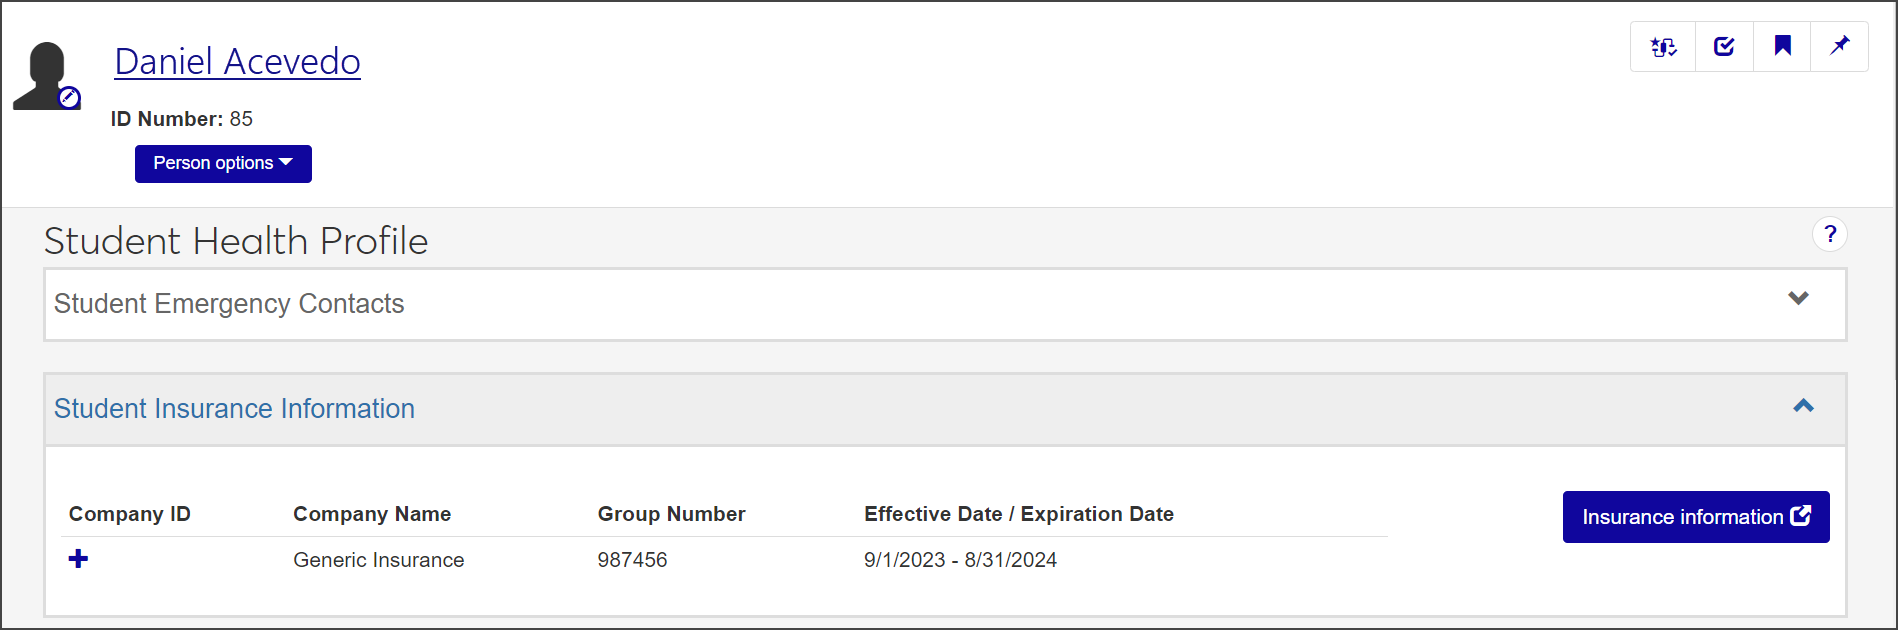
Click the Insurance Information button to open the Student Insurance Information page.
To go directly to the Student Insurance Information page, click the Student insurance information link on the Student Health Summary block.
To see this feature, you must be in the Student Health Administrator or Student Life Module Manager role with the "Can manage health group roster" permission enabled.
Navigate to the student's summary page. You can reach this page by clicking the student's name anywhere it appears as a link in the J1 Web system.

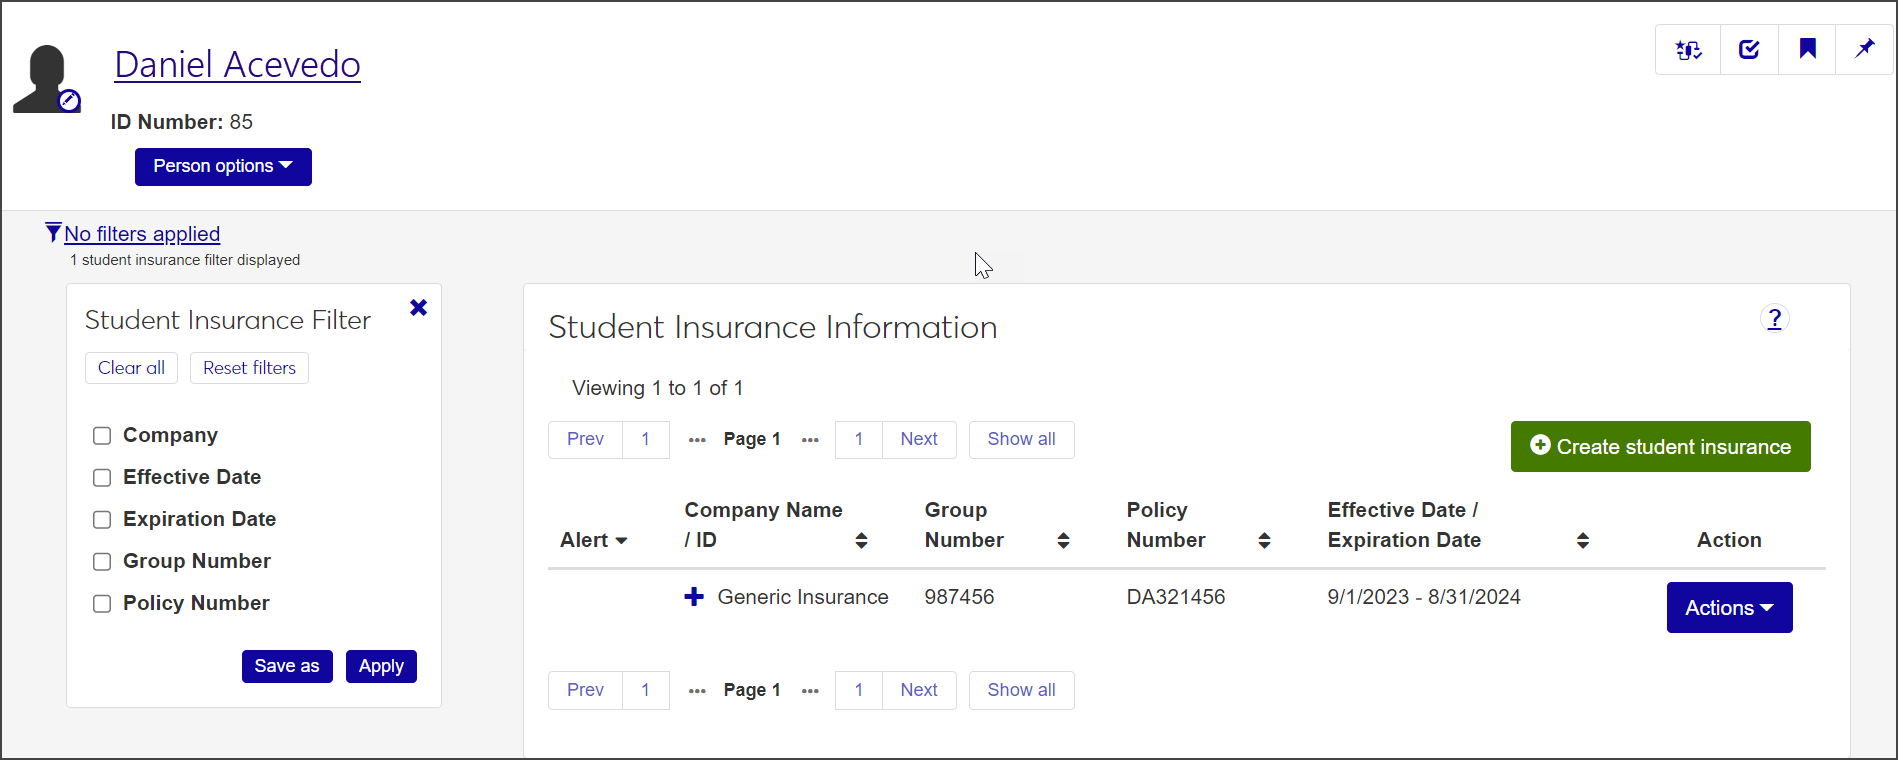
From the Person options drop-down menu, select Student > Student > Student insurance information. The Student Insurance Information page opens, displaying the student's existing insurance information.
Click the plus sign next to the insurance company name to expand the row and view any comments that have been added about the insurance coverage.
Note
If the student's insurance policy has expired, a warning icon appears in the Alert column and a message is displayed under the page title requesting that the insurance information be updated. The student and Health Administrator receive system and email notifications beginning 60 days before a policy expires and continuing with 30-, 10-, 5-, and 1-day warnings, as well as when the policy has expired.
If the student has multiple insurance policies, you can narrow the list by checking one or more options under Student Insurance Filter. For each filter you choose, select or enter the criteria by which you want to filter the list and click Apply.
To save a filter that you will use often, select the relevant criteria, click Save As, and enter a name for the filter. Check Set as default if you would like this to be the default filter. When you are done, click Save.
Click a heading in the list to sort the definitions by that heading.
Navigate to the student's summary page. You can reach this page by clicking the student's name anywhere it appears as a link in the J1 Web system.
From the Person options drop-down, select Student > Student > Student insurance information. The Student Insurance Information page opens, displaying the student's existing insurance information.
Click the Create student insurance button. The Create Student Insurance pop-up opens.
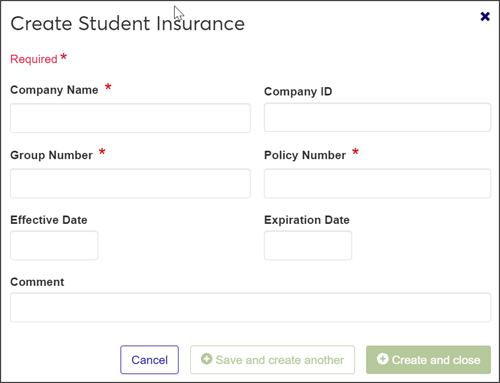
Enter the insurance Company Name, Group Number, and Policy Number. All are required fields.
Note
Although the Company ID is not required, you can use it to search for existing organizations in the database. Begin typing the ID in the field to generate a list of possible company names. When you select an organization, the Company Name field fills in automatically.
Enter the Effective Date and Expiration Date of the policy, if applicable. These fields are optional.
Enter an optional Comment about the insurance plan or coverage.
When you're done, click Save and create another or Create and close. The new insurance information is now listed on the Student Insurance Information page.
You can edit the group number, policy number, and effective and expiration dates for the insurance policy. You can also enter or edit a comment. You cannot edit the company name or ID.
On the Student Insurance Information page, select Edit from the Actions drop-down menu for the insurance you need to update. The Edit Student Insurance pop-up opens.
Edit the fields as needed.
Click Update to save your changes.
On the Student Insurance Information page, select Delete from the Actions drop-down menu next to the insurance policy you need to remove. The Delete Student Insurance? pop-up opens.
If the insurance policy can be deleted, the window displays "Ready to Delete" and asks you to confirm the deletion. Click Yes, delete to confirm and close the window. The insurance policy is removed from the list and will not appear in any lists or tables where it was included.
If the policy cannot be deleted because it is in use or is protected by the system, the window displays "Unable to Delete." Click OK to close the window.
Student Health Settings
On the Student Health Settings page, you can set up a schedule to send email notifications to students alerting them that their health insurance is about to expire. For example, you might want the student to receive an email 90 days before their insurance is set to expire, with additional notifications to be sent 30, 15, and 2 days before the expiration date. You can create as many notification settings as you want.
To access the Student Health Settings page, click Hub options on the Student Health Administration Hub and select Setting options > Manage student health settings.
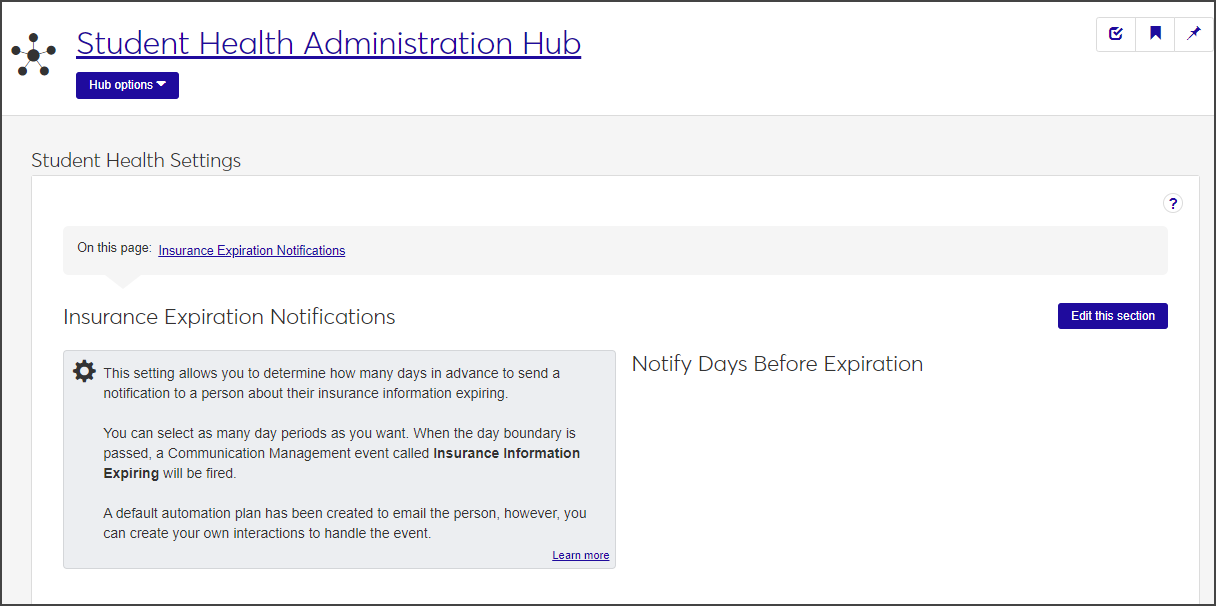
If a notification schedule already exists, it will appear under Notify Days Before Expiration. If not, that section is empty.
In order to manage student health settings, you must have the permission "Can manage student health settings" enabled in the Student Health Administrator or Student Life Module Manager role.
On the Student Health Settings page, click Edit this section.
Click the Add another notification link under Notify Days Before Expiration. A blank field appears.
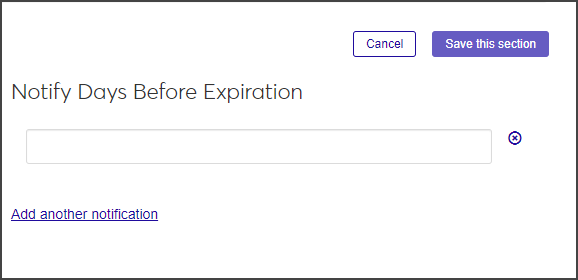
Click in the field and enter how many days before the insurance expires you want the notification to be sent.
To add another notification, click Add another notification again and repeat step 3.
You can add as many notification periods as you want.
When you have finished, click Save this section.
You can add or remove existing notifications and edit the number of notification days before the student's insurance expires.
On the Student Health Settings page, click Edit this section. The fields under Notify Days Before Expiration become editable.
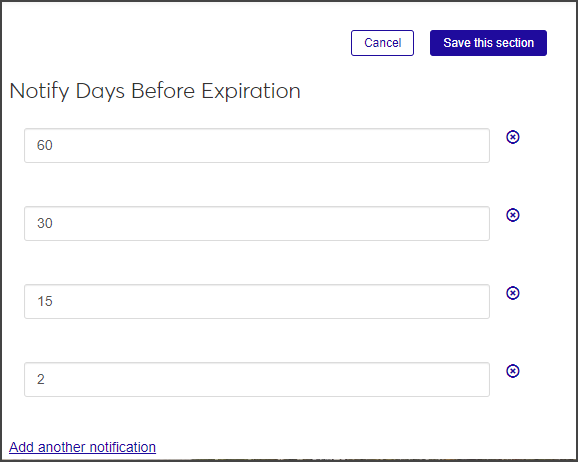
To change a value, delete the existing value and enter a new number.
To delete a notification setting, click the X icon next to it.
When you are done editing, click Save this section.
Note
You do not have to manually rearrange the rows so they're in the correct order. The rows are automatically sorted in descending order when you save your changes.