Using Document Storage With Workflow
Important
Information and features vary according to the roles to which you belong and the permissions associated with those roles. For more information, contact your module manager or your campus support team.
Document Storage is a centralized file management system within the Desktop environment. Workflow uses this system to store documents that are uploaded as part of a workflow or generated through document interactions within an automation plan associated with the workflow.
Documents are categorized and access to them is role-based, ensuring users can only view and manage files within their authorized areas.
To save documents and attachments workflow users upload the following must be set up in Desktop:
Enable access to the different types of files you want to allow users to store at the category level
Create the different document types
Grant the base and licensed roles the appropriate directory list (dir), view (Viw), and add permissions
Log in to J1 Desktop as a Document Storage Administrator with permission to add new documents, and access the Desktop, Document Storage Setup window.
From the Document Category tab, select the Document Category you want to use or create a new one.

Select the Active checkbox and click Save.
Click the Make File Extensions Available for Category: GENERAL link. The Make File Extensions Available for Document Storage System window appears.
Select the checkboxes for the file types you want to allow. You'll likely want to allow applicants and students to upload PDFs, DOCs and DOCXs.
For each selected file type, enter the highest allowable file size in the Maximum File Size column.
Click the Save button and close the Make File Extensions Available for Document Storage System window.
Access the Document Type Definition tab on the Document Storage Setup window.
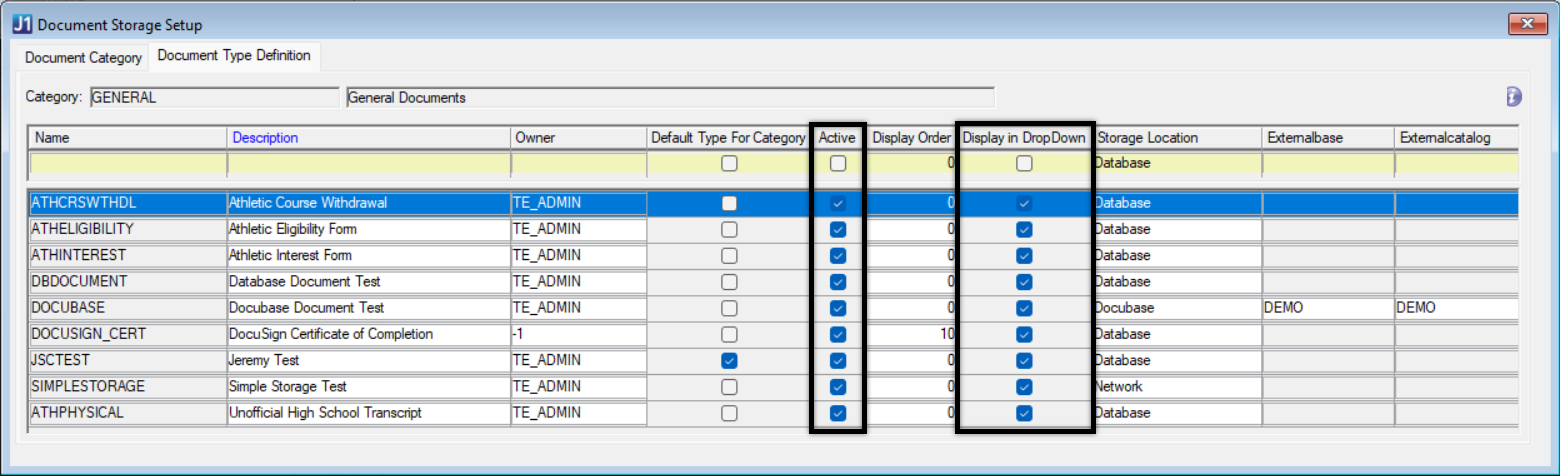
Right-click and select Add Row. New row fields are enabled.
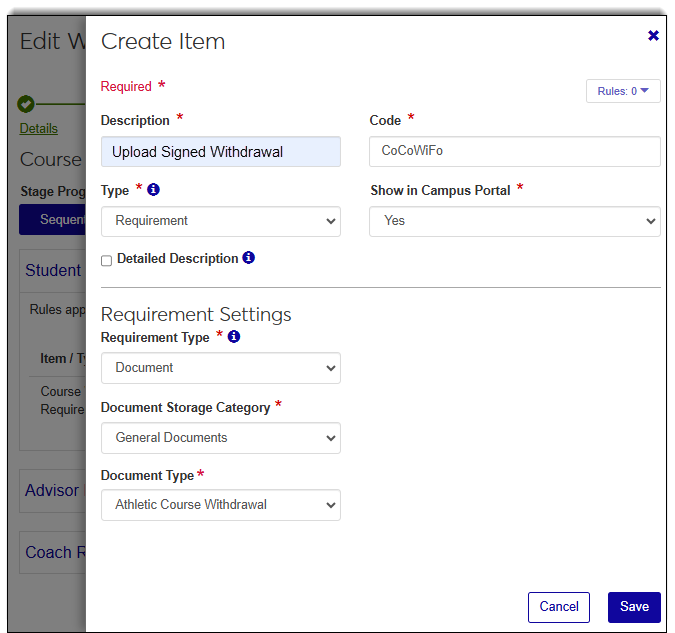
Enter a Name and Description. Make this a recognizable name as it will appear as an option when users work in J1 Web.
Repeat Steps 9 and 10 for as many documents as needed. For example, you might create separate Athletic Interest Form, Unofficial High School Transcript, and Honors Eligibility document types.
Select the Active and Display in DropDown checkboxes. These selections ensure the options are available in J1 Web.
Click Save and close the Document Storage Setup window.
Access the Document Security window.
From the Permission On options, select Document Type.
From the Permission On: Document Type tab, select the general document type you created earlier.
From the Permission For options, select J1 Web Role. The Permissions For: J1 Web Role tab appear.
For the Workflow Base and Workflow Licensed roles, select the Dir, Viw, and Add checkboxes.
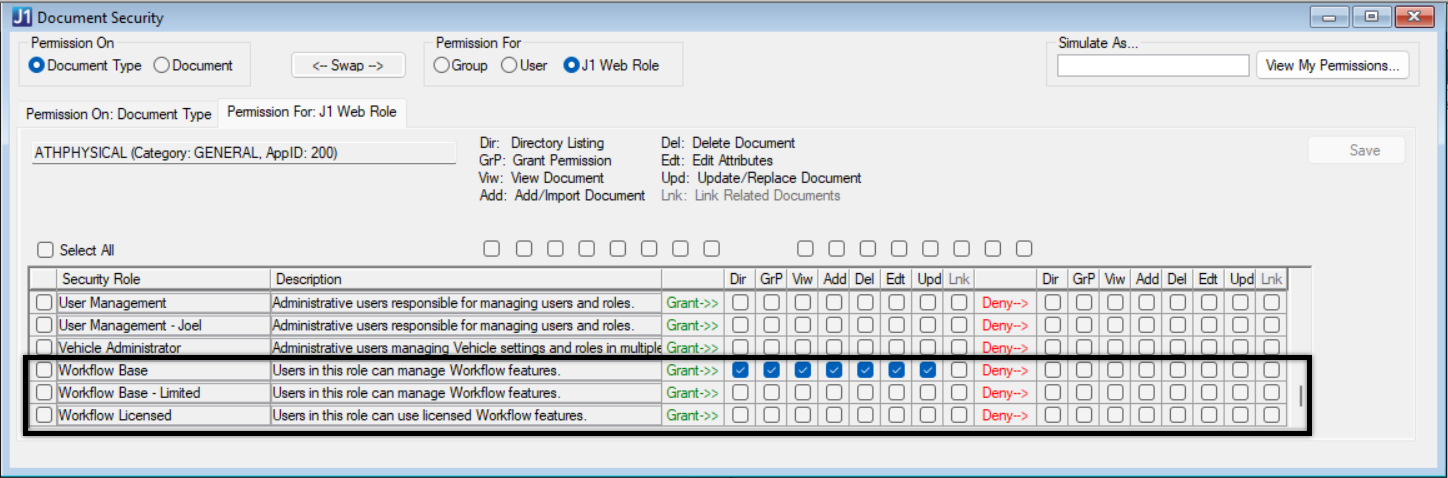
Click Save. The document types will be available for users to select in J1 Web when working with workflows.