Sanctions
Important
Information and features vary according to the roles to which you belong and the permissions associated with those roles. For more information, contact your module manager or your campus support team.
The Sanctions page lists all sanctions associated with existing cases. You can edit the sanctions individually or in a batch and download the list to an Excel file.
To see the Sanctions page, you must be in one of the following roles with the indicated permissions:
Student Conduct - Assistant Director Access by Department role with the "Can view assigned sanctions" permission (this permission is enabled by default for this role)
Student Conduct - Director Access by Department role with the "Can view all sanctions" permission (this permission is enabled by default for this role)
The Sanctions page includes the following information for each sanction listed:
Column | Description |
|---|---|
Case Number | The case to which the sanction is applied. Click the case number to open the case summary page. |
Involved Party Name / ID | The name and ID number of the involved party for the case. Click the name to open the student's summary page. |
Description | A brief description of the sanction (e.g., fine or community service). |
Sanction Start / End Date | The start and end date of the sanction, if applicable. |
Status | The status of the sanction (e.g., In Progress, Paid, or Outstanding). |
Action | The Actions drop-down in this column includes options for editing sanction details and user-defined fields. |
Code | The unique code for the sanction. |
Fine | The amount of the fine, if applicable. |
Sanction Assigned By | The name and ID of the person who assigned the sanction to the violation. |
Disciplinary Contact | The name and ID number of the assigned disciplinary contact, if any. Click the name to open the contact's person summary page. |
Contact Date | The date the student was contacted about the sanction, if applicable. |
Sanction Completed Date | If the sanctions's status is Completed, the date it was completed. |
Sanction Text | The sanction text, if any. |
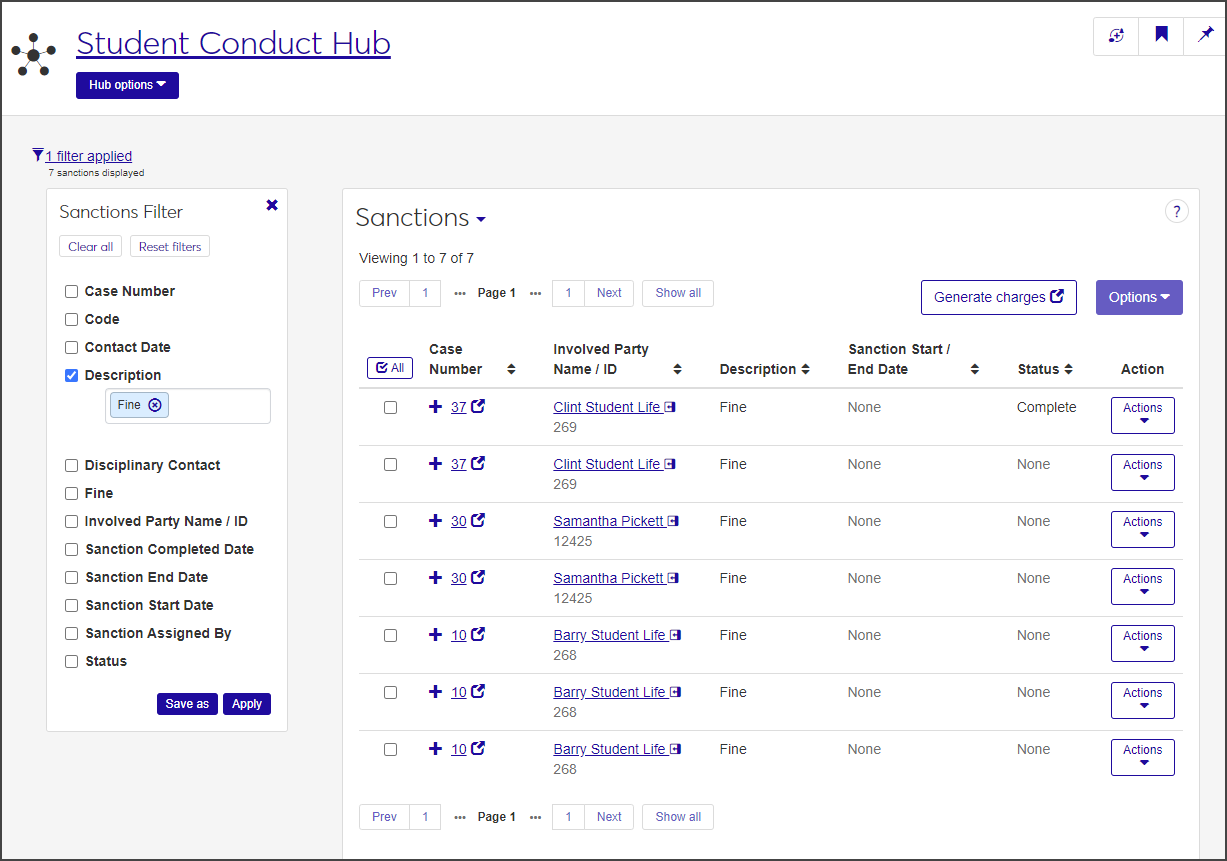
On the Student Conduct Hub page, select Sanctions from the Hub options drop-down. The Sanctions page opens, listing all sanctions you have access to based on your role and permissions.
Click the plus icon next to a sanction to view all columns.
To filter the list:
In the Sanctions Filter, select the checkbox next to the category you want to filter the list by. You can select more than one filter.
Enter or select a value for the category you chose.
When you have selected your filters, click Apply.
If you know you'll use a particular filter often, you can save it and set it as your default filter. After you create the filter, click Save as and enter a name for the filter in the Save the Current Filter As ... field. To ake this your default filter, select the Set as default checkbox.
You can edit the details for one sanction at a time, or for multiple sanctions in a batch. When you edit a batch, the changes apply to all the sanctions you select.
On the Sanctions page, select Edit sanction details from the Actions drop-down for the sanction you need to update. The Edit Sanction Details pop-up opens.
The Case Number, Involved Party Name / ID, Code / Description, Fine, and Sanction Assigned By / ID fields are read-only and cannot be edited.
Make updates to the editable fields as needed.
When you are done, click Update to save the changes and close the pop-up.
On the Sanctions page, select the checkbox next to each sanction you need to edit.
Select Edit sanction details from the Options drop-down. The Edit Sanction Details pop-up opens.
From the Select a Detail to Update drop-down, select the detail you want to edit. You can edit the Disciplinary Contact, Contact Date, Sanction Completed Date, and Status.
Enter or select a value from the field next to the Select a Detail to Update drop-down.
To edit another detail, click the Add another detail link. A new row of drop-down menus is added.
Repeat steps 3 and 4 for the new detail.
When you are done, click Update to save the changes and close the pop-up.
Use the following process to select the sanctions for which miscellaneous charges will be created. A suspended transaction batch will be created in the Business Office to hold the generated charges.
Caution
No users should enter or modify sanctions during the execution of this process.
Click the Generate charges button or select Generate charges from the Hub options menu. The Miscellaneous Charges for Sanctions page opens.
Select the students who have sanctions you want to generate charges for. You can select by Student Name / ID, Sanction Type, or Data Set.
Student Name / ID: Select the Student Name / ID radio button, then click in the field and begin typing the name or ID number of a student. Select the correct name when it appears in the list. You can add multiple students at a time.
Sanction Type: Select the Sanction Type radio button, then click in the field and select the type of sanction you want to generate charges for. You can add multiple sanction types at a time.
Data Set: Select the Data Set radio button, then click in the field and select the data set you want to use.
As you add students or sanction types, the Add sanctions button updates to reflect the number of sanctions that will be added.
When you have selected the sanctions to add, click Add sanctions. The Sanctions List updates with the sanctions you added. For each sanction, the student's name and ID number and the amount of the fine are displayed. A student might be listed more than once, depending on how many sanctions have been applied to the student's violations.
After you have selected the sanctions you want to generate charges for, you need to send the charges to the student's account.
In the Miscellaneous Charges for Sanctions window, select the checkbox next to each sanction you want to generate charges for. Click All to select all sanctions listed.
Click Generate charges. The Generate Miscellaneous Charges pop-up opens, listing the students you selected.
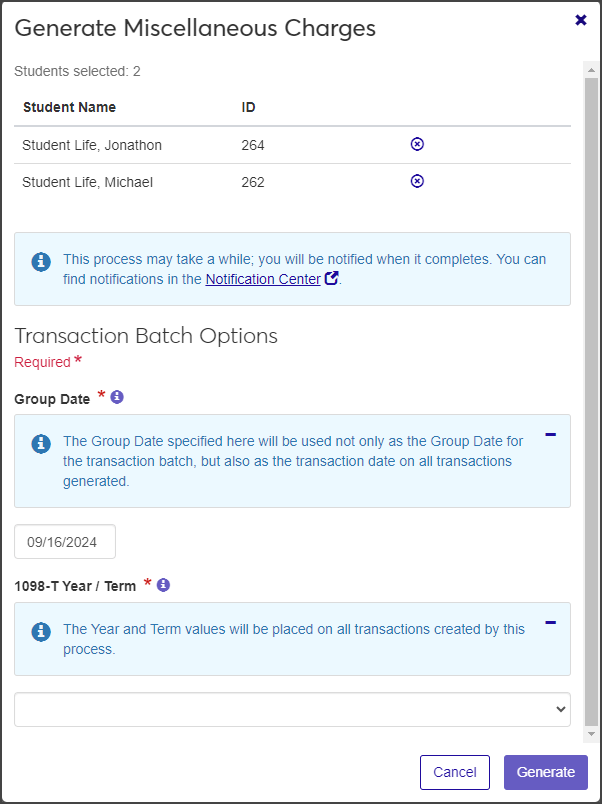
To remove a student from the list, click the Remove icon next to the student's name.
Under Transaction Batch Options, click in the Group Date field and use the pop-up calendar to select a date. The Group Date you select will be used not only as the Group Date for the transaction batch, but also as the transaction date on all transactions generated. This field is required.
Select the year and term from the 1098-T Year / Term drop-down. The value you select will be placed on all transactions created by this process. This field is required.
When you are done, click Generate.
You can remove students from the sanctions list one at a time or in a batch.
To remove a single student from the list, click the Remove icon next to the student's name.
To remove students in a batch, select the checkbox next to each student you need to remove, then select Remove selected from the More drop-down.