Payment List
Important
Information and features vary according to the roles to which you belong and the permissions associated with those roles. For more information, contact your module manager or your campus support team.

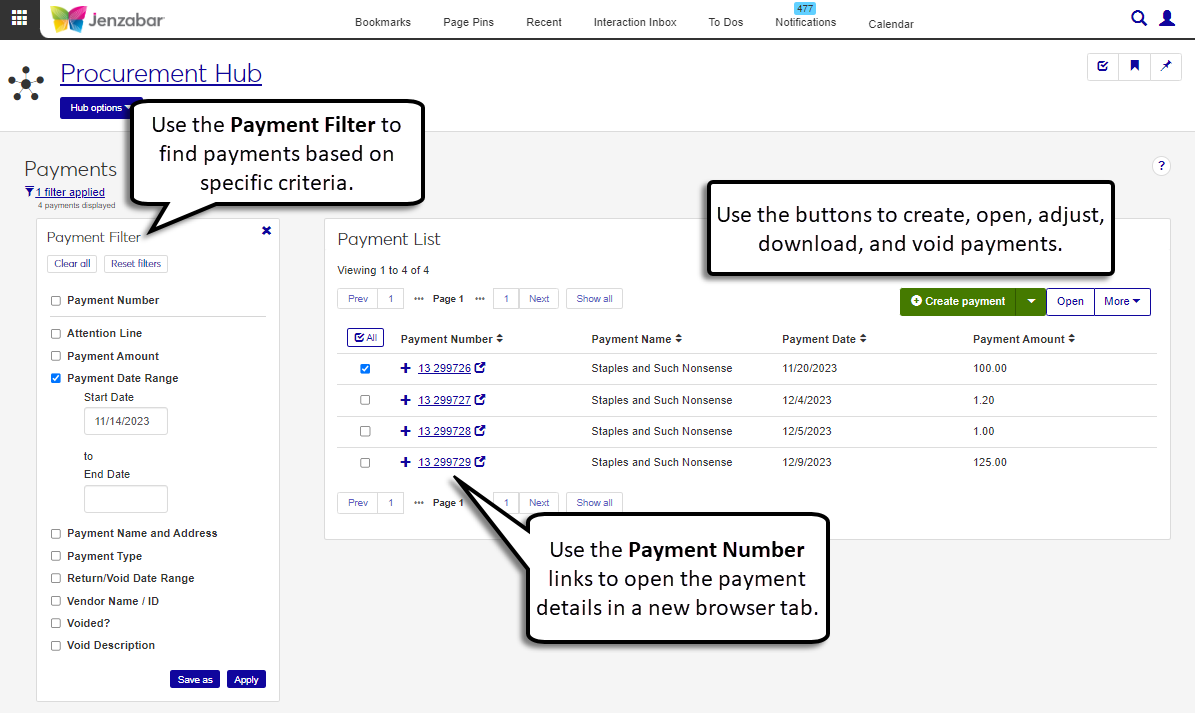
The Payments page lists the payments that have been made, both those created in J1 and those that have been recorded from other systems. The Payment Number link opens detailed payment information in a new browser tab for review, and you can use the Payment Filter to find payments based on specific criteria. From this page, you can create payments, make adjustments to previous system payments, download payment information to Excel, and void payments.
You can also view the list of payments from the Desktop Check/EPayment Inquiry window.
To access the Payments page, you must be in a Procurement - Accounts Payable role with the "Can view payments" permission. Additional permissions are needed to create and edit payments. For more details about permissions to work with payments, see Roles and Permissions for Creating Payments.
There are 4 steps in the process to create payments in J1 Web. For more details on each step, see Create Payment.
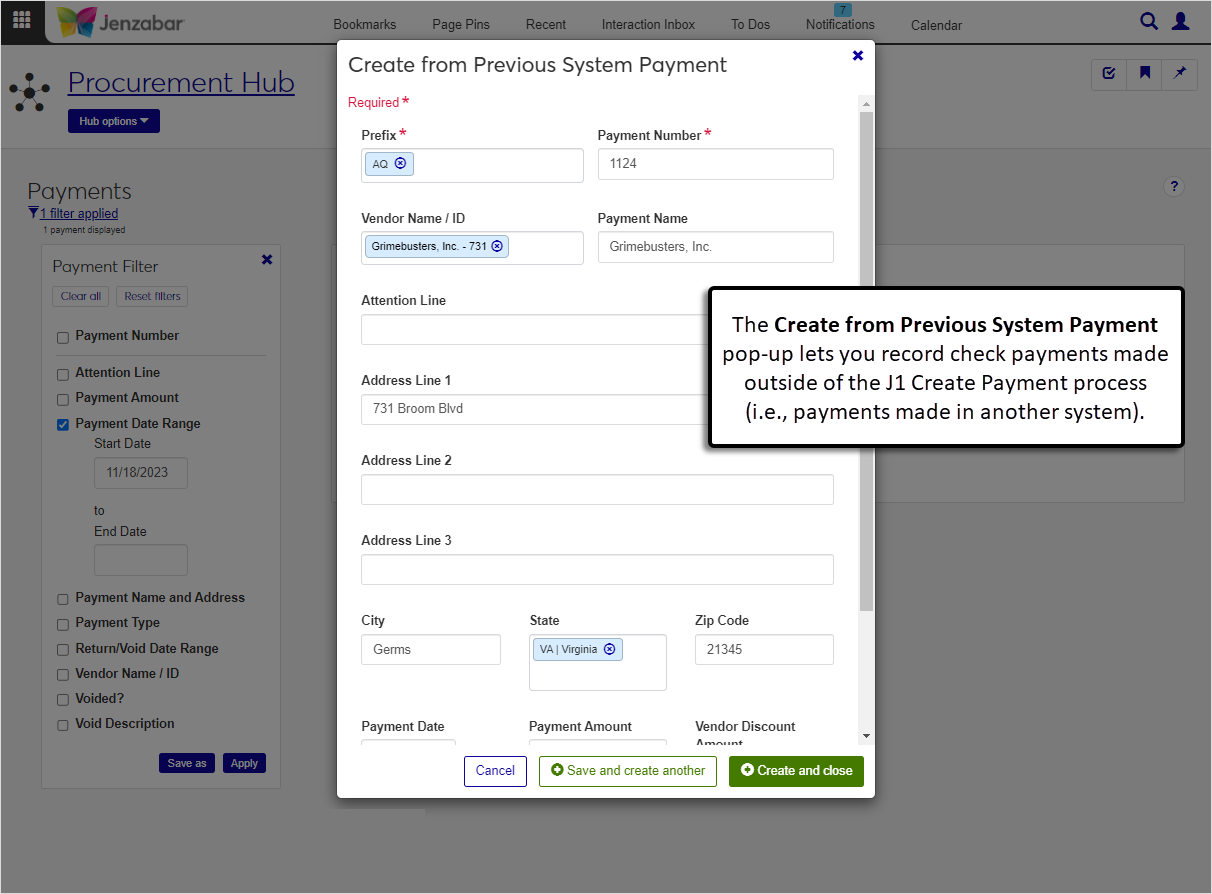
You can also record payments that weren't made in the J1 system with the Create from previous system payment option on the Payment List page. When this option is selected from the Create payment drop-down, you can enter payment information without selecting invoices.
Throughout the Create Payment process, you can save your progress and return to the process later. A link to the payment in progress appears at the top of the Payment List to let you finish the process. When a payment is in progress, the payment process locks. If you attempt to create a payment while someone else is creating a payment, you'll see a warning that the process is locked on Step 1 of the Create Payment process. If you have permission to unlock payments, you can unlock the process to continue creating the payment.
Warning
Unlocking the payment process may cause errors and any unsaved changes are lost.
Payments can be voided with the Void option in the More drop-down. In the confirmation pop-up, you can review selected payments and continue with the void process. When payments are voided, a void (VD) batch with reversing invoice transactions is created. Batch details can be viewed on the Batches page in the General Ledger Accounting hub.
Note
Only payments created in J1 can be voided with this process. Payments that were entered with the Create from previous system payment option don't have invoice transactions associated with them and can be identified as voided by selecting the Voided? checkbox on the payment details page.
From the Finance, Procurement options, select Payments. The Payment List page opens.
Use the Payment Filter criteria to find specific payments.
Click the Expand icon
 to see additional payment details.
Click the Payment Number link, or select one or more payments and click Open to view the payment details page.
Tip
For detailed information about each step, see Create Payment.
From the Payment List page, click Create payment. The Create Payment page opens.
Complete the steps in the process.
On the Payment List page, click the Print registers, check, and e-Payments link in the alert at the top of the list. The Create Payment process opens to the page where information was last entered.
Complete the remaining steps of the process.
From the Payment List page, click the Create payment drop-down button and select Create from previous system payment. The Create from Previous System Payment pop-up opens.
Enter the Prefix. Required.
Enter the Payment Number (up to 9 digits). Required.
Enter or select optional information as needed.
Vendor Name / ID
Tip
The system updates the ID Number / Name field when you enter a full ID number and press Tab to move to the next field.
Payment Name (autofilled with the selected vendor name)
Attention Line
Address Line 1, 2, 3 (autofilled with the selected vendor's current address, if it's in the system)
City (autofilled with the selected vendor's current address, if it's in the system)
State (autofilled with the selected vendor's current address, if it's in the system)
Zip Code (autofilled with the selected vendor's current address, if it's in the system)
Payment Date
Payment Amount
Vendor Discount Amount
Voided?
Return/Void Date
Void Description
Click Save and create another to enter additional payments. Click Create and close to save payments and open the payment details page.
Note
Details can only be edited for payments that were not created with the J1 process. If you select payments associated with invoices, those detail pages do not have editable fields.
From the Payment List page, select one or more payments to enable the More button.
Click the More button and select Adjust previous system checks/e-payments. The payment details page opens. If multiple payments were selected, use the payment number drop-down to switch views between payment details.
Make updates to the editable fields.
Click Save.
From the Payment List page, select one or more payments to enable the More button.
Click the More button and select Void. The Void Payment? pop-up opens.
Review the payments in the Ready to Void and Unable to Void sections, and remove any payments that you don't want to void.
The default File Format is PDF, and you can add or remove others as needed.
Click Yes, void. The pop-up closes, the Voided? column for the selected payments updates to "Yes", and a void (VD) batch is created to reverse the associated invoice transactions. The alert at the bottom of the page has links to the VD batch and the Check Register report with the void payment details.
From the Payment List page, select the rows you want to export to enable the More button.
From the More drop-down menu, select Download to Excel.
Select options for the Excel format and data columns.
Click Download. Your .xlsx or .zip file is saved in the file location that you have set in your browser settings.
The void payment process creates void (VD) batches with reversing entries for invoices in the system. J1 cannot create a batch for payments made in another system because they aren't associated with invoice transactions, so those payments will always appear in the "Unable to Void" section of the Void Payments? pop-up. To indicate that a payment made in another system was voided, select the Voided? checkbox on the payment details page.
Although the Desktop and J1 Web applications run in parallel and payments created in one system are visible in the other, a new table for J1 Web tracks the payment type while the payment is created. This table is not used in Desktop, so the process must be completed in one application or the other before the payment information is saved and available to both.