Student Deposits
Important
Information and features vary according to the roles to which you belong and the permissions associated with those roles. For more information, contact your module manager or your campus support team.

Use the Student Deposits page to transfer advance deposits into the appropriate student accounts. If your school receives an advanced deposit from students after they are accepted, those deposits typically stay in a liability account until the term starts. At the beginning of the term, the funds can be transferred to the student's AR subsidiary account from this page.
Desktop Location
You can transfer student deposits in Desktop from the Transfer Advance Deposits window. Use the Clear Advance Deposits Flag window to set the "Acceptance Deposit Paid" column in the STUDENT_MASTER table to empty.
Permissions Required
To access the Student Deposits page, you must be in a Receivables Management role with "Can transfer student deposit" permissions. To perform additional actions on the page and see TP batches, you'll need to be in the following roles (or copies of them) with the appropriate permissions:
Registrars role with permissions to view and edit student general info
Person Management role with permissions to access campus name and contact details
General Ledger Accounting Charge Batches role with permission to view batches and Associations enabled for the TP source code
For additional information about roles and permissions, see Roles and Permissions to Work with Student Deposits.
Tip
The system updates the ID Number / Name field when you enter a full ID number and press Tab to move to the next field.
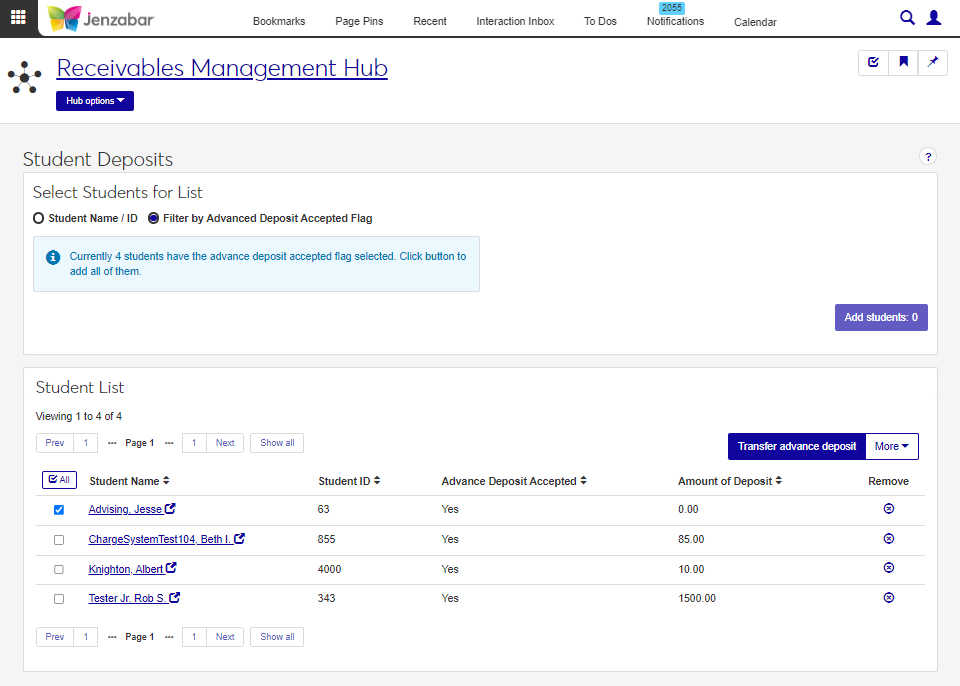
From the Receivables Management Hub options, select Student deposits. The Student Deposits page opens.
Select students with advance deposit amounts.
The Filter by Advanced Deposit Accepted Flag radio button is selected by default. Any students in the STUDENT_MASTER table with a 'Y' in the "Acceptance Deposit Paid" column are included.
Click the Student Name / ID radio button to select students individually.
Click the Add Students button. The selected students appear in the Student List section.
Review the Advance Deposit Accepted and Amount of Deposit columns for each student.
Remove students from the list by clicking the Remove icon.
Select one or more students and click the Transfer advance deposit button. The Transfer Advance Deposit pop-up opens.
Select the GL Account Number (Credit) from the drop-down. This is the GL account that was initially credited for the receipt of the advance payment. Required.
Select the GL Account Number (Debit) from the drop-down. This is the General Ledger account number associated with the AR Subsidiary account to be credited for the transfer. Required.
The Date of Transaction defaults to today's date. Enter a different date if necessary. Required.
Leave the Amount of Deposit field empty to transfer the current amount listed in the student's information record. To transfer a different amount, enter the desired amount in the field.
Note
If multiple students are selected, the value entered for the "Amount of Deposit" is applied to each student in the list.
To clear the advance deposit accepted flag after the transfer is complete, select the Clear deposit accepted flag for all selected students checkbox. Leave the checkbox unselected if you still want students to be flagged with an advanced deposit.
Select the File Format. PDF is the default, and you can select one or more additional formats. Required.
Click Transfer. The process starts and the pop-up closes. When the process is complete, a notification appears with links to the validation report and TP batch.
From the Receivables Management Hub options, select Student deposits. The Student Deposits page opens.
Select students with advance deposit amounts.
The Filter by Advanced Deposit Accepted Flag radio button is selected by default. Any students in the STUDENT_MASTER table with a 'Y' in the "Acceptance Deposit Paid" column are included.
Click the Student Name / ID radio button to select students individually.
Click the Add Students button. The selected students appear in the Student List section.
Review the Advance Deposit Accepted and Amount of Deposit columns for each student.
Remove students from the list by clicking the Remove icon.
Select one or more students, click the More button and select Update advance deposit accepted flag. The Update Advance Deposit Accepted Flag pop-up opens.
The default selection for Advance Deposit Accepted is 'Yes'. If appropriate, select 'No' from the drop-down. Required.
Enter the Amount of Deposit. The amount entered overwrites the current amount listed on the student information record. Leave the field empty to use the current amount on each student's information record for the transfer.
Click Update. The Student List and the selected students' information records are updated.
Note
Available options may differ based on your roles and permissions.
From the Student Deposits page, select students to add to the list.
In the Student List, select one or more students.
Click the More button and select from the following options to access additional student information in a new browser tab.
Person information details - to view general information about the student, including name, contact, biographical, ethnicity/race, military records, and tribal details
Student account details - to view financial information about the student, including account activity, payment plans, and electronic payment details
Student information details - to view general information related to the student's registration, including enrollment, division, program, graduation, and term academics and financials
If the Advanced Deposit Selected flag hasn't been selected for any students in your system, this filter won't return any results. However, you can select individual students to add to the list, then use the "Update advance deposit acceptance flag" option to flag students. When you access the Student Deposits page again, the filter will include the students whose records were updated.