Close a Year
Important
Information and features vary according to the roles to which you belong and the permissions associated with those roles. For more information, contact your module manager or your campus support team.
The year close process allows you to move (or roll) all of transactions from the year you are closing to their appropriate place within the General Ledger, move the summary balances in the GL Master table to the previous year's balances, and allow you to start with a clean slate for a new year.
Confirm that every month in the fiscal year is closed on the Close a Month page
Run Depreciation Expense Transfer (optional for J1 Asset Management users)
Run Calculate Balances to ensure all transactions are in sync
General Ledger Accounting Processing > Can close a year
Year Close Processing
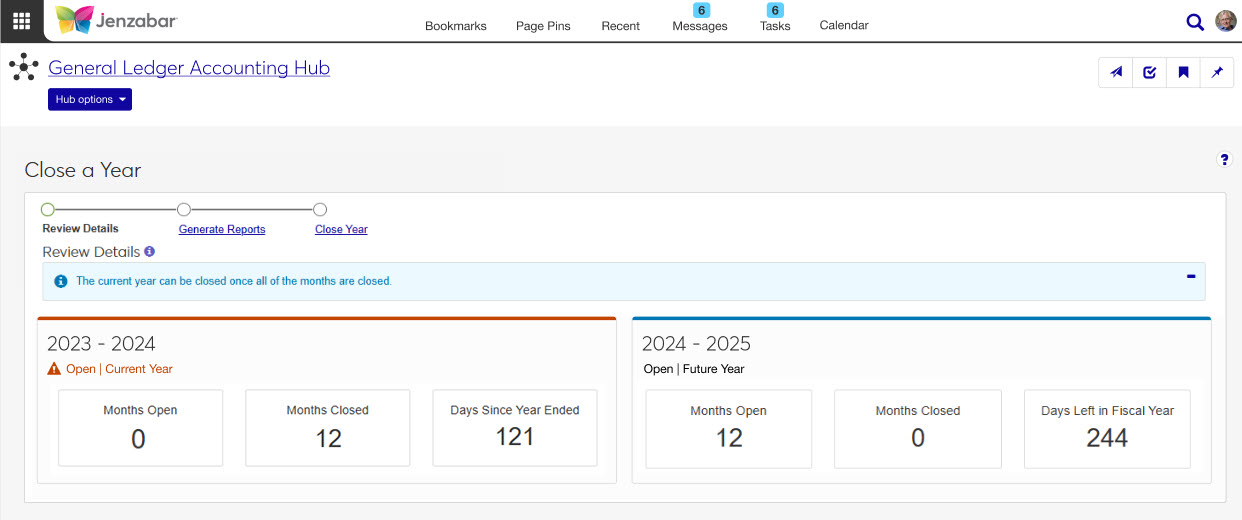
The Year Close process is designed similar to a wizard. At the top of the page, you will see a line with circles representing steps. Click each link (in the correct order) to move through the process steps.
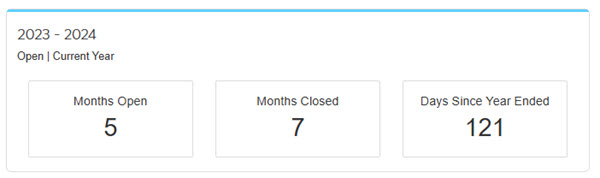
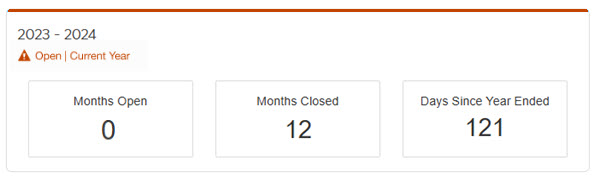
This page offers a view of the open year or years in your general ledger system. The current year can be closed once all of the months are closed.
On this step, you'll want to generate several reports. The generating report process may take a while, and you'll be notified when it completes. You can find notifications in the Notification Center.
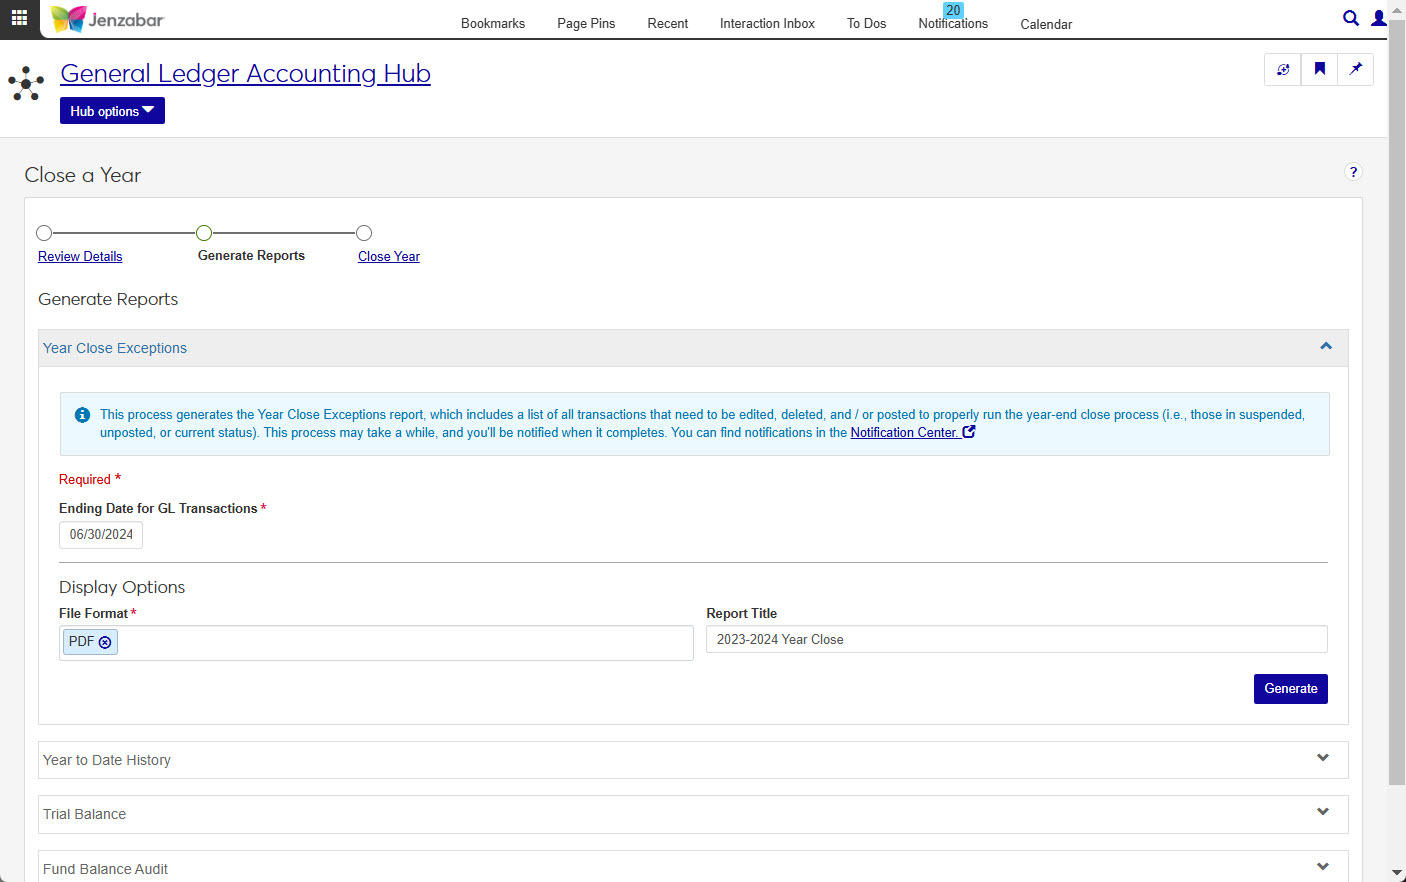
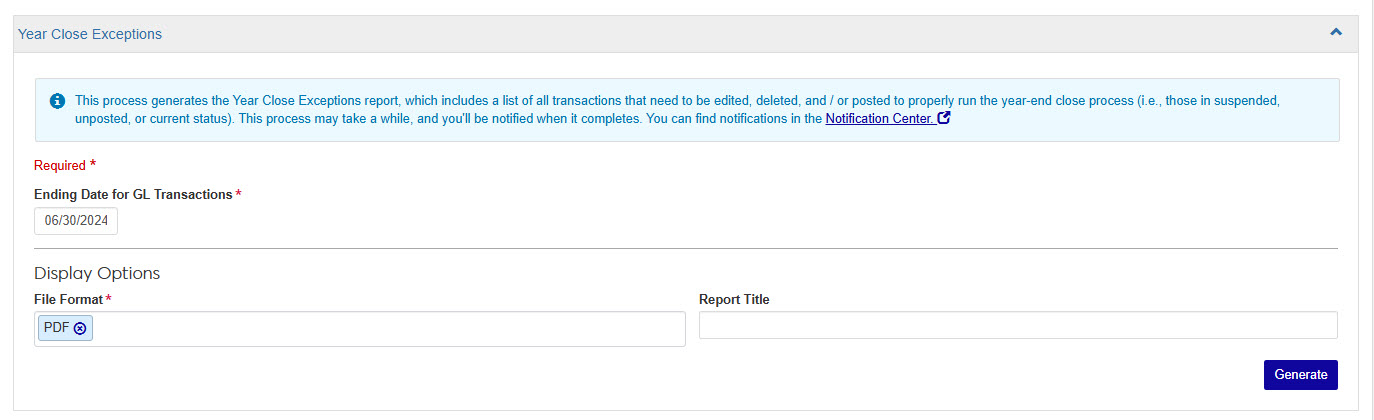
This process generates the Year Close Exceptions report, which includes a list of all transactions that need to be edited, deleted, and / or posted to properly run the year-end close process (i.e., those in suspended, unposted, or current status). For more information see the Year Close Exceptions Report help.
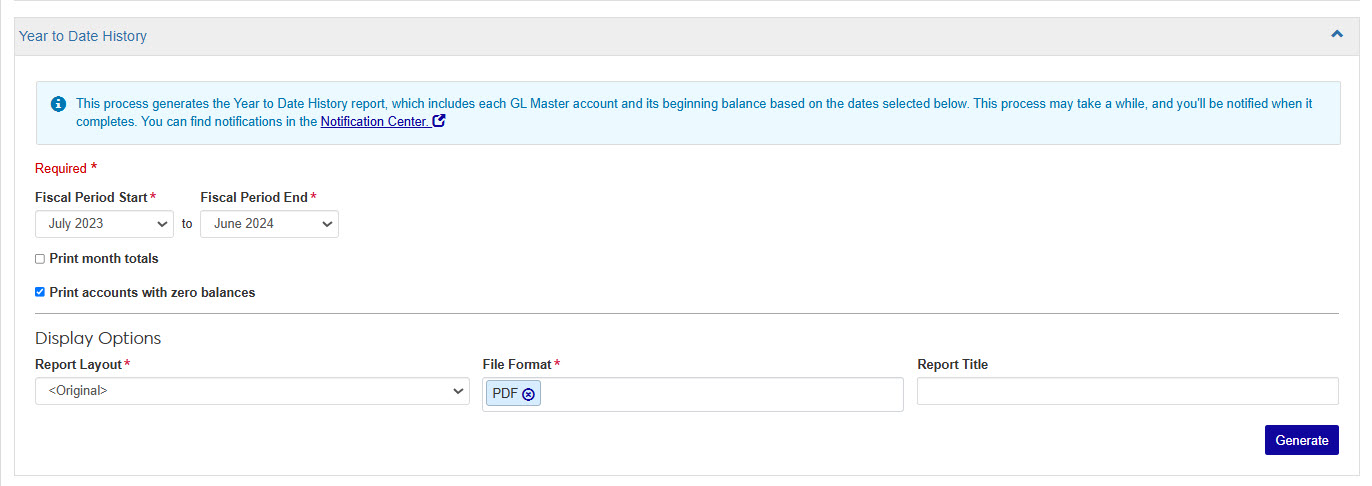
This process generates the Year to Date History report, which includes each GL Master account and its beginning balance based on the dates selected below. For more information see the Year to Date History Report help.
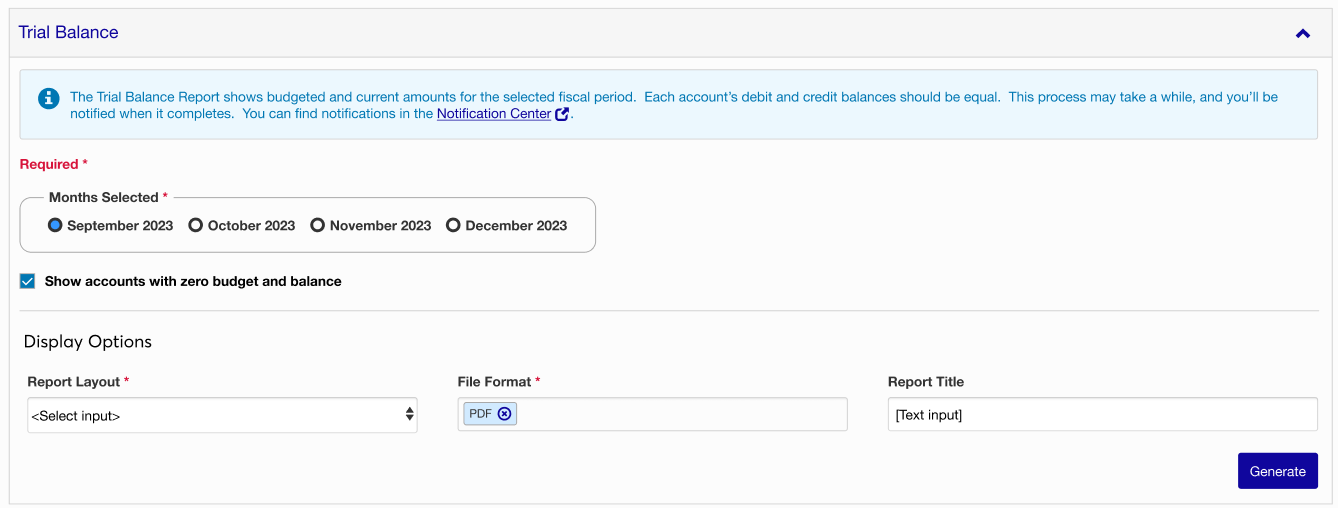
The Trial Balance Report shows budgeted and current amounts for the selected fiscal period. Each account's debit and credit balances should be equal. This process may take a while, and you'll be notified when it completes. For more information see the Trial Balance Report help.
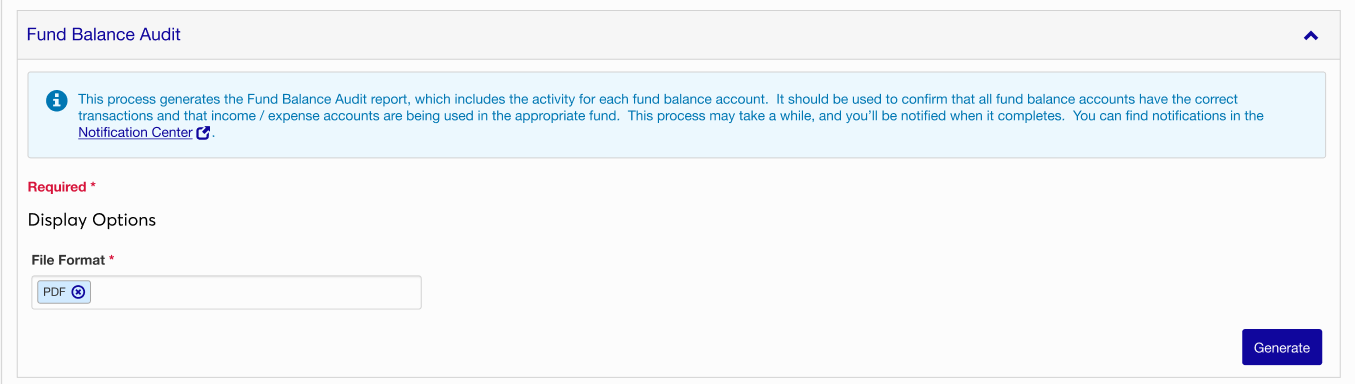
This process generates the Fund Balance Audit report, which includes the activity for each fund balance account. It should be used to confirm that all fund balance accounts have correct transactions and that income / expense accounts are being used in the appropriate fund. For more information see the Fund Balance Audit Report help.
Warning
No other business office processes should be running when the Close a Year process starts.
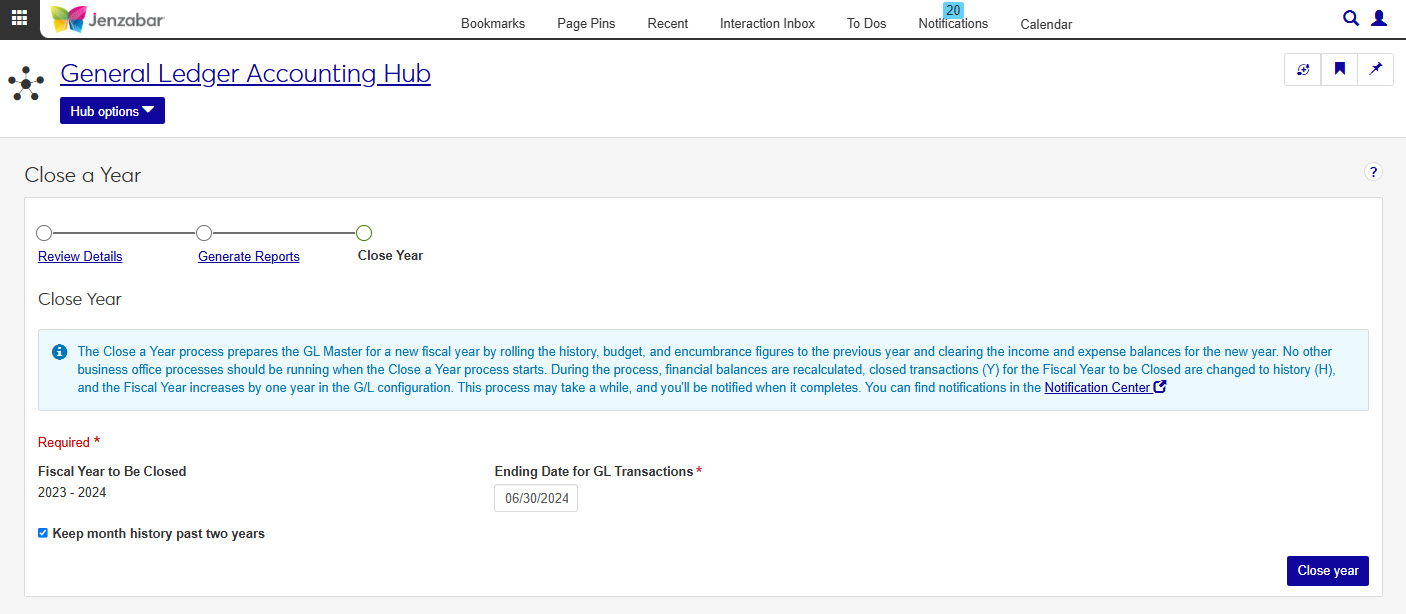
The Close a Year process prepares the GL Master for a new fiscal year by rolling the history, budget, and encumbrance figures to the previous year and clearing the income and expense balances for the new year.
During the process, financial balances are recalculated, closed transactions (Y) for the Fiscal Year to be Closed are changed to history (H), and the Fiscal Year increases by one year in the GL Configuration.
Warning
No other business office processes should be running when the Close a Year process starts.
From the General Ledger Accounting hub, select Close a Year.
From Step 1 Review Details in the wizard, make sure the Months Open block reads 0 and the Months Closed reads 12.
Click Step 2 Generate Reports from the progress bar at the top of the page.
From Step 2 Generate Reports in the wizard, you'll generate four reports:
Generate the Year Close Exceptions report.
Enter an ending date for the GL transactions that will be included in the report.
Choose your Display Options: File Format and Report Title.
Click Generate. This process may take a while, and you'll be notified when it completes. You can find notifications in the Notification Center.
Generate the Year to Date History report.
Select a start and end month for the fiscal period.
If you want to include monthly totals on the report select the Print month totals checkbox.
By default the Print accounts with zero balance checkbox is selected, if you don't want accounts with a zero beginning balance or no transactions included on the report, deselect the checkbox.
Choose your Display Options: Report Layout, File Format, and Report Title.
Click Generate. This process may take a while, and you'll be notified when it completes. You can find notifications in the Notification Center.
Generate the Trail Balance report.
Select a fiscal period for the report.
If you don't want accounts with a zero budget and balance to appear on the report, deselect the Show Accounts with zero budget and balance checkbox.
Choose your Display Options: Report Layout, File Format, and Report Title.
Click Generate. This process may take a while, and you'll be notified when it completes. You can find notifications in the Notification Center.
Generate the Fund Balance Audit report.
Choose the File Format options you want for this report.
Click Generate. This process may take a while, and you'll be notified when it completes. You can find notifications in the Notification Center.
Click Step 3 Close Year from the progress bar at the top of the page.
Choose an ending date for the GL transactions to include in the year close.
The Keep month history past two years checkbox is selected by default, but if you don't want to keep history on a monthly basis for two years prior to the Fiscal Year to be Closed date.
Click Close year.
Confirm that you want to close the selected year, click Yes, close year.
This process may take a while, and you'll be notified when it completes. You can find notifications in the Notification Center.
There are a couple reasons you may not be able to complete the process. The most common reason is permissions and the roles you've been assigned within the J1 system.
Another reason may have to do with the Months Open count that must be zero to continue.
Currently, J1 only allows for the current and future years.