Course Component Definitions
Important
Information and features vary according to the roles to which you belong and the permissions associated with those roles. For more information, contact your module manager or your campus support team.
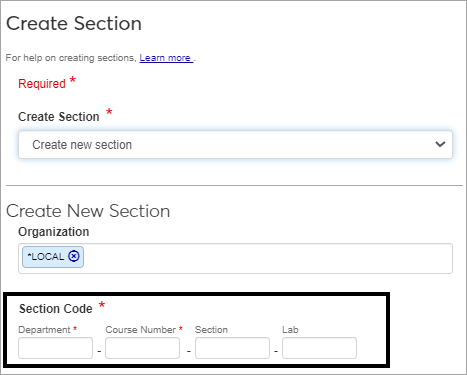
Use this page to create and manage the components of the Course IDs that are associated with every course at your institution. The Course ID is a unique identifier for each course and section, for example, ENGL-101-30-D.
The Course ID can consist of up to six components, each containing up to five characters, limited to letters and numbers. Special characters such as dashes and hyphens used as separator characters between components can be applied with an Edit Mask that displays on reports and transcripts. Edit Masks are managed in the Registration Configuration window in Desktop.
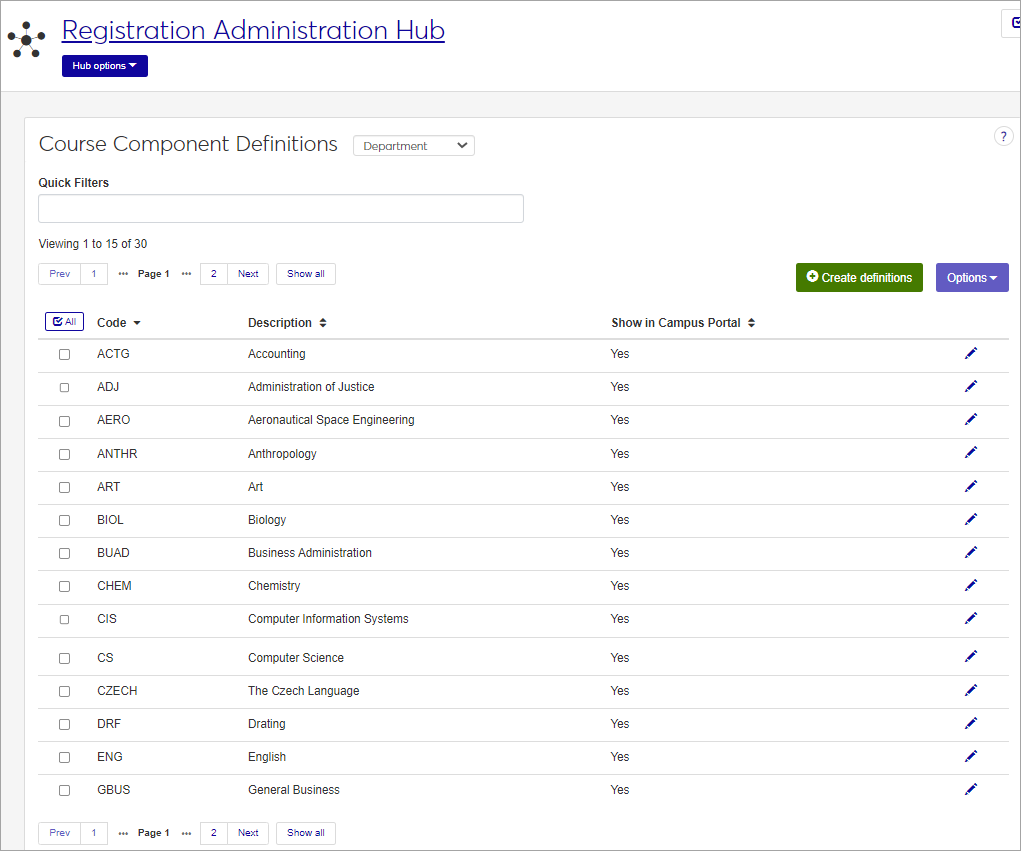
When you first access this page, the list displays the Department components that have been defined. To work with other components, such as the Course Number, use the drop-down menu at the top, beside the page title, to switch to another component type.
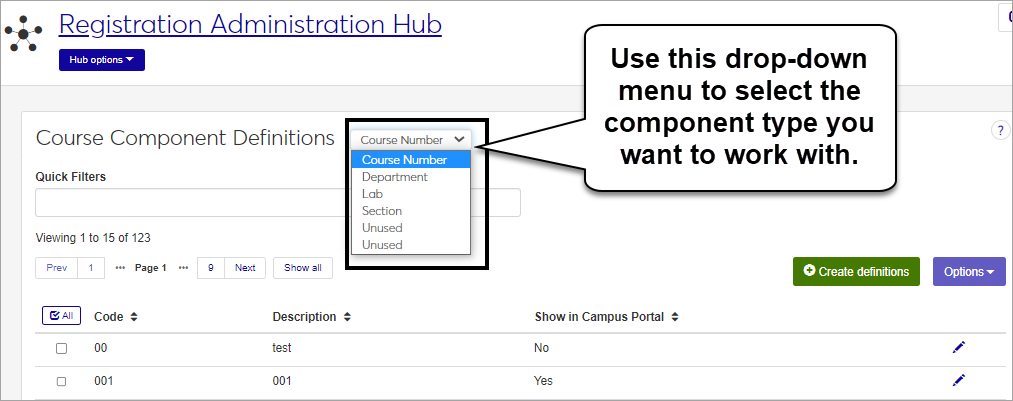
The six types of components are managed in Desktop, on the Registration Configuration window. Your school may or may not use all six available component types.
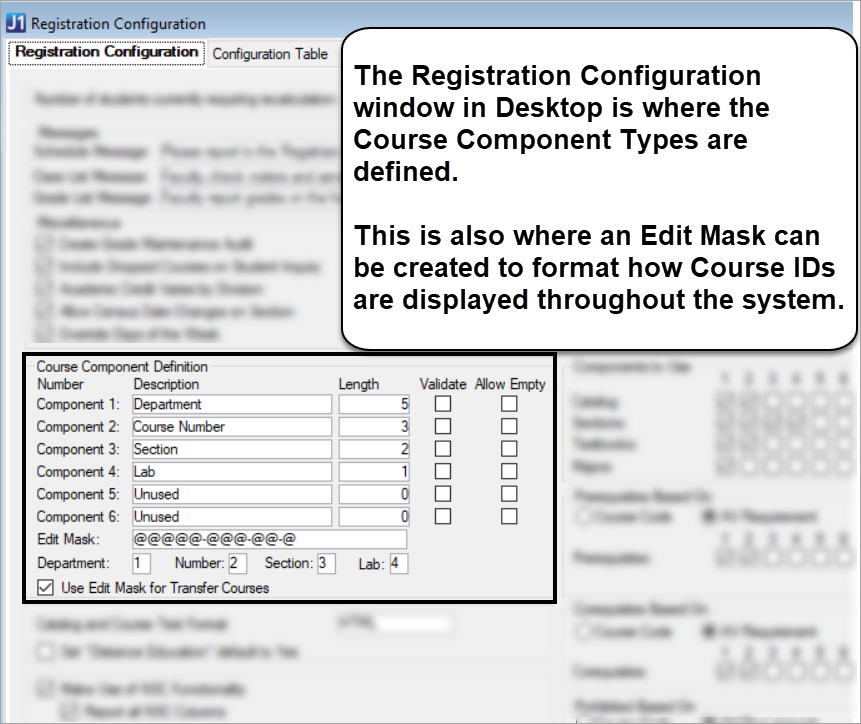
You can also manage these definitions in the Desktop, on the Course Components window. The Course Component types and Edit Mask can be managed on the Registration Configuration window.
Course Component definitions are stored in the crs_comp_# tables. There are six tables, which correspond with the 6 allowable components of the Course ID. Your school may or may not use all six components.
Notice
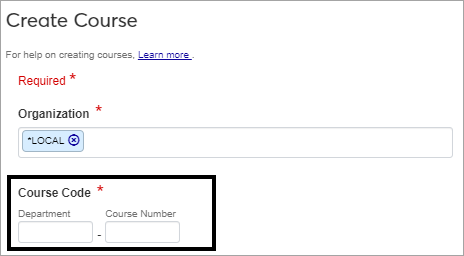
The crs_comp_1 table corresponds to the first component. In this example, it is Department. The crs_comp_2 table corresponds to the second, in this case, Course Number.
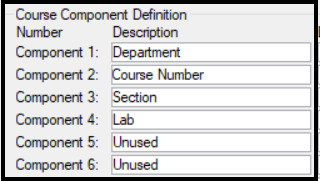
Course components are used in Course IDs throughout the Jenzabar One system. The components defined on this page will be the options available to select when creating a new course or section.
The permission to manage Course Components in Jenzabar One is in the Registration Module Manager and Registrar default roles, listed under Manage Definitions.
Field | Note |
|---|---|
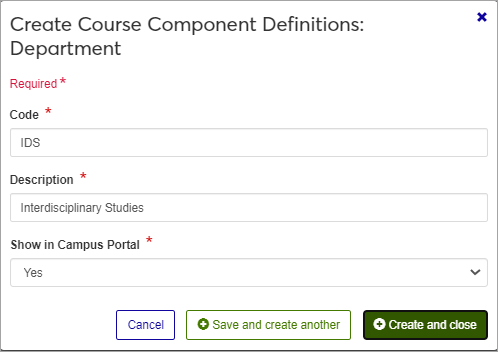
Code | Up to 5 characters. Required. Not editable for existing definitions. Must be unique. |
Description | Up to 30 characters. Required. |
Show in Campus Portal | Required. Yes or No drop-down menu selection. |
From the Registration Administration hub, click Hub options.
Click Manage Definitions, and select Course Component Definitions.
Enter characters, words, or phrases in the Quick Filters to limit the list of definitions.
Click a heading to sort the list by that column.
Tip
You can also use the page search in the upper right corner of J1 Web. Just start typing the name of the definition page you want, and select it in the results.
Click the Create definitions button.
Enter a unique Code, required, up to ten characters.
Enter a Description, required, up to 255 characters.
Choose an option in the Show in Campus Portal field. If yes is selected, this course will be available in the Course Search tool of the Course Schedules feature.
Click either Save and create another or Create and close.
Click the Edit icon
 on the row of a definition. The edit pop-up opens.
The Code cannot be edited once it has been created. The Description and Show in Campus Portal status may be edited. Edit the available fields as needed. If you set the status as Inactive, this code will still be visible in the drop-down menus where it can be selected, but it will be marked as (Inactive).
Click the Update button.
Select the checkboxes next to the rows you want to export.
From the Options drop-down, select Download to Excel. The Download to Excel pop-up opens.
Select options for the Excel format and data columns.
Click Download. Your .xlsx or .zip file is saved in the file location that you have set in your browser settings.
