Setting Up J1 Web Grade Entry
Important
Information and features vary according to the roles to which you belong and the permissions associated with those roles. For more information, contact your module manager or your campus support team.
J1 Web Grade Entry is designed to replace the grade entry feature in the Campus Portal. J1 Web Grade Entry offers a smoother, more integrated workflow. Your school controls when to switch to J1 Web's Grade Entry.
Caution
When your school switches to using J1 Web Grade Entry, the feature is no longer available in the Campus Portal. A message on the Campus Portal appears where the feature used to be, and it directs the user to J1 Web.
To use J1 Web Grade Entry, your school needs to do some setup in both Desktop and J1 Web. A sample setup might include these tasks:
Task | Location |
|---|---|
Define grading period types and grading periods Create types if you need more than the Midterm and Final types. | Grading Period Type page Grading Period Definition page |
Create grading periods for all courses in all terms Set up default Midterm and Final grading periods for all courses in all year/terms and year/term/subterms. | Registration Settings page. Click the Create grading periods button. A message lets you know whether grading periods were created. |
Fine-tune grading periods per term Assign the Grade Entry and Grade Blackout dates per term, plus Last Withdrawal Passing Date and Last Campus Portal Withdrawal Date. | Year / Term / Subterm Definitions page |
Fine-tune grading periods per course section Edit the dates for a particular course section in the selected year/term or subterm only if they need to be different from the other course sections in the year/term or subterm. Add grading periods if
| Manage Section Details page | Grading Controls tab | Grading Periods group |
Set the Settings Set the parameters for repeats, withdrawals, credit-hour limits, transcripts, and related settings. | Registration Limits page and Repeat, Transcript, and GPA Settings page |
If you need more grading period types than the default Midterm and Final types, you can create them in J1 Web on the Grading Period Type Definitions page.
In addition to the Short Name and Description, you can indicate the number of Occurrences per Course for each type. You can also make types active or inactive.
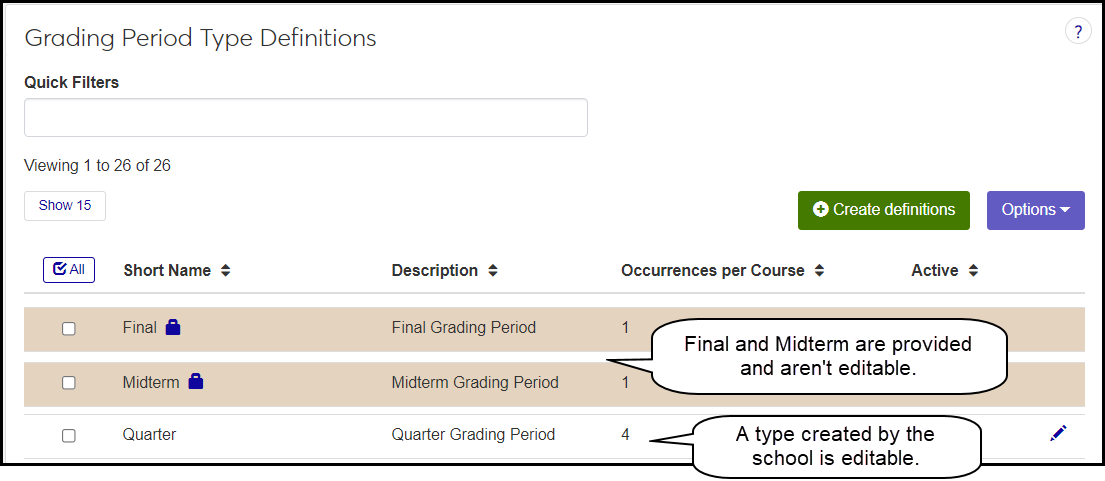
The provided types, Midterm and Final, are not editable.
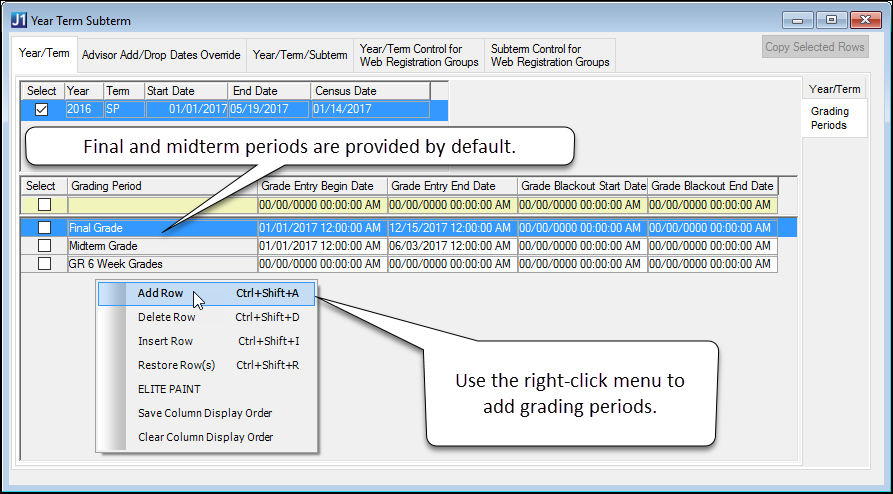
Once you have types, you can define grading periods in J1 Web on the Grading Period Definitions page. Jenzabar provides two: Final Grade and Midterm Grade. You can't delete them, but you can change the display order and set them as active or inactive. You can also add more grading periods. These can be variations of the midterm and final (with alternative columns available or required), or they can be other grading periods such as one for the first four weeks.
The Details section is where you select the columns to include on the J1 Web Grade Entry page, and determine which of those columns are required.

With grading periods defined, you can now create individual grading periods; that is, apply the grading period definitions to year/terms and to courses and course sections. There are several ways to create them in J1 Desktop and in J1 Web.
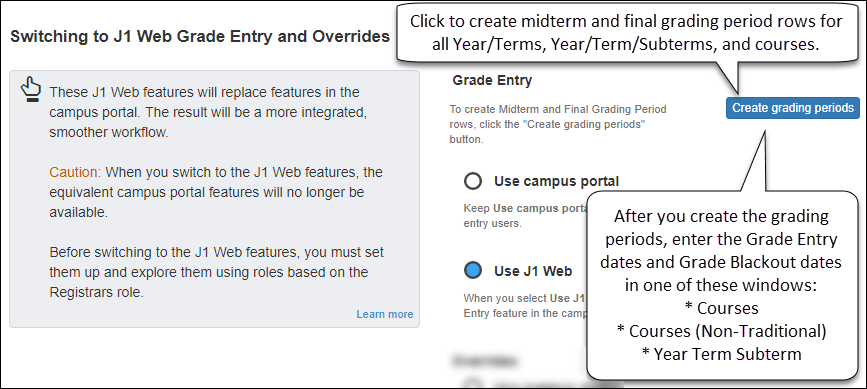
As an alternative, when you're initially setting up J1 Web Registration, you can create grading periods in J1 Web. On the Registration Settings page is a section labeled Switching to J1 Web Grade Entry, and Overrides. The Create grading periods button creates the default Midterm and Final grading period rows for all year/terms, for all year/term/subterms, and for all course sections in them. A message lets you know whether the grading periods were created.
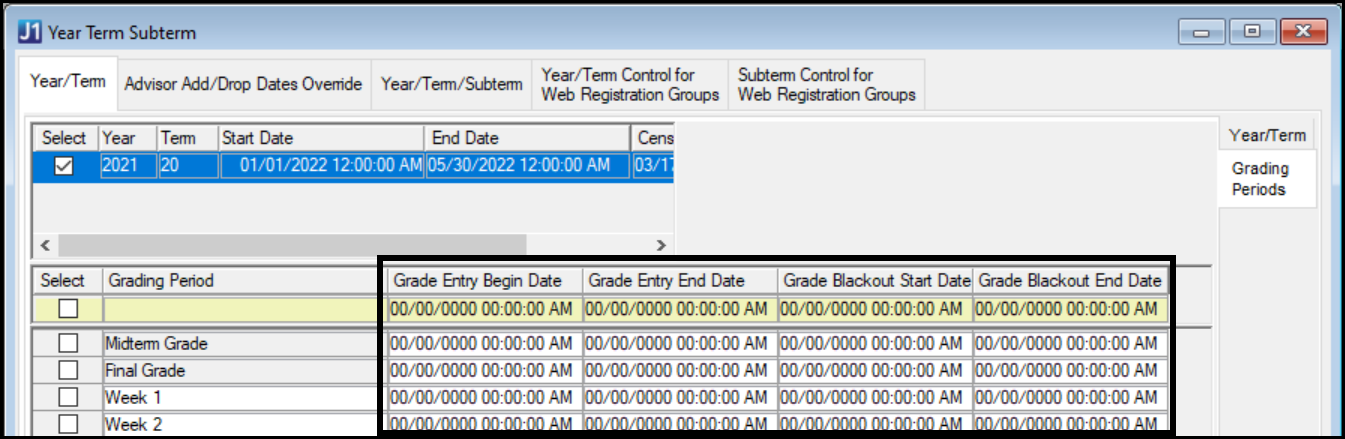
In J1 Desktop, you can assign Grade Entry dates and Grade Blackout dates to the grading periods in each year/term and year/term subterm. The dates you set here default to the course sections in that term or subterm, but they can be edited for each course section.
Tip
Grade Blackout dates represent a short period of time when students can't view grades because grades are being entered or student records are being recalculated.
Note
Grade Entry dates and Grade Blackout dates are not required. If you don't enter dates for Grade Entry, then the grading period lasts the whole term. If you don't enter dates for Grade Blackout, then there are no blackout days.
In J1 Web, you can fine-tune a section's grading periods in these ways:
Edit the dates for Grade Entry if they need to be different from the term or subterm's start and end dates. Dates in the course section override dates in the term or subterm.
Enter dates for Grade Blackout if you need days when students can't see grades. (If you don't enter dates, there are no blackout days.)
Add grading periods if you need different options (such as comments or numeric grades) for this section instead of the options available to all sections in the term or subterm.
Use the section's Manage Section Details page, Grading Controls tab to edit dates and add grading periods as necessary.
Tip
If you see the need for changes to existing registrations that would be too hard to manage manually, enlist the help of your campus support team to do the work using scripts.
Make sure you've attended the settings that affect grades and grade entry. They're located on the Registration Limits page and Repeat, Transcript, and GPA Settings page.
Create and/or edit grading period type definitions. See the Grading Period Type Definitions topic for instructions.
Create and/or edit grading period definitions. See the Grading Period Definitions topic for instructions.
Create grading periods in year/terms::
To create grading periods in year/terms using Desktop:
Open the Year Term Subterm window to the Year/Term tab.
Select a Year and Term.
Click the Grading Periods subtab.
Use the right-click menu to add rows as needed.
Click the Save button on the main toolbar.
If you have subterms, follow the same procedure on the Year/Term/Subterm tab.
To create grading periods in year/terms using J1 Web:
Open the Registration Administration hub.
From the Hub options, click Manage registration settings.
In the Switching to J1 Web Grade Entry and Overrides section, click the Create grading periods button. This creates Midterm and Final grading periods for year/terms that don't have them yet.
Fine-tune the grading periods per term or subterm.
In J1 Desktop, open the Year Term Subterm window, Year/Term tab (or Year/Term/Subterm tab), Grading Periods subtab.
Enter begin and end dates for Grade Entry and Grade Blackout.
Click the Save button on the main toolbar.
Fine-tune the grading periods per course.
In J1 Web, open the Registration Administration hub.
From the Hub options, click Manage sections. The Manage Sections page opens to the Section Demographics view.
On the view drop-down, select Grading Controls.
Use the filters to find the sections you want to edit.
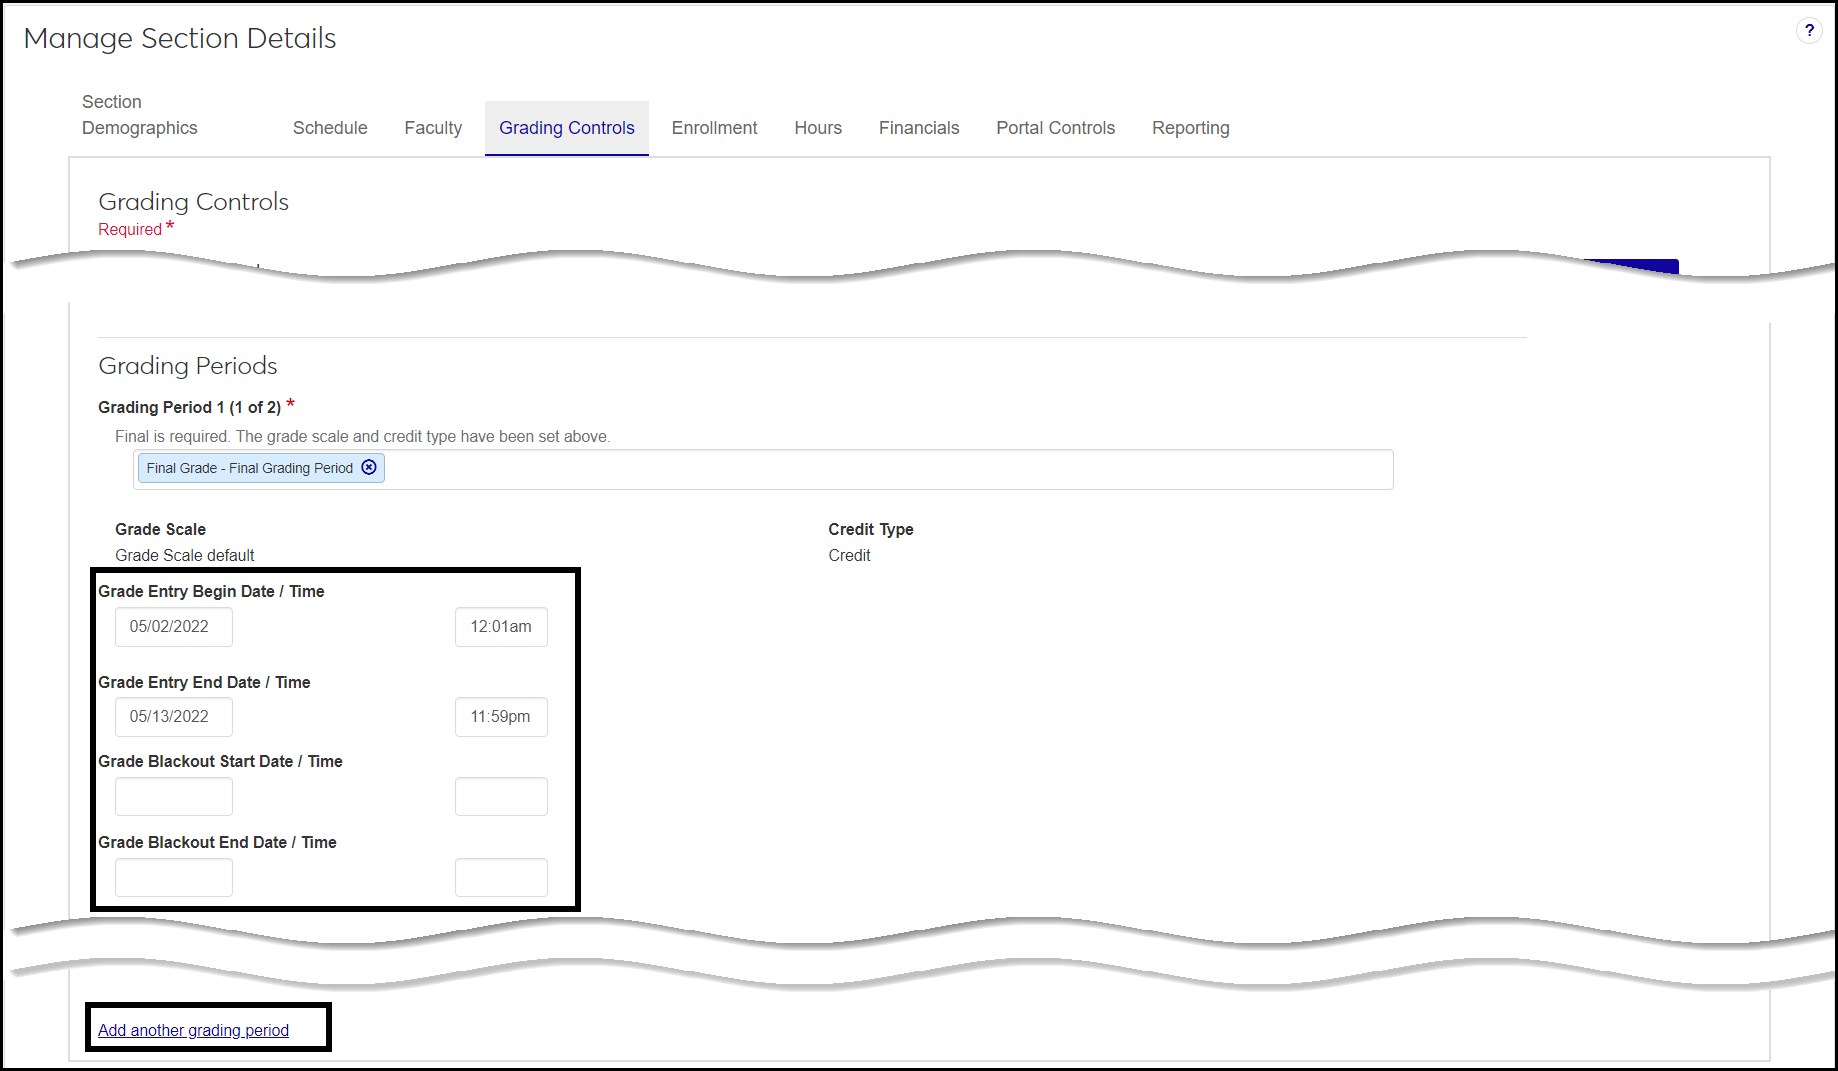
On a section's row, click the the Actions button, and select Manage section details. The Manage Section Details page for that section opens to the Grading Controls tab.
Click Edit details.
Under Grading Periods, edit dates and times as needed for Grade Entry and Grade Blackout.
If needed, click Add another grading period.
Click in the Grading Period field, and select a grading period.
Edit the Grade Scale and Credit Type as needed.
Add dates and times as needed for Grade Entry and Grade Blackout.
Click Done editing.
