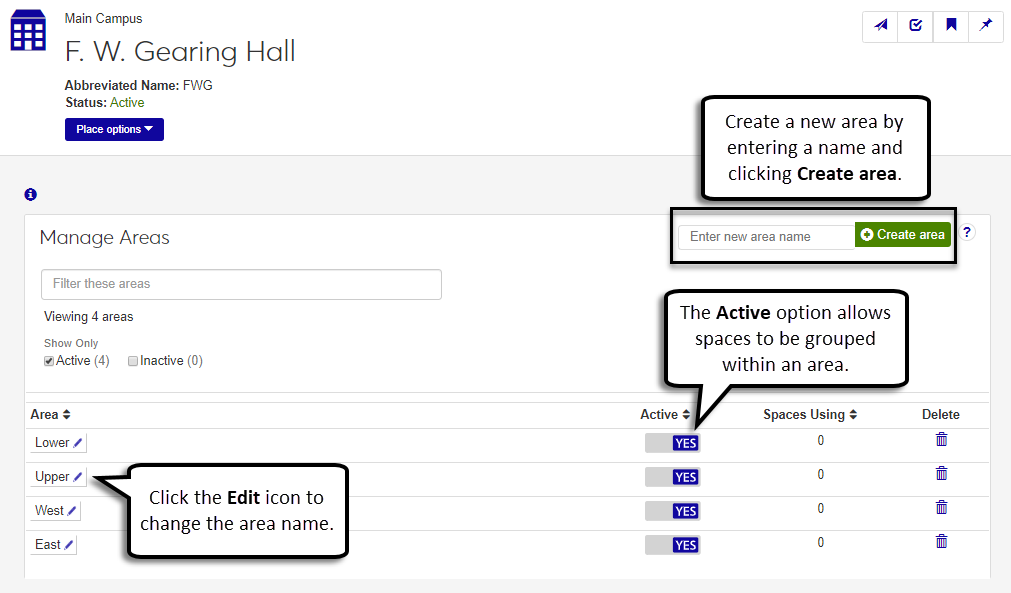
Manage Areas
Important
Information and features vary according to the roles to which you belong and the permissions associated with those roles. For more information, contact your module manager or your campus support team.
Use this page to add, update, active/inactivate, and remove areas. Areas consist of a collection of spaces within a place and can be used to group spaces. For example, your campus library may have an office area with general administrative offices. Groupings can be useful when planning multi-part events that may require several spaces by allowing planners to quickly see potentially needed facilities.
Tip
Inactivating an area makes it unavailable for grouping spaces. You may want to inactivate an area if a lengthy remodeling project is taking place.
In the Filter these areas field, start typing the name of the area you want to view. The list automatically sorts the areas until it locates the match.
You can sort areas to help locate a specific one, identify how many are active or inactive, and see which ones have the most spaces.
To sort by active/inactive:
To view only those areas that are active and available for use, select the Active checkbox. You can further sort the active areas by clicking on a column heading such as Name.
To view only those areas that are not active and unavailable for use, select the Inactive checkbox. You can further sort the inactive areas by clicking on a column heading such as Name.
To sort by name or the number of spaces within the area:
To sort by name, click on the Name column heading. This displays the areas in alphabetical order.
Tip
To reverse the order, click the heading again.
To sort by the spaces utilizing the area, click on the Spaces Using column heading. This displays the areas in use in ascending or descending order.
Tip
To reverse the order, click the heading again.
In the Enter new area name field, enter the name of the area being added.
Tip
Make this a commonly understood name to ensure others can easily identify it.
Tip
You do not need to use the word “area” in the area name. It will be added automatically as needed.
Click Create new area. The new area is added.
New areas are automatically inactive, which means they are unavailable for grouping spaces. To make the area active, click or slide the Active slider to Yes.
Tip
Inactivating an area makes it unavailable for grouping spaces.
Find the area to be activated or inactivated.
To make the area active, click or slide the Active slider to Yes. To make the area inactive, click or slide the Active slider to No.
Click the Edit icon next to the area name to be updated. The update options appear.
Update the area name.
Click Save.
Click the number link in the area's Spaces Using column. The View Spaces page appears showing a full list of all the places within that area.
Click the Delete icon next to the area to be deleted.
Click Delete.