Tribal Definitions
Important
Information and features vary according to the roles to which you belong and the permissions associated with those roles. For more information, contact your module manager or your campus support team.
Use the Tribal definitions page to manage tribal information that can be associated with individuals in your system. Several definitions related to tribal organization and lineage can be viewed and updated from this page.
Tribal information is used throughout the system and is visible with other biographical information.
J1 Web
Person Information Details page > Tribal tab
Desktop (in the Biograph tab > Tribal subtab of the following windows)
Name Entity
Review Internet Submissions
Student Information
Maintain Candidacy
HR Employee Master via Payroll
HR Employee Master via Personnel
Additionally, tribal information associated with an individual's record can be used for state and other reporting.
To manage tribal definitions, you must belong to a role with Can manage tribal definitions enabled. Jenzabar provides this permission with the Core, Campus-wide Definitions role, but your school may have created a customized version of this role.
These definitions describe the different tribes to which an individual may belong and the country that officially recognizes the tribe.
Desktop Location
Affiliation definitions can also be managed in the Desktop Tribal Affiliation Definition window. Changes made in J1 Web are saved in Desktop, and vice versa.
Database Location
Definitions are stored in the TRIBAL_AFFILIATION_DEF table.
Fields
Code allows up to 10 characters. Required. The Code must be unique. If your school uses tribal affiliation codes that might conflict with the federal codes, you can add a prefix to differentiate them. For example, if the federal code is 003, your school's code may be OK003.
Description allows up to 120 characters. Required. Both Code and Description appear in drop-downs, but only the Description is visible when an option is selected and saved.
Federally Recognized Tribe can be Yes or No; default is No. Required.
You can select a Recognizing Country to identify the country that officially recognizes the selected tribe (e.g., a tribe that is recognized by Canada). Optional. This field is typically filled in when Federally Recognized Tribe is set to Yes.
Active can be Yes or No; default is Yes. Definitions can still be selected from drop-downs if they are marked inactive.
These definitions are used to describe the different tribal agencies.
Desktop Location
Agency definitions can also be managed in the Desktop Tribal Agency Definition window. Changes made in J1 Web are saved in Desktop, and vice versa.
Database Location
Definitions are stored in the TRIBAL_AGENCY_DEF table.
Fields
All fields are required.
Code allows up to 10 characters. The Code must be unique.
Description allows up to 60 characters. Both Code and Description are visible in drop-downs, but only the Description is visible when an option is selected and saved.
Active can be Yes or No; default is Yes. Definitions can still be selected from drop-downs if they are marked inactive.
These definitions differentiate the chapters that can be associated with a tribal agency.
Desktop Location
Chapter definitions can also be managed in the Desktop Tribal Chapter Definition window. Changes made in J1 Web are saved in Desktop, and vice versa.
Database Location
Definitions are stored in the TRIBAL_CHAPTER_DEF table.
Fields
All fields are required.
Code allows up to 10 characters. The Code must be unique.
Description allows up to 60 characters. Both Code and Description are visible in drop-downs, but only the Description is visible when an option is selected and saved.
Active can be Yes or No; default is Yes. Definitions can still be selected from drop-downs if they are marked inactive.
These definitions describe the generational lineage associated with an individual (e.g., second generation Cherokee).
Desktop Location
Generation definitions can also be managed in the Desktop Tribal Generation Definition window. Changes made in J1 Web are saved in Desktop, and vice versa.
Database Location
Definitions are stored in the TRIBAL_GENERATION_DEF table.
Fields
All fields are required.
Code allows up to 10 characters. The Code must be unique.
Description allows up to 60 characters. Both Code and Description are visible in drop-downs, but only the Description is visible when an option is selected and saved.
Active can be Yes or No; default is Yes. Definitions can still be selected from drop-downs if they are marked inactive.
These definitions describe which parent is associated with a specific tribal lineage (e.g., father is Cherokee).
Desktop Location
Parental Line definitions can also be managed in the Desktop Tribal Parental Line Definition window. Changes made in J1 Web are saved in Desktop, and vice versa.
Database Location
Definitions are stored in the TRIBAL_PARENTAL_LINE_DEF table.
Fields
All fields are required.
Code allows up to 10 characters. The Code must be unique.
Description allows up to 60 characters. Both Code and Description are visible in drop-downs, but only the Description is visible when an option is selected and saved.
Active can be Yes or No; default is Yes. Definitions can still be selected from drop-downs if they are marked inactive.
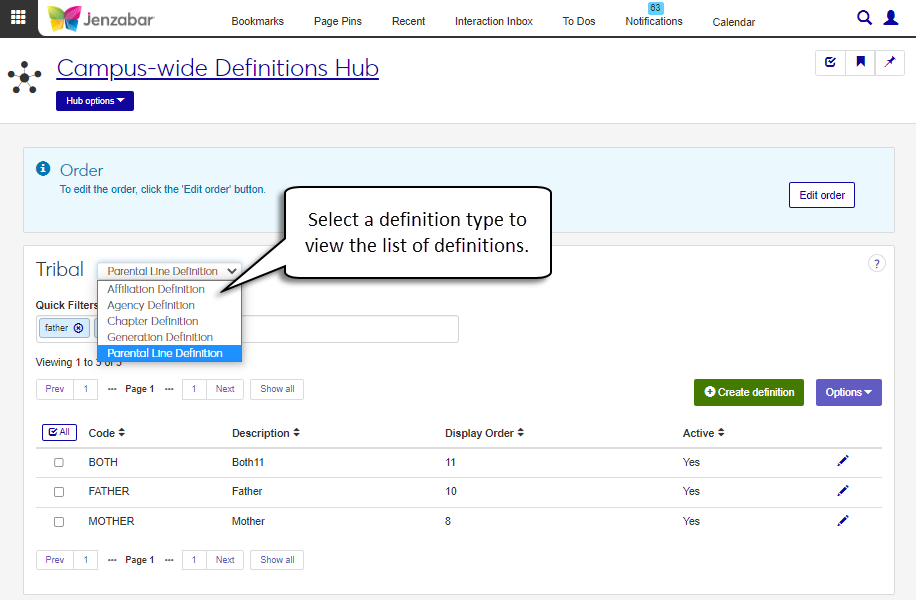
From the Campus-wide Definitions Hub options, select Tribal.
In the Tribal drop-down, select a definition type from the following options:
Affiliation Definition
Agency Definition
Chapter Definition
Generation Definition
Parental Line Definition
To filter the definitions, enter a phrase in the Quick Filters field. To remove a filter, click its Remove icon
 .
.To sort the definitions, click the arrows at the head of the column you want to sort on.
The Edit Order options let you set the order of definitions in drop-down menus and how they are prioritized when used.
In the Edit Order window, change the order using either the Sort By and Order drop-down menus or the drag and drop option.
Sort By and Order:
From the Sort By drop-down, select the column you want to sort by.
From the Order drop-down menu, select Ascending or Descending.
Drag and drop:
Hold your cursor over the arrow icon
 on the left side of the row until the cursor changes to a hand icon
  .
.Click and hold while you drag the definition to the new location.
Release the mouse button.
Click Update.
After you click Update, your changes are saved in the following ways:
The definitions are listed in the saved order whenever they appear in drop-down menus (where a user selects from the list of definitions).
If the definitions are used in calculations or rules where priority matters, the definitions are now in your saved order of priority.
The definitions page is now sorted according to your changes.
From the Campus-wide Definitions Hub options, select Tribal.
Select Affiliation Definition from the Tribal drop-down.
Click Create definition.
In the Create Tribal Affiliation pop-up, enter a unique Code up to 10 characters. Required.
Enter a Description up to 120 characters. Required.
If the tribal affiliation is federally recognized, select Yes from the Federally Recognized Tribe drop-down.
Select a Recognizing Country. Optional. This field is typically used when Federally Recognized Tribe is set to Yes.
Set Active to No if you want the new definition to remain inactive. Inactive definitions can still be selected from drop-downs throughout the system.
Click Save and create another or Create and close.
From the Campus-wide Definitions Hub options, select Tribal.
Select Agency Definition from the Tribal drop-down.
Click Create definition.
In the Create Tribal Agency pop-up, enter a unique Code up to 10 characters.
Enter a Description up to 60 characters.
Set Active to No if you want the new definition to remain inactive. Inactive definitions can still be selected from drop-downs throughout the system.
Click Save and create another or Create and close.
From the Campus-wide Definitions Hub options, select Tribal.
Select Chapter Definition from the Tribal drop-down.
Click Create definition.
In the Create Tribal Chapter pop-up, enter a unique Code up to 10 characters.
Enter a Description up to 60 characters.
Set Active to No if you want the new definition to remain inactive. Inactive definitions can still be selected from drop-downs throughout the system.
Click Save and create another or Create and close.
From the Campus-wide Definitions Hub options, select Tribal.
Select Generation Definition from the Tribal drop-down.
Click Create definition.
In the Create Tribal Generation pop-up, enter a unique Code up to 10 characters.
Enter a Description up to 60 characters.
Set Active to No if you want the new definition to remain inactive. Inactive definitions can still be selected from drop-downs throughout the system.
Click Save and create another or Create and close.
From the Campus-wide Definitions Hub options, select Tribal.
Select Parental Line Definition from the Tribal drop-down.
Click Create definition.
In the Create Tribal Parental Line pop-up, enter a unique Code up to 10 characters.
Enter a Description up to 60 characters.
Set Active to No if you want the new definition to remain inactive. Inactive definitions can still be selected from drop-downs throughout the system.
Click Save and create another or Create and close.
From the Campus-wide Definitions Hub options, select Tribal.
Select the appropriate definition type from the Tribal drop-down options.
Affiliation Definition
Agency Definition
Chapter Definition
Generation Definition
Parental Line Definition
Click the Edit icon for the definition you want to edit.
Make updates to the editable fields. Some or all of these fields may be updated for the selected definition. The Code cannot be updated.
Description
Active
Federally Recognized Tribe
Recognizing Country
Click Update.
From the Campus-wide Definitions Hub options, select Tribal.
Select the appropriate definition type from the Tribal drop-down.
Select the checkbox next to each definition you want to delete.
Select Delete from the Options drop-down. The Delete Definitions? pop-up opens.
The Delete Definitions? pop-up lists the selected definitions in two categories:
Ready to Delete (for definitions that can be deleted)
Unable to Delete (for definitions that can't be deleted, either because they're in use or are protected by the system)
If you decide not to delete one or more of the definitions listed under Ready to Delete, click the Remove icon to remove them from the list.
When you're sure you want to delete all the rows listed under Ready to Delete, click Yes, delete.
Select the checkboxes next to the rows you want to export.
From the Options drop-down, select Download to Excel. The Download to Excel pop-up opens.
Select options for the Excel format and data columns.
Click Download. Your .xlsx or .zip file is saved in the file location that you have set in your browser settings.
The Display Order can be managed by clicking the Edit order button at the top of each definition page. For more details about display order, see Manage Drop-Down Display and Priority of Definition.