Scheduled Imports
Important
Information and features vary according to the roles to which you belong and the permissions associated with those roles. For more information, contact your module manager or your campus support team.

Scheduled imports streamlines data importing by automating the process and reducing data import errors. Criteria for scheduled imports:
Specify the file location.
Choose where the system should look for your file. Ensure the system has the necessary permissions to access this location.
Associate the file with a data mapping template.
Attach the file to a data mapping template that you create. This template tells the system exactly where to store each piece of imported data.
Control import behavior.
Each data mapping template includes a setting for automatic data import.
If enabled, the system imports the data immediately, with any duplicate entries being sent to the processing queue for review.
If disabled, all imported data is held in the processing queue, allowing you to review and manually approve the import.
Set your schedule.
Define how often you want to import data—whether it's daily, aligned with academic terms, or according to your custom schedule.
Data Review
During the import process, the system checks for
To access this page and work with the different features, you must belong to a Data Management role with the Can manage scheduled imports permission enabled.
To associate data mapping templates with the file being imported, you must belong to a Data Management role with the Can manage data mapping templates permission enabled and the appropriate module access codes enabled. Module access codes are associated with data mapping templates and determine what templates you can view and data you can process.
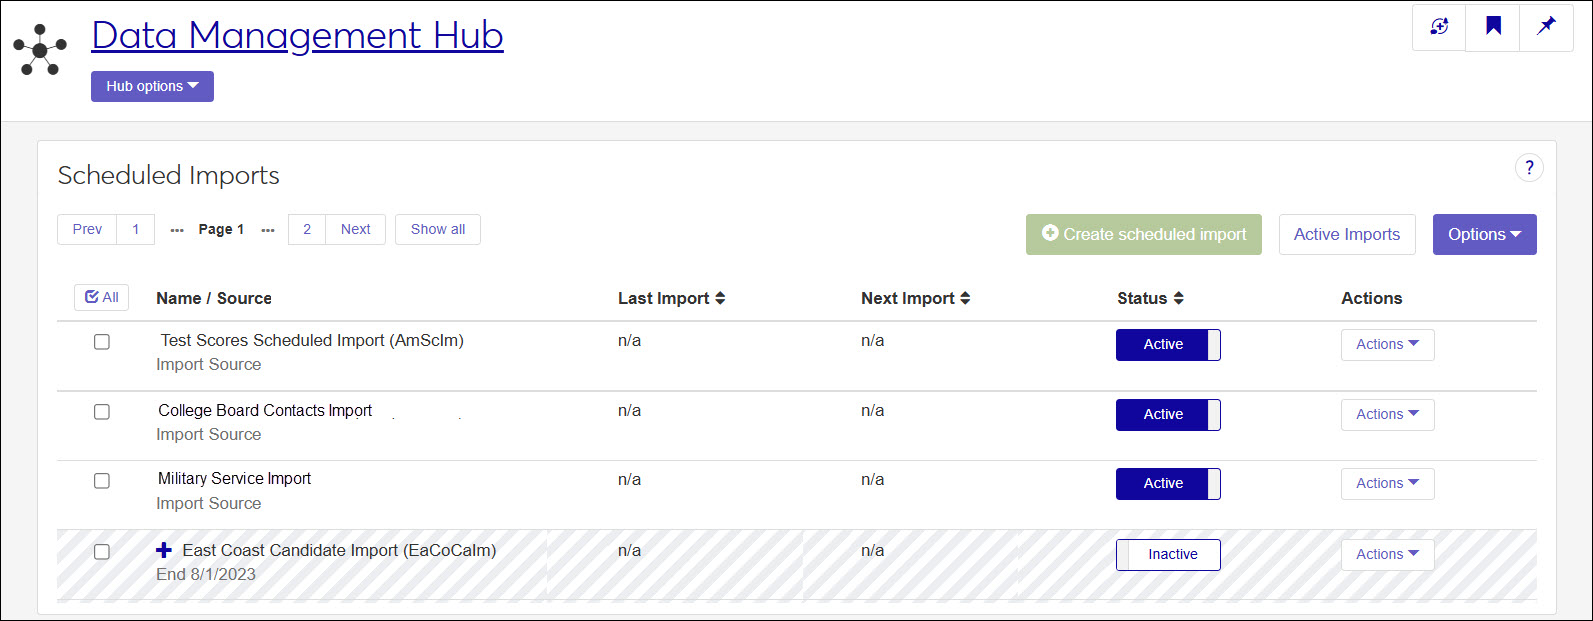
You can find scheduled imports in several ways:
Using the filter options. If filter options aren’t appearing, click the No filters applied link.
Using the Name filter to search by a keyword in the name.
Using a combination of filters (e.g., alert, status, source, template, etc.).
Using the column headings to sort by ascending or descending order.
Access the Scheduled Imports page.
Click the Create scheduled import button. The Create Schedule Imports window appears.
Enter a Name.
Press the Tab key to allow the system to generate a unique code or enter one manually.
In the Import From field, enter the directory location where the file you'll be regularly importing will be located.
Important
In order to import the file, your J1 Web server must have permission to access the directory location.
From the Data Mapping Template drop-down, select
From the Source drop-down, select
From the Schedule drop-down, select
Click the Create scheduled import button.
Access the Scheduled Imports page.
Find the scheduled import you want to update.
From the Actions drop-down, select Edit. The Edit Scheduled Import window appears.
Make the needed updates. Only the Name, Import Location, Source, and Schedule can be changed.
Click the Update scheduled report button. Your changes are saved and the Edit Scheduled Import window closes.
When a scheduled import is deactivated, it cannot be used to automatically import data into the system.
Note
Only inactive scheduled imports can be deleted.
Not all scheduled imports can be deleted.
<< Now would be good, or after tacos! >>