Import Receipts
Important
Information and features vary according to the roles to which you belong and the permissions associated with those roles. For more information, contact your module manager or your campus support team.
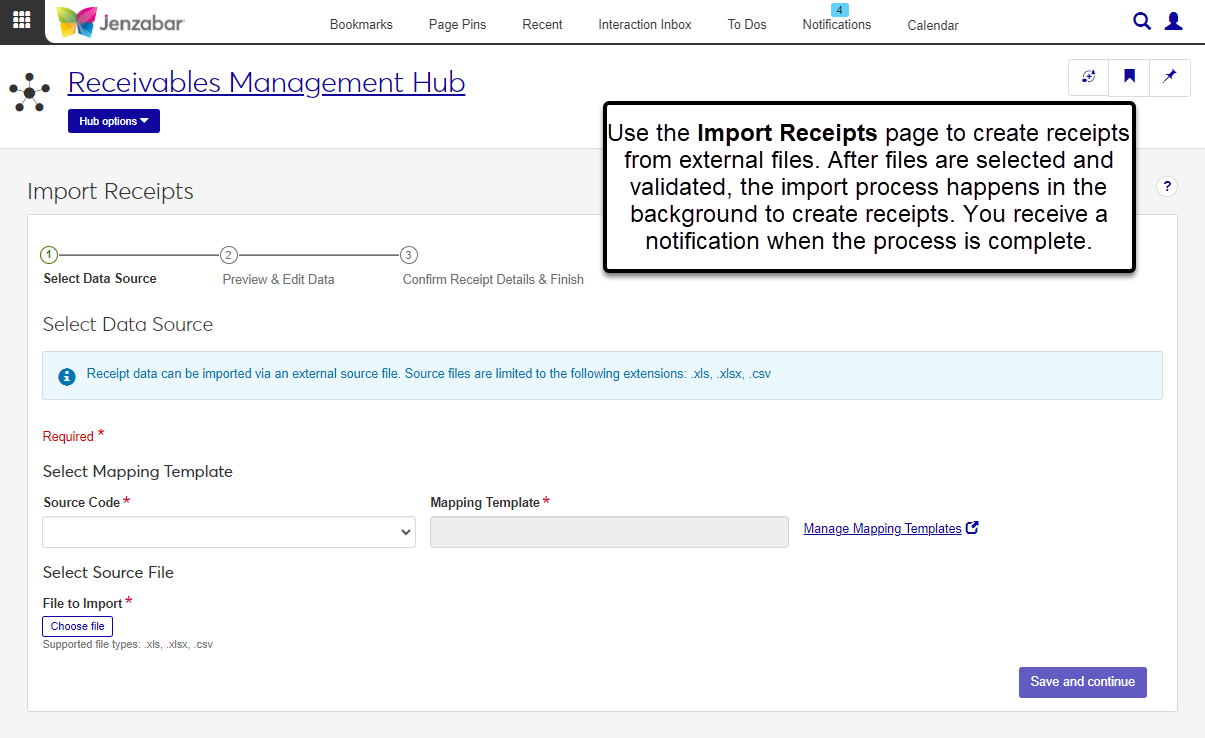
From the Import Receipts page, you can upload an external file (usually an Excel spreadsheet) to add receipts to J1 Web. There are three steps in the process.
Select Data Source. Select the file and mapping template, then preview the data to be imported.
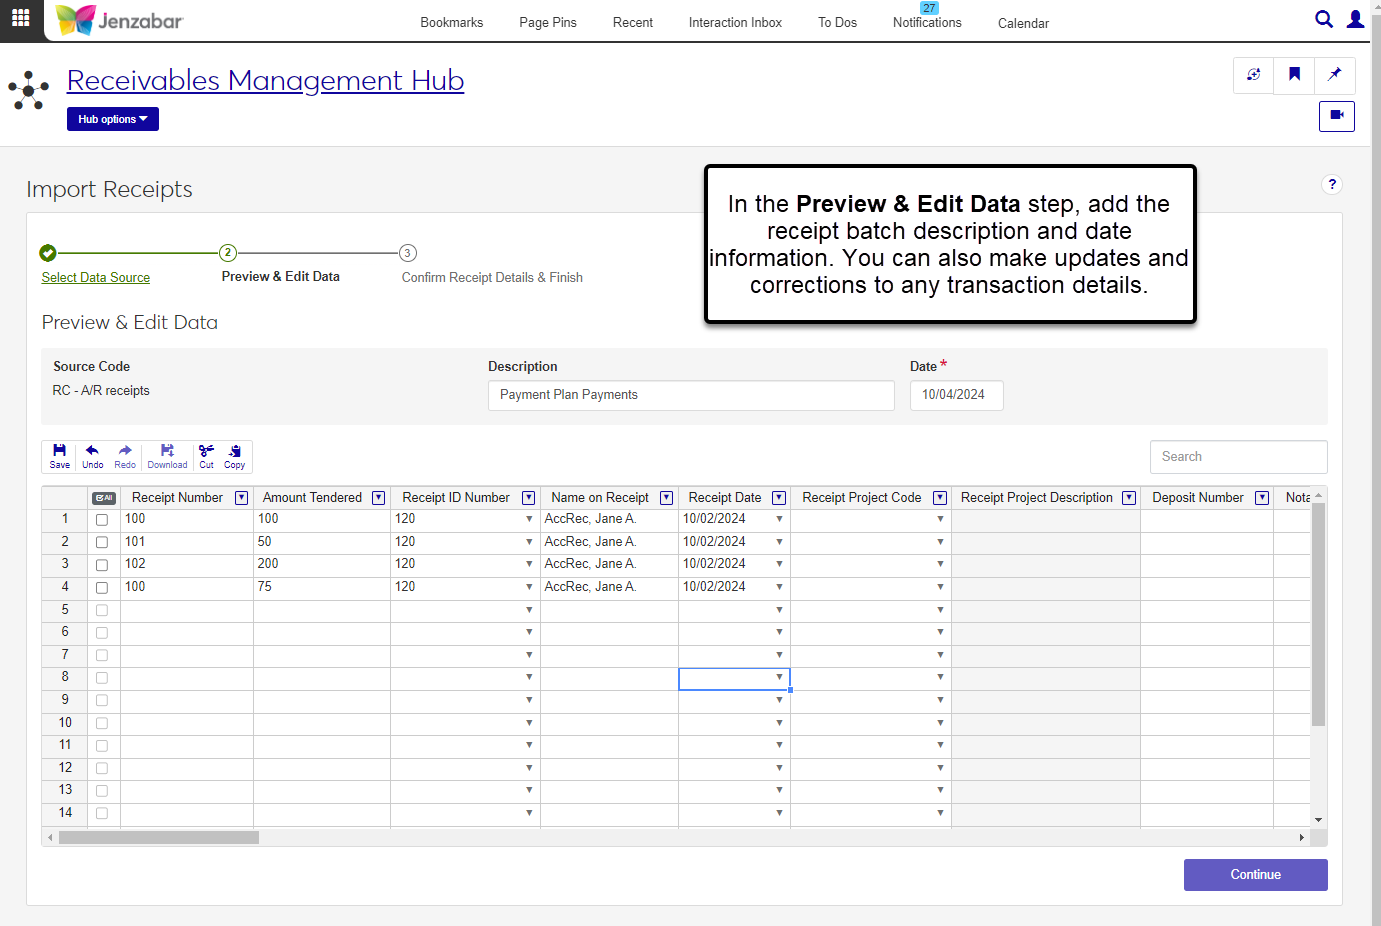
Preview & Edit Data. Review the imported data, enter the batch description and date, and make updates to any rows with errors.
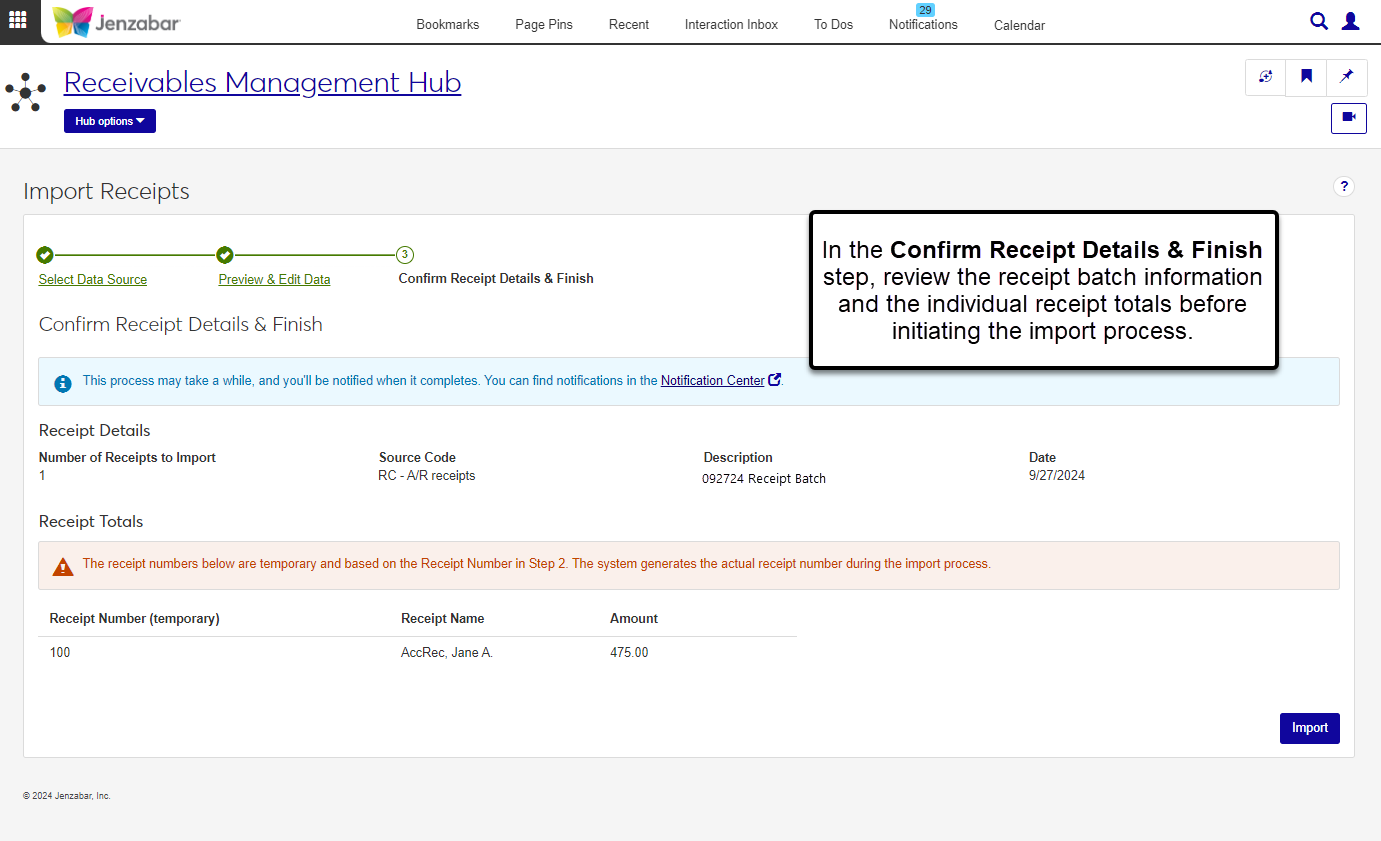
Confirm Receipt Details & Finish. Review a summary of the receipt to be created and start the import process. The process runs in the background, so you can continue working in J1 Web. You'll receive a notification when the process is complete and receipts are created.
J1 Web uses data mapping templates to import data from external files such as Excel spreadsheets. The template tells the system which database fields are to be populated with the imported data. Only templates associated with designated source codes can be selected during the import process.
After selecting a template, choose the file to upload. The file you import into the system must contain all the columns defined in the selected template and the column names must match exactly.
Note
Your school may create Excel templates that you can use for the import process. That Excel template should have all the required columns to import data. If you have issues importing data with your file, contact your IT administrator.
After the file has been uploaded and validated, you can make updates to the data on the Preview & Edit Data step of the wizard. On this step, you'll also enter the following information.
Description: this description is used for the batch that is created when the data is imported.
Date: this date is assigned to the batch and to any transactions that didn't have a date when they were imported into the system.
The columns visible on this step may vary based on the mapping template selected in Step 1. The system validates the imported data and highlights fields that need to be corrected. Most columns can be edited, and some columns are required based on the type of import.
The Confirm Details & Finish step displays a summary of what will be created during the process. When you click the Import button to start the process, the system performs a final validation to confirm all required information was entered. The process runs in the background so you can keep working in J1 Web. You'll receive a notification when it's complete with links to view the related batch and transaction details.
From the Finance Receivables Management Hub options, select Import receipts. The Import Receipts page opens to the Select Data Source step of the process.
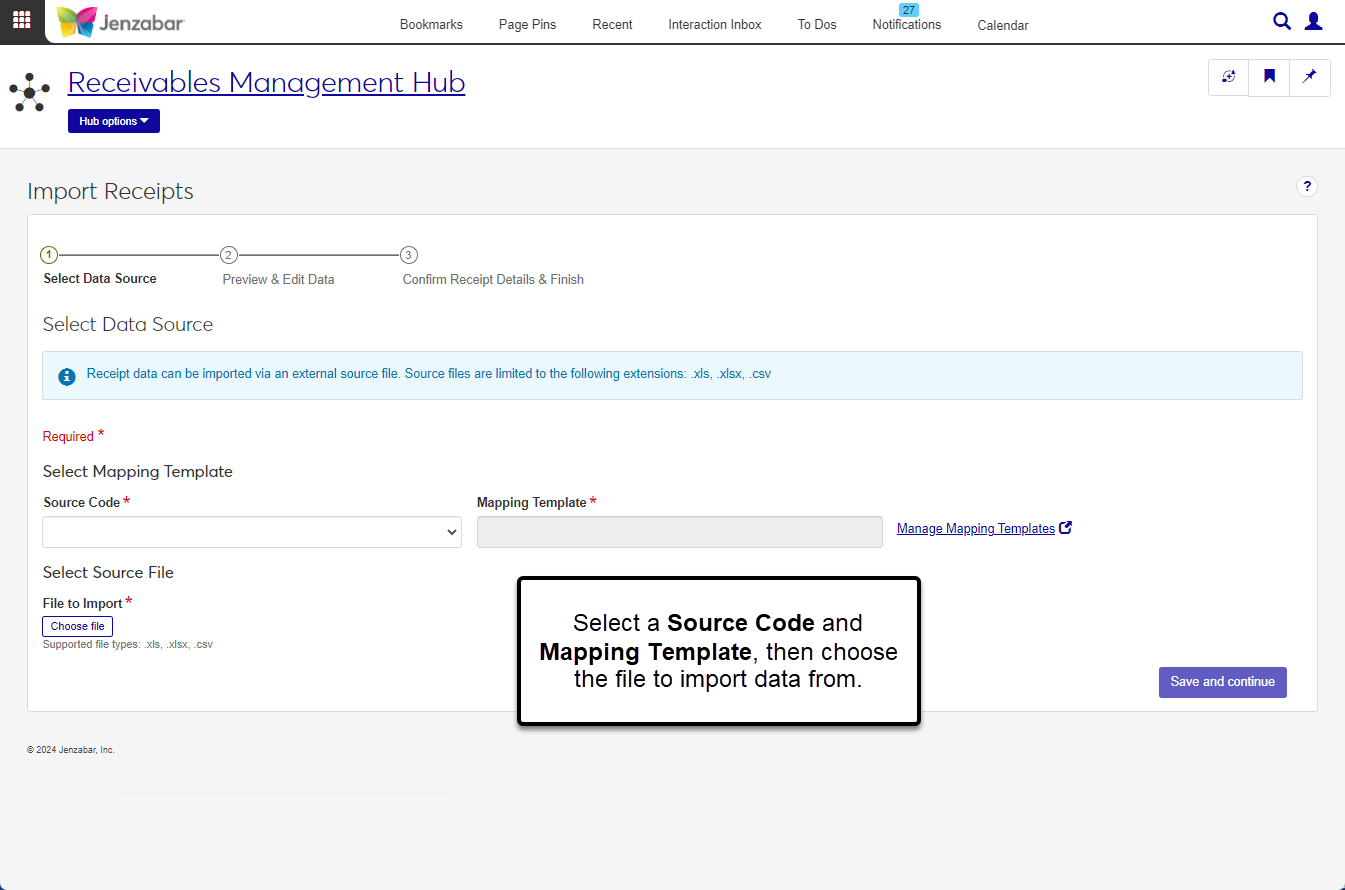
In the Select Data Source step, select a template and upload the import file. All fields are required.
Select a receipt Source Code. Any source codes flagged as Payment Source Codes can be selected.
Click in the Mapping Template field and select an option from the list. Only templates associated with the selected source code are available for selection.
Under the File to Import section, click the Choose file button.
In the pop-up, navigate to and select the import file (allowable file types are .xls, .xlsx, and .csv), then click Open.
To view the imported data:
Click the Preview data button below the imported file. A pop-up opens with a read-only table of the header and columns from the imported file.
Click the Close button or the x in the top right corner to close the pop-up.
Click Save and continue.
In the Preview & Edit Data step, review and update imported data. All the columns from the selected mapping template are displayed in the details spreadsheet. Most can be edited and some are required.
Enter the Description (up to 40 characters). The receipt batch uses this description when receipts are created in the final step. Required.
The Date defaults to today's date and can be changed if needed. This date populates the Transaction Date column in the details spreadsheet if a transaction date wasn't included in the import data and is also used as the receipt batch date. The date must be within the current or future fiscal year. Required.
Make updates to any of the editable columns in the details spreadsheet. The following columns are required.
Amount Tendered
Receipt Code
Transaction Amount
ID Number (required when the GL Account associated with the Receipt Code is an AR subsidiary account)
1098-T Academic Year (required when an ID Number has been entered)
1098-T Academic Term (required when an ID Number has been entered)
Click the Save button in the transaction spreadsheet toolbar after you've made your changes.
Click the Continue button.
In the Confirm Invoice Details & Finish step, review receipt and receipt batch summary information.
Review the information in the Receipt Totals section. If there are any issues, click the Preview & Edit Data link to go back and make changes.
Click the Import button. The process runs in the background so you can continue working in J1 Web. When it's complete, a notification appears with links to access the receipt batch details and the details for each receipt that was created.
Note
Permissions to view and manage mapping templates are typically reserved for IT administrators and those who manage the database.
On the Import Receipts page, click the Manage Mapping Templates link. The Data Mapping Templates page opens with a list of templates for the selected receipt source code.
To view and edit details about an existing template:
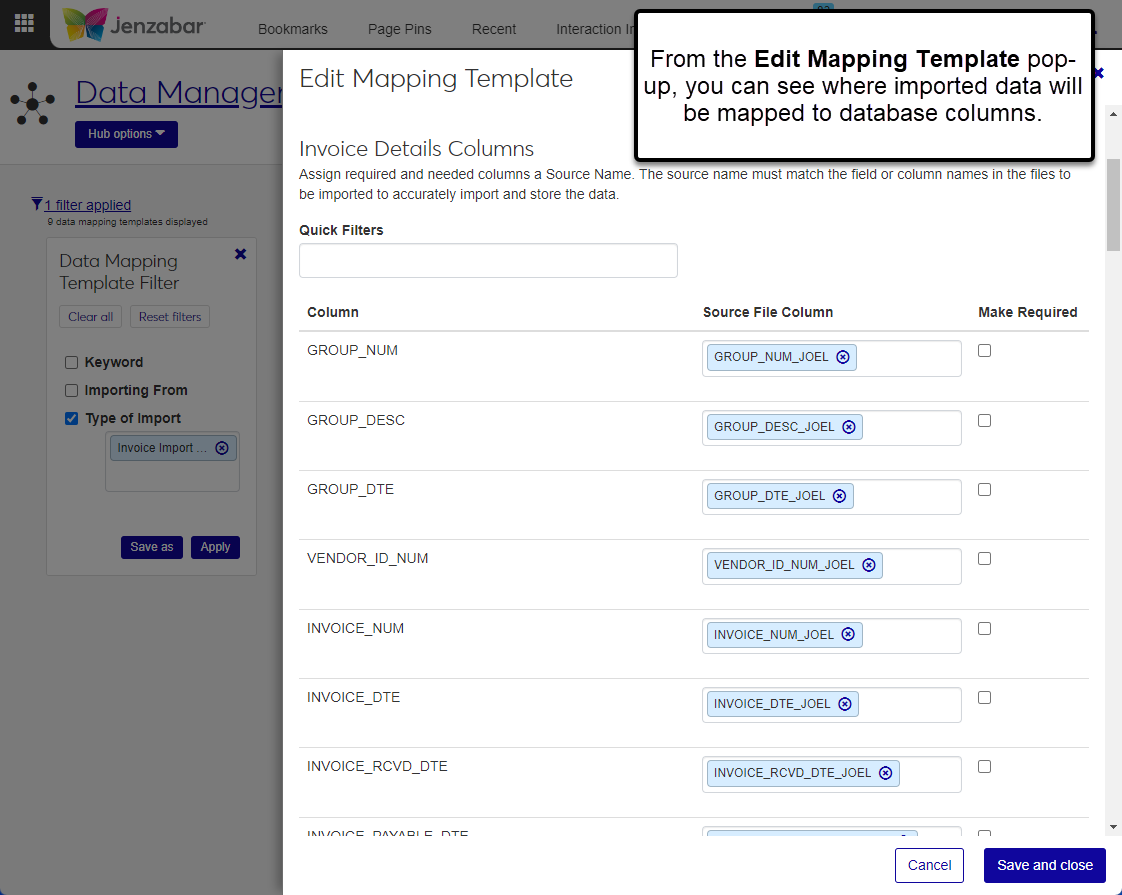
Click the Actions button for a row and click Edit. The Edit Mapping Template pop-up opens.
In the Receipt Details Columns section, you can remove and select new values in the Source File Column to map data from the imported file to the database Column.
Select the Make Required checkbox for columns that must contain a value.
Click the Show details button at the top right of the pop-up to view and update the template Name, Description, or Modules allowed access.
Click Save and close or click the x at the top right corner.
To create a new data mapping template, see Data Mapping Templates.
The file you import must have the same columns as the selected mapping template and the column names must match the template exactly. Your school creates customized data mapping templates, so contact your module manager or IT administrator if your file doesn’t match the mapping template parameters.
At this time, the following file types can be imported for the process: .xls, .xlsx, .csv.
Mapping templates are defined and managed in the Campus-wide Definitions Hub, usually by your school's IT administrator. If you have permission and access, a Manage Mapping Templates link on the Import wizard page lets you access the Data Mapping Templates page to view, add, or update templates. The Edit Data Mapping Template pop-up shows which database columns the imported values are mapped to. The file you import into the system must contain all the columns defined in the selected template and the column names must match exactly.
For more information about mapping templates, see Data Mapping Templates.
In the Confirm Receipt Details & Finish step, you'll see placeholder receipt numbers to differentiate between the receipts to be created. During the import process and creation of receipts, the system assigns receipt numbers to imported data based on the AR Config window Online Payment Receipt Number receipt number group.
After the process is complete, you can click the link in the notification to access receipt details. You can also access the Notification Center from the universal toolbar and enter "Import receipts" in the Keyword filter to access a link to the receipt batch. Open the notification and click the link to the receipt batch. From the receipt batch, you can open the individual receipt details.
