Create Vendor: Vendor Details
Important
Information and features vary according to the roles to which you belong and the permissions associated with those roles. For more information, contact your module manager or your campus support team.
The Vendor Details section lets you add details related to 1099s and electronic payment to vendor records. It's another optional section in the Create Vendor process, so you can choose to enter information during this step or save the vendor record and update these details later from the Vendor Information Details page.
Note
Although 1099 forms are optional in this part of the process, vendors that require 1099s regardless of invoice payment should have at least one 1099 form associated with one of the vendor's subsidiary codes.
If your school is licensed for Arkansas or Oklahoma State reporting, you can also choose to add information about vendor contracts (Arkansas) and vendor load (Oklahoma).
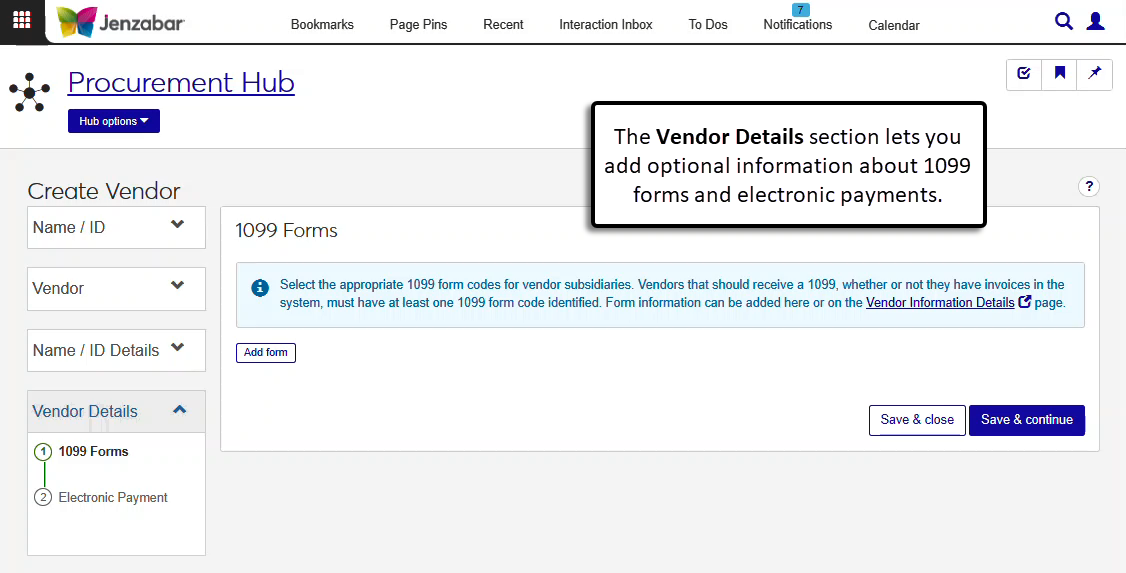
On the 1099 Forms step, click the Add form button.
Select an AP Subsidiary Code to associate with the organization. Available options are the subsidiary codes that were assigned to the vendor in the Vendor step.
Select a 1099 Form Code for the selected subsidiary code.
Click the Add another form button and repeat the above steps to add 1099 information for additional subsidiary codes.
Click Save & continue. The Electronic Payment section opens.
Note
You can add electronic payment information for each subsidiary code associated with the vendor.
On the Electronic Payment section, click the Add account button.
Enter a Deposit Title to describe how the payment is identified.
Enter a Start Date and an End Date to indicate when the payment details are valid.
The US Bank checkbox is selected by default. Deselect it if needed.
Select a Bank Type.
Enter a bank Routing Number and Account Number.
Enter an optional Comment with notes about the electronic payment information.
Click the Add another account button to associate another account with the subsidiary code. Multiple payment accounts can be added to the same subsidiary code, but the date ranges cannot overlap.
Click Save & finish to complete the Create Vendor process.