Depreciation Expense Transfer
Important
Information and features vary according to the roles to which you belong and the permissions associated with those roles. For more information, contact your module manager or your campus support team.
Use this window to calculate depreciation for depreciating assets. Once you have reviewed the Fixed Asset List to verify the assets and calculations are what you expect, you can send the depreciation journal entries to GL.
Tip
For the 2024.1 release, the Depreciation Expense Transfer process does not produce a report. Assets can be reviewed in the Fixed Asset List before running depreciation or you can run a report from the Asset Management > Reports > Depreciation Expense Summary Report page.
Note
Once you send depreciation to GL, you cannot run depreciation again for that time period unless the GL batch is deleted or reversed in the GL module.
You can run the asset depreciation process on a monthly, quarterly, or annual basis. Once you select how frequently you will run the depreciation, you cannot change until the next quarter or fiscal year. For example, if you are running depreciation monthly, you cannot start running it quarterly until the beginning of the next quarter break.
Before calculating a monthly or quarterly depreciation, you must run depreciation for the months or quarter prior to the month or quarter currently being calculated.
Note
New items must have a Status of Depreciating to be included in this process.
In order to access and use the Depreciation Expense Transfer feature users will need the following:
Role | Role Permission |
|---|---|
Asset Management Fixed Asset Access | Can run depreciation |
Note
Jenzabar provides default roles and permissions for finance users and the default roles are listed below. It's recommended that you create copies of the default roles to manage permissions and access for your users. For additional information about setting up finance roles and permissions, see the J1 Web Finance Permissions Overview and Setup Guide.
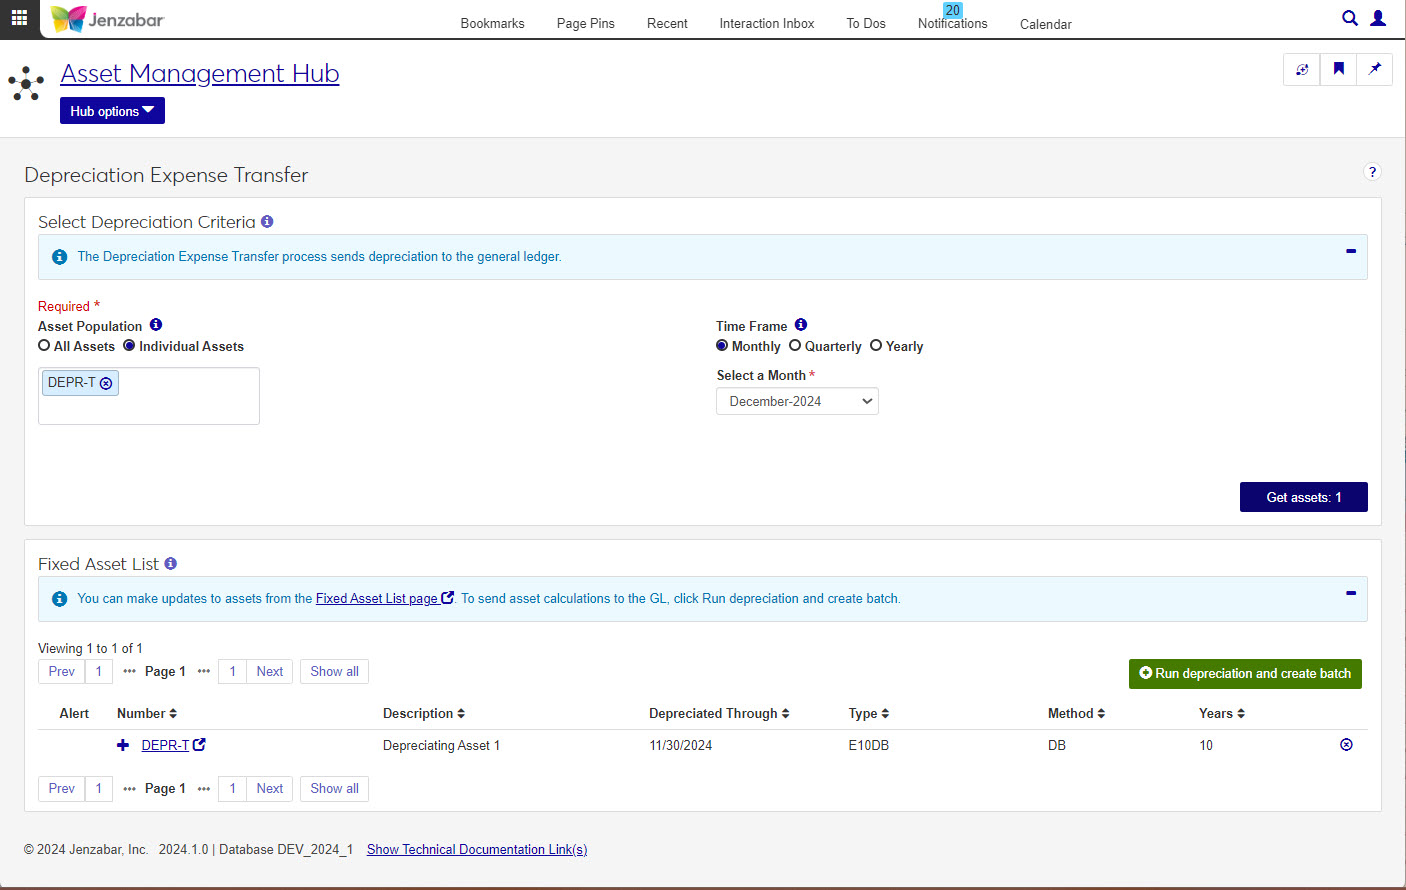
Use the criteria fields to expand or limit the depreciating assets displayed in the list. Options include:
Asset Population
Time Frame
Select Month/Quarter/Year
When you click the Get assets button at the bottom of the criteria section the Fixed Asset List will populate.
Note
Only assets with a depreciating status set to begin depreciating in the period you select are included.
The list contains the following information for each asset: Alert, Number, Description, Depreciated Through, Type, Method, and Years.
Start Date, End Date, Department, Class, and Acquisition Date information can be viewed by clicking the plus sign at the beginning of each fixed asset's row.
You may notice some of the rows in your asset list are highlighted, that means the asset cannot be included in the current depreciation batch and you will need to remove the asset from the list or, in some cases, update the asset to meet the limitations shown in the Alert column.
Note
The Run depreciation and create batch button will only be available once all assets in the asset list are free of all alerts. You can update assets from the Fixed Assets List page, or remove them from the asset list by clicking the X at the end of the asset row.
Tip
If you need to make updates to assets, go to the Fixed Assets page or click the link to the asset's details page by clicking the asset's Number column in the spreadsheet.
How To
Open the Depreciation Expense Transfer from the General Ledger Accounting hub.
Select the assets to include in the depreciation, either all assets or select individual assets.
Choose a time frame.
Tip
The asset depreciation process runs on a monthly, quarterly, or annual basis. Once you select how frequently you will run the depreciation, you cannot change until the next quarter or fiscal year.
Click Get Assets .
In the Fixed Asset List review the selected assets.
When you're ready, click the Run depreciation and create batch button.
Note
The Run depreciation and create batch button will not be active until all assets in the Fixed Asset List are free of all alerts.
On the Depreciation Expense Transfer page, enter the depreciation criteria and click Get assets.
In the Fixed Asset List you can review the assets and recognize any issues by the red highlights and alert icons. Click on the alert icons
 to see what issue the asset needs corrected or why it cannot be included in this depreciation transfer.
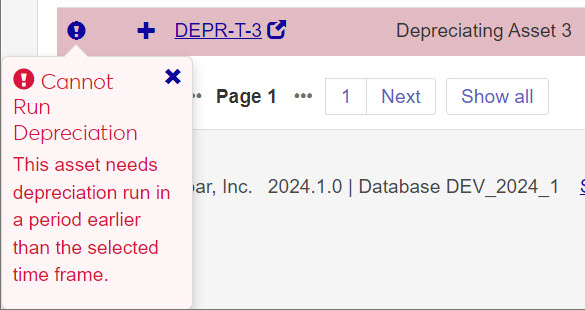
Fixed Assets can be updated by clicking on the asset link in the Number column. A new window for the asset will open to the Fixed Asset Detail page. Make any changes needed to the asset details.
After saving, refresh the Depreciation Expense Transfer page.
Repeat as necessary or until all assets are alert free.
As you work with the Depreciation Expense Transfer process, you may need to remove one or more assets. You may not want to include an asset that was pulled in or perhaps an asset has already been run.
In the Fixed Asset List, you will see a remove icon  at the end of every row. Click the X to remove the asset from the list.
FAQ
There are several reasons an asset row might be red. Most common reasons include
Asset has already been depreciated for the selected time frame and cannot be run again.
Asset was previously run for a select time frame and cannot be run in a in a new time frame until the beginning of the next time frame.
Asset needs depreciation run in a period earlier than the selected time frame.
In the Fixed Asset List, you will see an Alert column that will provide the reason an asset cannot be depreciated. All highlighted rows must be updated or removed before running depreciation.
You can update assets on the Fixed Asset List page. You can get to an asset quickly by clicking on the blue, underlined asset in the number column or you can go to Finance, Asset Management, Fixed Assets in the J1 Web Menu.