Manage Interaction Schedules
Important
Information and features vary according to the roles to which you belong and the permissions associated with those roles. For more information, contact your module manager or your campus support team.

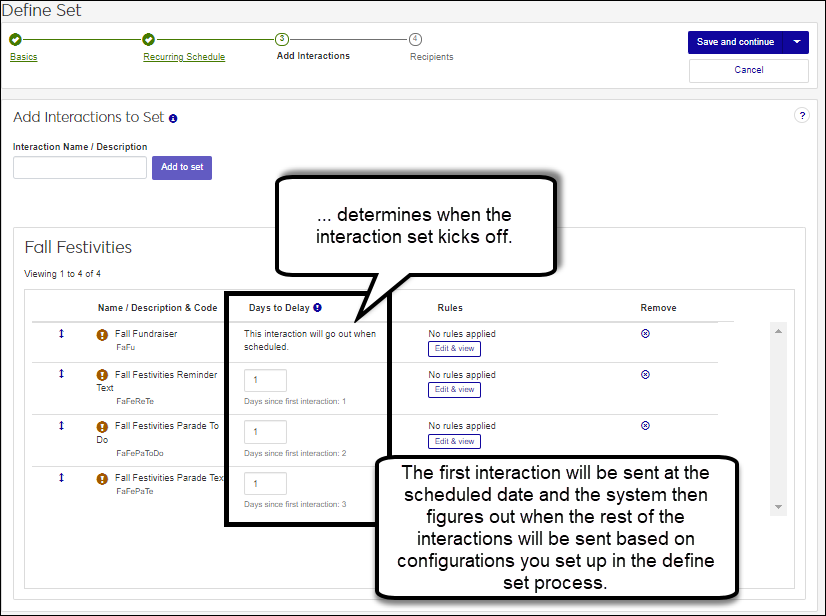
Schedules are associated with automation plans (sets of interactions). They tell the system when to send the first interaction in a series of communications out, which automates the process of sending communications out for you. In Notepad, these were referred to as daily procedures.
 Schedules save you from manually generating your communications every day, week, month, or year.
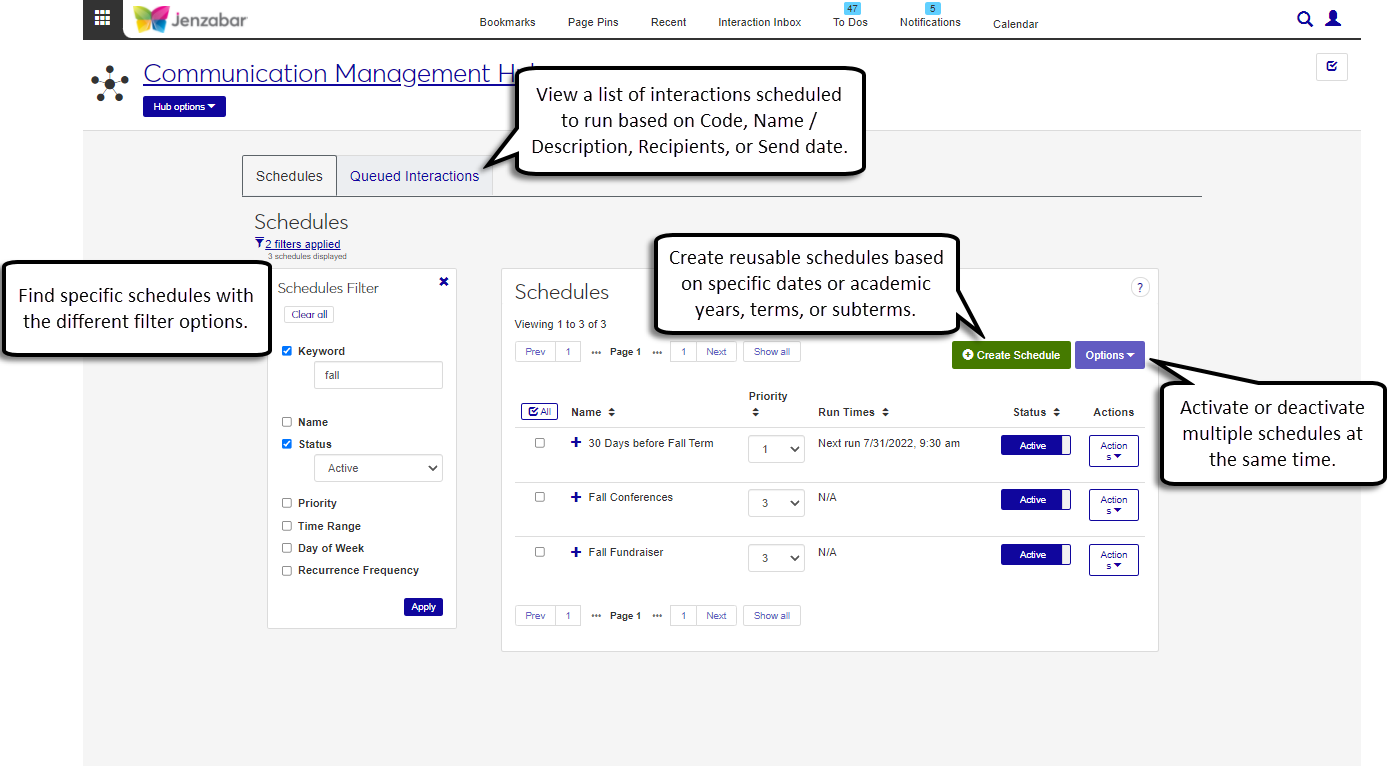
You can base schedules on a specific date or academic time periods set up in the Desktop. You can determine the frequency of when a set will go out and for how many times.
Note
The Desktop Year/Term/Subterm window determines which years/terms/subterms are available. If you don’t see an expected year/term/subterm, it might be because you are building out communications and the automation plan before the terms have been built out for a year.
A schedule can be reused and associated with more than one automation plan, but individuals setting up automation plans should consider if the recipients overlap and if you want them to receive multiple interactions at the same time.
Notice
You can create a schedule that kicks off 45 days before the start of the fall term and associate it with a series of different interactions. As soon as it is 45 days before the fall term starts, notifications are sent to advisors to remind them to reach out to their advisees, emails are sent to incoming freshmen, etc.
Collaborate with different areas on campus to identify when communications are sent to build meaningful schedules that can be reused by multiple automation plans. Collaboration will also ensure recipients aren’t inundated with communications on the same day/time.
Evaluate communications to identify when it is best to use calendar-driven or term-driven schedules. Consider if there are there relevant business processes or related communications that make sense to build into a plan/ workflow.
If filter options aren’t appearing, click the No filters applied link. You can filter scheduled in several ways:
Search by specific word using the Keyword filter
Use a filter or combination of filters to view select schedules by name, status, priority, timeframe, and recurrence frequency
Click the column headings to sort schedules
Tip
To save filter criteria for reuse, click Save as. Enter a name for the filter and click Save. Set as default reuses the filter every time you access the page.
Note
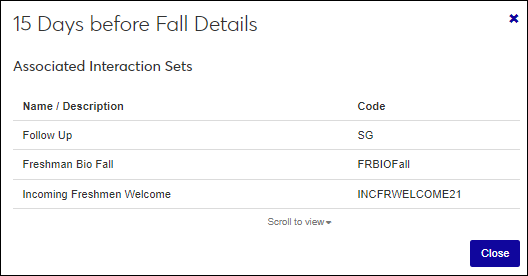
The View details pop-up shows every automation plan associated with the selected schedule.
Access the Campus-Wide Definitions, Schedules page.
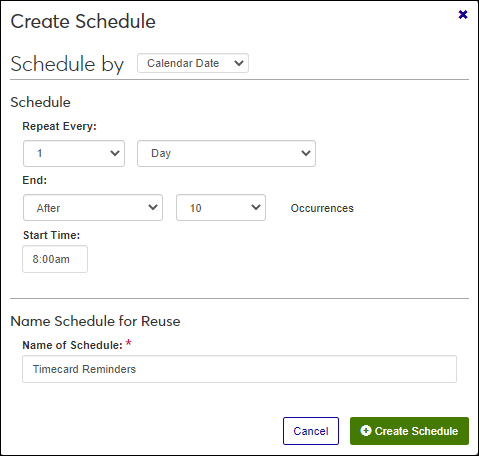
Click Create Schedule. The Create Schedule pop-up appears.
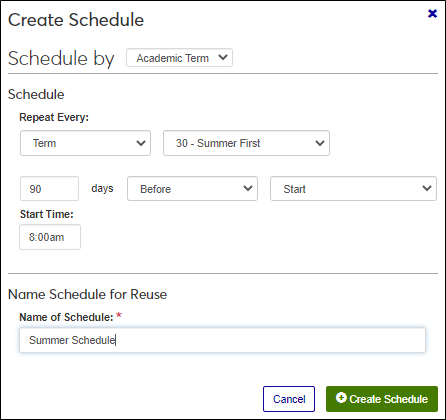
From the Schedule by drop-down, select from the following:
Note
Options vary according to the type of schedule you are creating.
Calendar Date to create a schedule based on hourly runs, daily runs, weekly, monthly, etc. Select the schedule's Repeat Every frequency, End date or number of occurrences, and Start Time.
Academic Term to create a schedule based on when your terms start. Select the schedule's Repeat Every frequency and Start time. Academic term options are based on values in your year/term/subterm table (Desktop, Year Term Subterm window). To work correctly, these values will need to be available for future years.
Enter a descriptive Name of Schedule.
Click Create Schedule.
Access the Campus-Wide Definitions, Schedules page.
Use the available filter options to find the schedule you want to view more information about.
To activate a schedule, from the Status column, select click on the Inactive option. The schedule is activated and the Run Times column updates to show the next time automation plans using this schedule will kick off.
To deactivate a schedule:
From the Status column, select click on the Active option to open the Deactivate Schedule pop-up.
Click Yes, deactivate. The Deactivate Schedule pop-up closes and interactions sets associated with this schedule will no longer kick off.
Note
Only inactive schedules can be updated because changes in the schedule impact when automation plans associated with the schedule are run. To see the automation plans a schedule is associated with, select View details from the Actions menu.
Access the Campus-Wide Definitions, Schedules page.
Use the available filter options to find the schedule you want to update.
If the schedule you want to update is active, you must deactivate it before making changes.
From the Status column, click on the Active option to open the Deactivate Schedule pop-up.
Click Yes, deactivate.
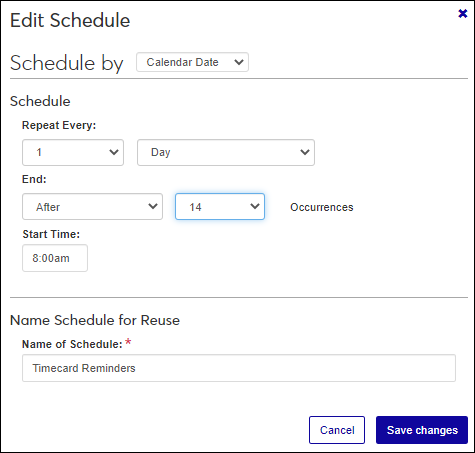
From the Actions menu, select Edit to open the Edit Schedule pop-up.
Make the needed changes.
Click Save changes.
To continue to use the schedule, click on the Inactive option. The schedule is activated and the Run Times column updates to show the next time automation plans that use this schedule will kick off.
Note
Only inactive schedules that are not associated with an automation plan can be deleted. This ensures automation plans associated with the schedule aren't impacted. If you need to delete an active and associated schedule, you'll need to assign the automation plans to another schedule first. To see the automation plans a schedule is associated with, select View details from the Actions menu.
Access the Campus-Wide Definitions, Schedules page.
Use the available filter options to find the schedule you want to delete.
If the schedule you want to delete is active, you must deactivate it before deleting it.
From the Status column, click on the Active option to open the Deactivate Schedule pop-up.
Click Yes, deactivate.
If the schedule you want to delete is still associated with an automation plan, you must remove it from the set before deleting it.
Access the Automation Plans page.
Use the available filter options to find the automation plan associated with the schedule you want to delete.
From the Actions menu, select Edit to open the Edit Interaction, Basics page.
Click Save and continue to go to the Edit Interaction, Schedule page.
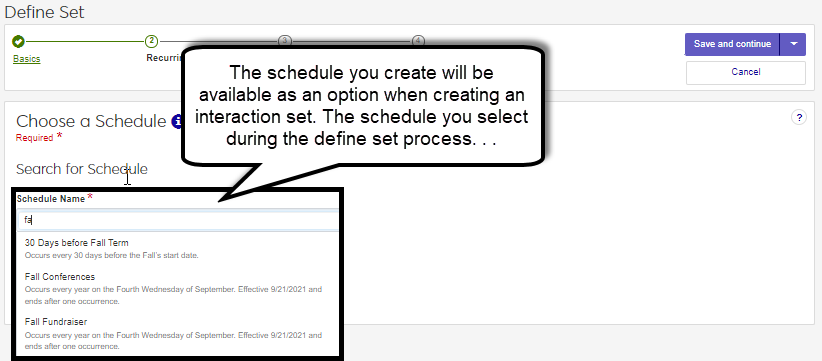
From the Schedule Name field, click the remove icon to disassociate the schedule from the automation plan.
Select another schedule by starting to type the name and selecting it from the available options in the Schedule Name field.
Click Save and continue.
Make any needed changes, then click Save and continue to go to the Edit Interaction, Recipients page.
Make any needed changes and click Save and finish.
Return to the Schedules page.
Use the available filter options to find the schedule you want to delete.
From the Actions menu, select Delete. The Delete Schedule pop-up appears.
Click Yes, delete to permanently delete the schedule.
Access the Campus-Wide Definitions, Schedules page.
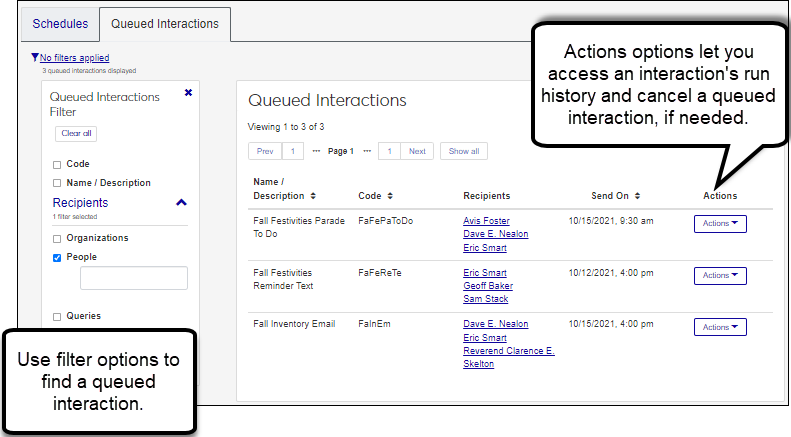
Click the Queued Interactions tab.
Find the interaction you want to cancel using the filter options/ sort by headers.
From the Actions button, select Stop and remove. The confirm pop-up appears.
Click Yes, stop and remove. The interaction is removed from the queue and will not be sent/applied.
Active schedules cannot be edited. This ensures schedules that might be associated with an automation plan aren’t impacted. To see the automation plans a schedule is associated with, select View details from the Actions menu.
It might not exist in your Year Term Subterm window in the Desktop application.
Yes, a schedule can be used for multiple automation plans. When using the same schedule multiple times, consider if the interaction recipients overlap. If there are overlapping recipients in your interactions, they may potentially be inundated with communications.
When more than one automation plan uses the same schedule, the priority determines which set will be sent first.