Leave of Absence Definitions
Important
Information and features vary according to the roles to which you belong and the permissions associated with those roles. For more information, contact your module manager or your campus support team.
Use this page to define leaves of absence that can be assigned to students. Schools are required to track leaves of absence for Title IX Financial Aid recipients per the guidelines in the Code of Regulations (link provided below). Currently, you will need to use J1 Desktop to associate a leave of absence with a student, but look for that functionality to be available in J1 Web in a future release.
The permission to define and edit Leave of Absence definitions is in the Registration Module Manager and Registrars default roles.
You can also manage Leave of Absence definitions in J1 Desktop, in the Leave of Absence Definitions window.
Leave of Absence definitions are stored in the Absence Definition table (abs_def) and the Leave of Absence table (leave_of_absence.absence_cde).
On a student's Manage Student Leaves of Absence page, you can view, create, edit, comment on, and delete a student's leaves of absence.
You can do this in J1 Desktop, too, either in the Leave of Absence window or in the Student Information window, Degree tab, Leave of Absence subtab.
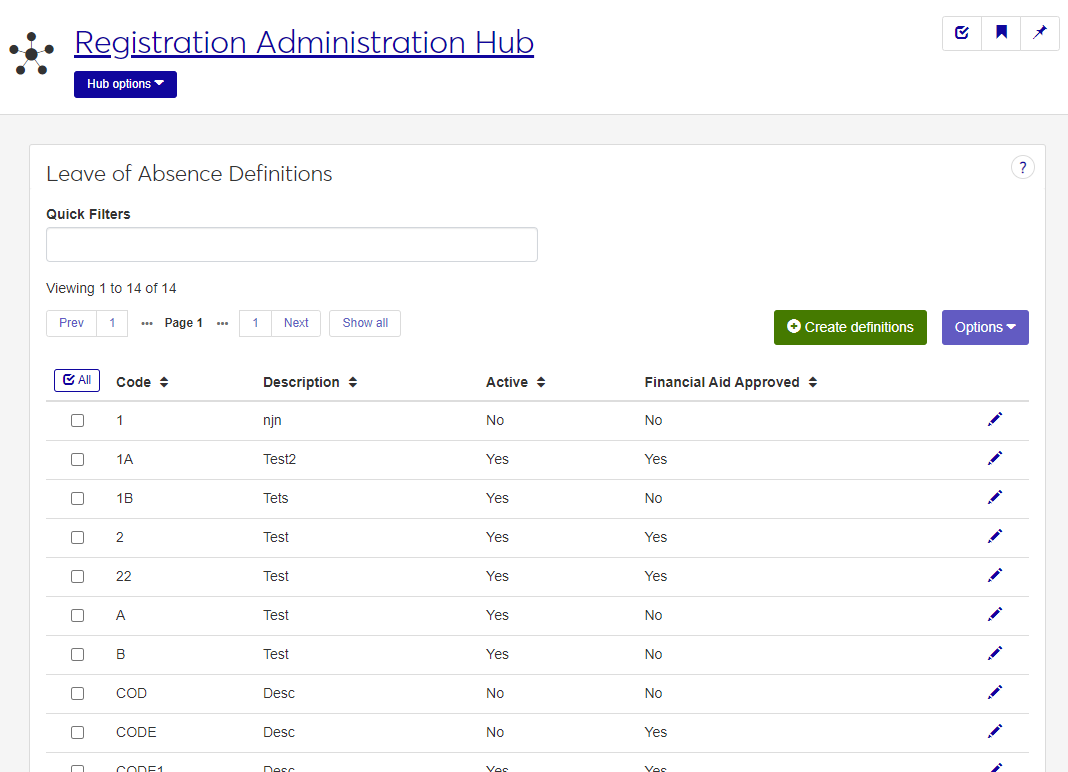
From the Registration Administration hub, click Hub options.
Click Manage Definitions, and select Leave of Absence definitions.
Enter characters, words, or phrases in the Quick Filters to limit the list of definitions.
Click a heading to sort the list by that column.
Tip
You can also use the page search in the upper right corner of J1 Web. Just start typing the name of the definition page you want, and select it in the results.
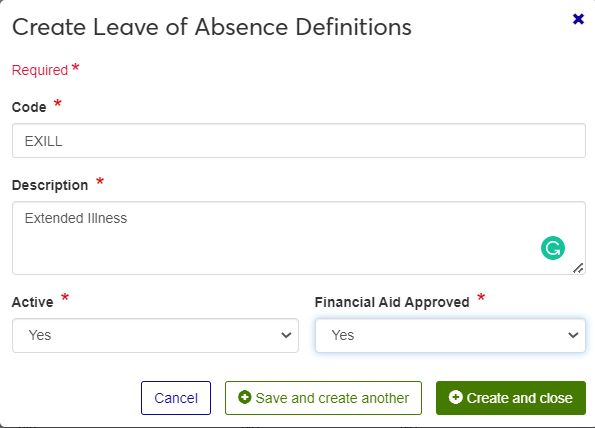
Click the Create definitions button.
Enter a unique Code, up to 5 characters.
Enter a Description of up to 80 characters. Use something that others will easily understand.
Set the Active option, to active or inactive. Inactive definitions will not be available for users to choose in drop-down menus throughout the J1 system.
Select whether or not the reason for the absence is financial aid approved. This Yes/No option indicates whether the leave of absence conforms to the school's policy as it relates to the Financial Aid Title IV regulations. Codes that are set to Yes can be used by the NSC Enrollment process to set the student's Special Status as Leave of Absence and set the status date. The status of this field affects whether or not this definition is included in the Cross Table Student Information Update, so be sure that you understand the process for your school. For more information, see the Leave of Absence topic in the Desktop help.
Click either Save and create another or Create and close.
Click the Edit icon
 on the row of a definition. The edit pop-up opens.
All fields may be edited except the code, which cannot be changed. The fields are described under the How To Create Leave of Absence Definitions, above. Edit the available fields as needed.
Click the Update button.
Select the checkboxes next to the rows you want to export.
From the Options drop-down, select Download to Excel. The Download to Excel pop-up opens.
Select options for the Excel format and data columns.
Click Download. Your .xlsx or .zip file is saved in the file location that you have set in your browser settings.
External Resources
eCFR § 668.22 Treatment of title IV funds when a student withdraws