Faculty Hub
Important
Information and features vary according to the roles to which you belong and the permissions associated with those roles. For more information, contact your module manager or your campus support team.
Watch this quick video to learn more about features and functionality in the Faculty hub. Faculty Overview video
This hub is where instructors and teaching assistants work with courses and students. Here you can
Manage course sections
View rosters
Enter grades
Grant overrides for registration
Report attendance
Contact students
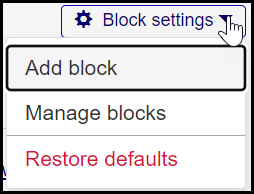
If you have permission, you can manage blocks on the page or add blocks using the Block Settings drop-down.
Important
There are "Can manage blocks" permissions for the following pages. The permissions are found in the Additional Permissions category of the Registration Module Manager role and roles copied from it.
Academic Depart hub Summary page
Catalog Course Summary page
Course Section Summary page
Faculty hub Summary page
Registration Administration hub Summary page
Registration Operations hub Summary page
Registration Reporting and Processes hub Summary page
Manage Blocks
Click the Block settings drop-down, and select Manage blocks. The Manage Blocks pop-up opens with a list of blocks on the page.
To remove a block, click the Remove icon
 , and then click the Update button.
To change a block's status from enabled to disabled or vice versa, click the Status button, and click the Update button.
Add Block
Important
Information and features vary according to the roles to which you belong and the permissions associated with those roles. For more information, contact your module manager or your campus support team.
The Add Block window lets you add Chart, Custom Content, and Data Set List blocks to a Hub's Summary page.
Chart blocks let you display information in a visual format such as bars in a bar chart, lines in a line chart, or slices in a pie chart.
Custom Content blocks offer a wide range of possibilities for displaying diverse information. They let you embed source codes, display images, add links, and utilize formatting options to effectively communicate important details such as internal policies, holiday schedules, tax changes, and more.
Data Set List blocks show data set information. This information can be anything in your system captured by a simple query and uploaded into J1 Web as a data set. For example, you may show a list of all available courses, recipients with missing or invalid contact information, enrolled students graduating in the upcoming term, etc.
To manage blocks, a user must belong to a module role with the Can manage blocks permission available and enabled. These are typically module manager and administrator-level roles.
There are no unique roles and permissions required to view blocks. Users only need to belong to a module role. For example, to see blocks on the Employee Hub's Summary page, users must belong to an Employee role.
For Chart and Data Set List blocks, users can only see information in the block when a data set they have permission to is selected. For example, if a user doesn't belong to a role with access to the course catalog data set and that's the one the block is configured to use, the block will appear blank.
Access the Hub Summary page where you want to add the Chart block.
From the Block settings drop-down, select Add block. The Add Block window appears.
From the Block Type drop-down, select Chart.
Click the Add Block button. The block is added to the page in a disabled state and can only be viewed by users with permission to manage blocks.
From the Chart block, click the Edit icon.
In the Block Title field, enter a short and recognizable name for the block. Enter up to 200 characters.
In the Detailed Description field, enter additional information and context to the information being shown.
From the Data Set drop-down, select the data set information you want to display in the block.
Tip
Only simple chart queries uploaded to the Data Sets page can be selected. If you are not seeing a query you expect, verify you belong to a role with permission to access it.
Users that do not belong to a role with access to the selected data set will not see any content in the block.
To add data parameters:
Click Configure parameters.
From the Chart Type drop-down, select the chart format you want used to show the information. Some queries can only support donut and pie charts while others can support bar charts.
Change Disabled to Enabled.
Click the Save button. The block is immediately available to users with access to the Hub's Summary page.
Access the Summary page where you want to add the Custom Content block.
From the Block settings drop-down, select Add block. The Add Block window appears.
From the Block Type drop-down, select Custom Content.
Click the Add Block button. The block is added to the page in a disabled state and can only be viewed by users with permission to manage blocks.
From the Custom Content block, click the Edit icon.
In the Block Title field, enter a short and recognizable name for the block. Enter up to 200 characters.
Add, update, or remove custom information.
Tip
Tools for developing your custom content:
Click this icon to insert an image:

Click this icon to insert a hyperlink:

Click this icon to insert source code:

Click this icon to perform an accessibility check on your content to ensure it meets accessibility requirements:

Change Disabled to Enabled.
Click the Save button. The block is immediately available to users with access to the Hub's Summary page.
Access the Summary page where you want to add the Data Set List block.
From the Block settings drop-down, select Add block. The Add Block window appears.
From the Block Type drop-down, select Data Set List.
Click the Add Block button. The block is added to the page in a disabled state and can only be viewed by users with permission to manage blocks.
From the Data Set List block, click the Edit icon.
Add a block title.
From the Data Set field, select the data set information you want to display in the block.
Tip
The Data Set List block uses data set list categorized queries uploaded to the Data Sets page. Users that do not belong to a role with access to the selected data set will not see any content in the block.
Change Disabled to Enabled.
Click the Save button. The block is immediately available to users with access to the Hub's page.
Every module in the system has Summary page. Chart, Custom Content, and Data Set List blocks can be added to these Summary pages. You can access a Hub's Summary page by clicking on a module name from the left-hand navigation menu.
Anyone with access to the Hub's Summary page with the Chart, Custom Content, and Data Set List blocks on it.
Chart and Data Set List blocks show data set information and users can only see that information when a data set they have permission to is selected. For example, if a user doesn't belong to a role with access to the course catalog data set and that's the one the block is configured to use, the block will appear blank.
No, newly added blocks are disabled. For others to see the block, you'll need to customize the content and enable it.