Case Summary
Important
Information and features vary according to the roles to which you belong and the permissions associated with those roles. For more information, contact your module manager or your campus support team.
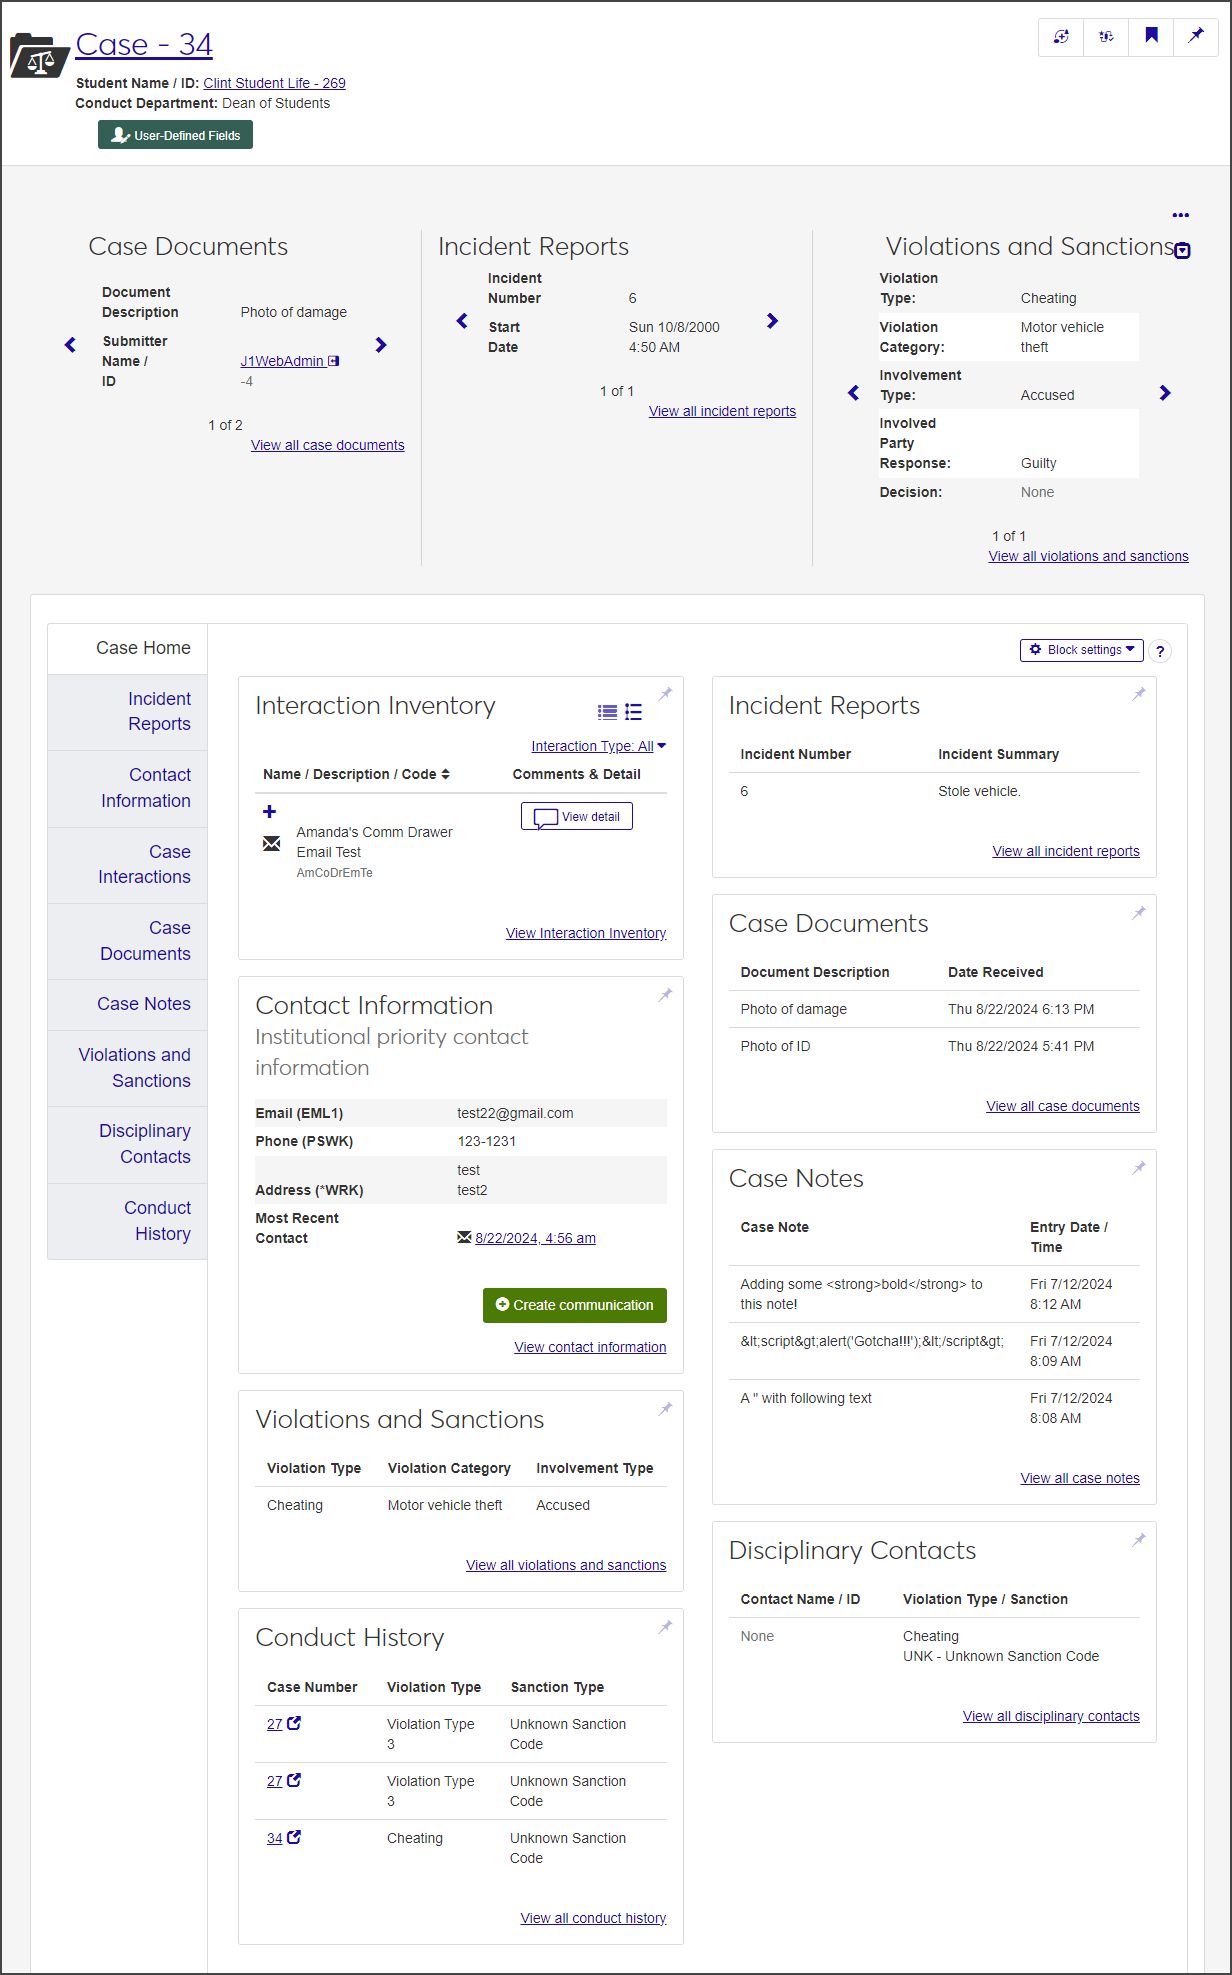
The Case summary page serves as a central repository for all information related to an individual case. From this page, users with the necessary permissions can manage incident reports, contact information, case notes and documents, violations and sanctions, and more.
Users in the Student Conduct - Director Access by Department role (or a role copied from it) with the "Can view all cases" permission are able to view cases assigned to departments they have permissions to see.
Users in the Student Conduct - Assistant Director Access by Department role (or a role copied from it) with the "Can view assigned cases" permission can view only the cases assigned to them.
The Case summary page is made up of three main components—tabs, blocks, and widgets. These three components make it easy to view both a summary of information and details about the case. Blocks and widgets can be configured so you see the information that's most useful to you.
The page defaults to the Case Home tab, which displays all the blocks and widgets that you choose to display. You can access other tabs by clicking the View all ... link on a block or widget or by selecting the tab you want to view.
To manage widgets and blocks on the Case summary page, you must be in the Student Conduct Administrator or Student Life Module Manager role (or a role copied from one of those roles) with the "Can manage blocks" and "Can manage widgets" permissions enabled.

The blocks on the Case Home tab provide a quick look at the most recent information contained in the corresponding tabs. The Incident Reports block, for example, displays up to three of the most recent incident reports related to the case. Each block also includes a link to the corresponding tab so you can see complete information.
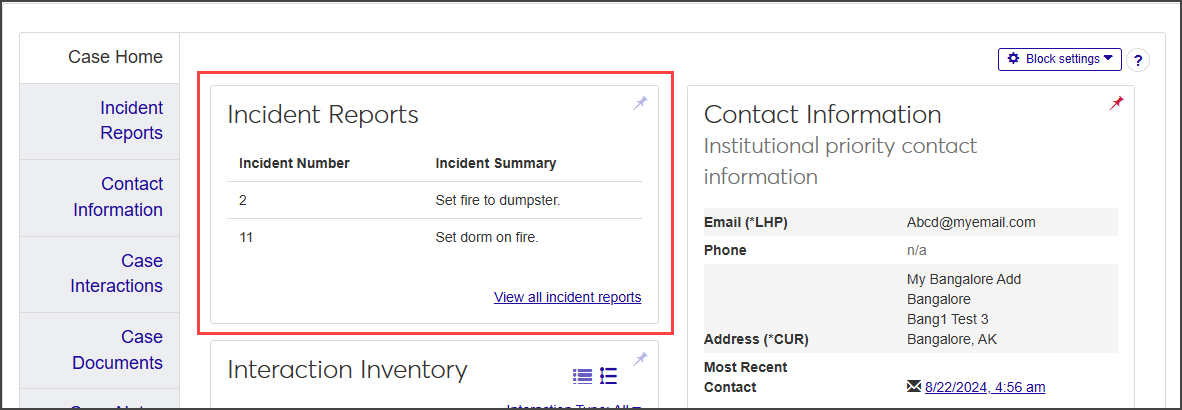
By default, the Case Home tab displays a block for each corresponding tab, but you can configure the display to show as many or as few blocks as you like and in the order that makes the most sense to you. For example, if you don't need to refer to disciplinary contacts very often, you can disable or remove the Disciplinary Contacts block. That information is still available in the Disciplinary Contacts tab, but the block does not appear on the Case Home tab. You can also pin frequently used blocks to your home page by clicking the pin icon in the upper right corner of the block.
Blocks only appear on the Case Home tab.
Widgets are displayed across the top of the window (horizontally on a computer screen and vertically on a mobile device). A widget displays a brief summary of information about one item at a time, but you can toggle quickly from one item to the next using the arrows on either side of the widget.
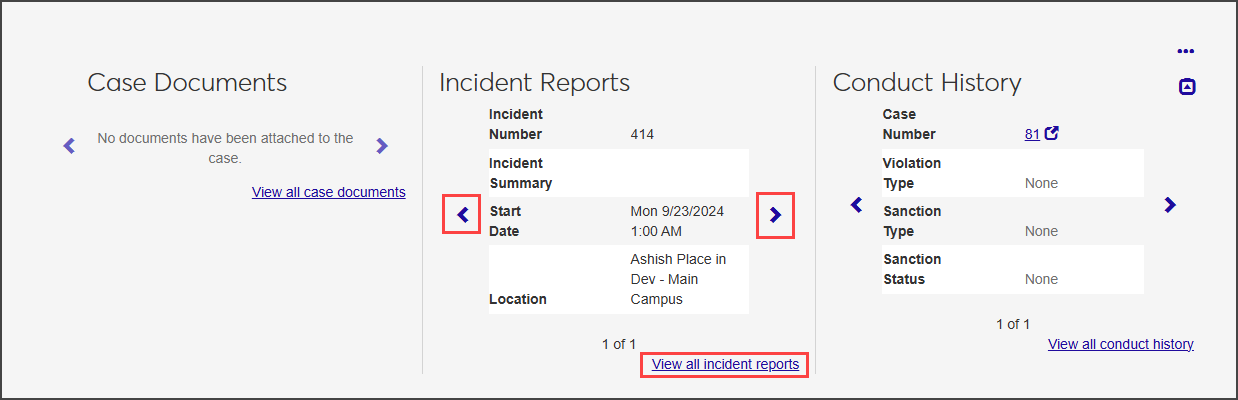
For example, the Incident Reports widget displays basic information—incident number, incident summary, start date, and location—for a single incident report; click the arrows to move to the next or previous report.
As with blocks, you can choose which widgets you want to display.
Widgets are always visible at the top of the Case summary page, no matter which tab is open.
All blocks are displayed on the Case Home tab by default, but users with the necessary permissions can disable, edit, or remove them.
To manage blocks, you must be in a Student Conduct Administrator or Student Life Module manager role (or a role copied from one of those roles) with the "Can manage blocks" permission enabled.
Most of the time you will only need to manage the case-related blocks provided by the system. If you delete any of those blocks, you can add them back one at a time using the Block settings menu.
You can also add chart, custom, or data set list blocks using the same process you use to add blocks to any hub page in J1 Web. The instructions below concern only the default case-related blocks.
For information about adding other types of blocks, see Add Block.
Select Add block from the Block settings drop-down. The Add Block pop-up opens.
Click in the Block Type field and select the block you want to add.
Click Add Block to return to the Case Home tab.
By default, blocks are displayed on the Case Home tab in the same order as the tabs they correspond to, starting in the top left corner of the tab, but you can rearrange them in any order that suits you.
Select Manage blocks from the Block settings drop-down. The Manage Blocks pop-up opens.
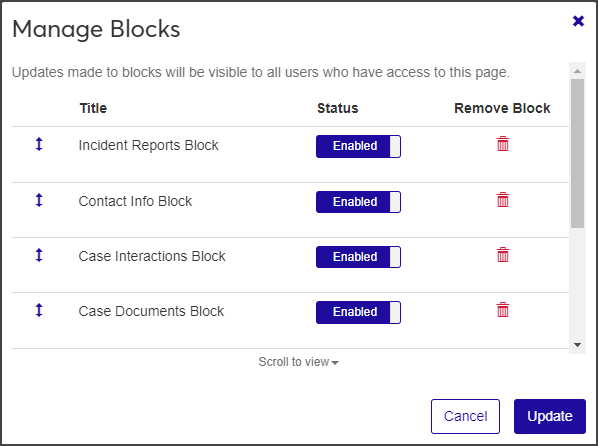
Hold your cursor over the vertical arrow next to the block you want to move until it changes to a hand icon and then drag the row to the new position. Repeat with other blocks as needed.
Click Update to save your changes.
When a block is disabled, it is only visible to users with the "Can manage blocks" permission.
Select Manage blocks from the Block settings drop-down. The Manage Blocks pop-up opens.
Click on the Status button to change the value from Enabled to Disabled or vice versa.
Click Update to save your changes.
Select Manage blocks from the Block settings drop-down. The Manage Blocks pop-up opens.
Select the delete icon next to the block you want to delete.
Warning
When you delete a custom content block, the block is removed permanently. You can also delete Jenzabar-provided blocks, but selecting Restore defaults from the Block settings drop-down restores all the default blocks on the page.
Click Update to save the changes.
On the Case summary page, select Restore defaults from the Block settings drop-down. The Restore Defaults pop-up opens, asking if you're sure you want to restore the page to its original format.
Click Yes, restore defaults. Any custom content blocks are deleted and Jenzabar-provided blocks are restored in their original order.
Using the widget management tool, you can display up to three widgets and determine the order in which they appear.
To manage widgets, you must be in a Student Conduct Administrator or Student Life Module manager role (or a role copied from one of them) with the "Can manage widgets" permission enabled.
Hold your cursor over the ellipsis icon
 in the upper right corner of the page to see the Widget Settings menu.
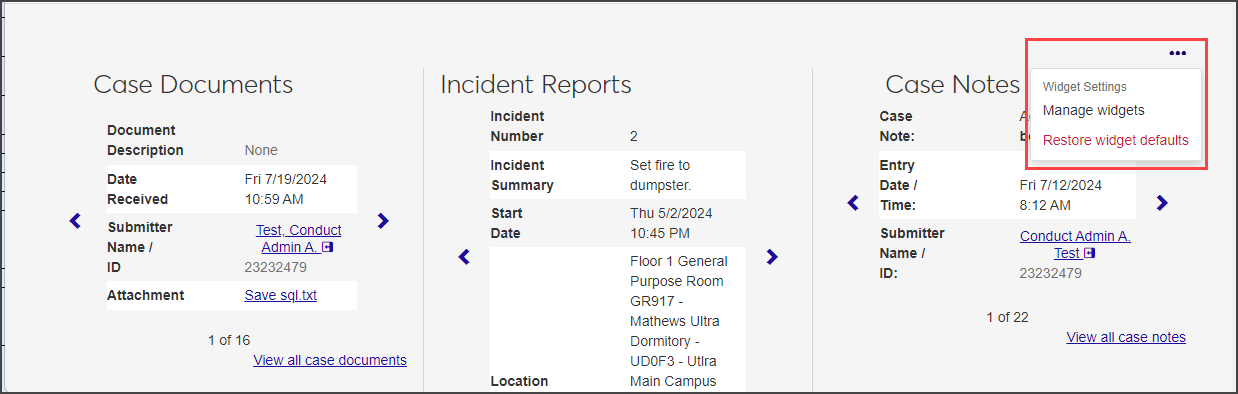
Select Manage widgets. The Case Widgets pop-up opens.
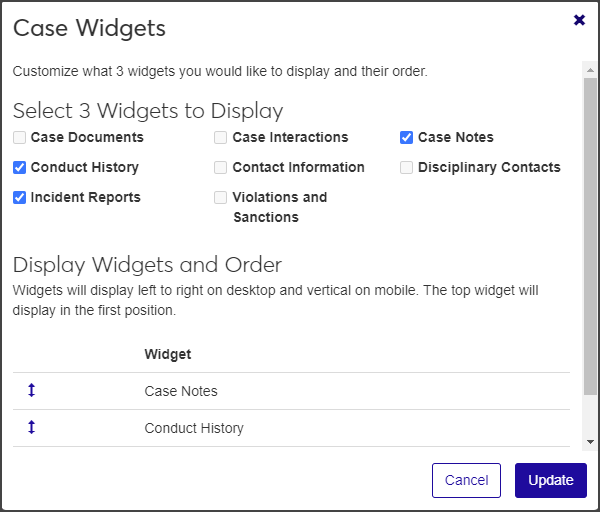
Select the checkbox next to each widget you want to display. You can select up to three. If three are already selected, you must deselect one before you can add another. When you select a widget, it is added to the list under Display Widgets and Order.
On the Case summary page, widgets are displayed in the order in which they were selected. To change the order, find the widget you want to move under Display Widgets and Order, hold your cursor over the vertical arrow until it changes to a hand icon, then click and drag the row to the new position.
To remove a widget from the Case summary page, deselect the checkbox next to the one you want to remove.
Click Update to save the changes and return to the Case summary page.
To expand or contract the widgets on the Case summary page, click the up or down arrow under the ellipsis menu. Clicking the down arrow expands the widget to show you more information; clicking the up arrow contracts the widget.
To restore the default settings, hold your cursor over the ellipsis icon and select Restore widget defaults, then click Yes, restore defaults in the Restore Defaults? pop-up.
The tabs on the Case summary page keep the case information organized and easily accessible. Most of the tabs include the same information and actions as their full-page counterparts, but the tab lists only the information associated with a specific case.
Each tab is described briefly below. Click the link to open a help topic with more detailed information about that tab.
Note
What you see on any given tab depends on your roles and permissions.
Incident Reports Tab: The Incident Reports tab lists all incident reports associated with the case. From this tab you can view incident details, edit the incident report's status, remove an incident report from the case, manage user-defined fields (if you have the necessary permissions), and view incident history.
Contact Information Tab: The Contact Information tab contains detailed contact information for the subject of the case. You can add and update contact details, create a new address record, copy contact information, view historical records, and manage user-defined fields in this tab (if you have the necessary permissions).
Case Interactions Tab: The Case Interactions tab lists the interactions, such as emails and phone calls, that have occurred in relation to the case. You can view details of each interaction, view and add internal comments, pull up audit information, and create new on-demand communications.
Case Documents Tab: The Case Documents tab includes all case documents attached to the case's incident reports as well as any documents uploaded from this tab. From here you can edit the document description (individually or in a batch), remove documents from the case, and upload additional documents.
Case Notes Tab: The Case Notes tab lists all case notes attached to the case. In this tab, you can view individual case notes and create new ones.
Violations and Sanctions Tab: In the Violations and Sanctions tab, you can manage all aspects of violations and sanctions for the case, including creating new violations and associating sanctions to them; copying and editing violations; and downloading a list of violations to an Excel file.
Disciplinary Contacts Tab: The Disciplinary Contacts tab lists contact information for all disciplinary contacts and allows you to assign a different contact to the case.
Conduct History Tab: The Conduct History tab provides an overview of all cases associated with the student (depending on your permissions). It displays detailed information about each case, including the type of violation, the sanctions associated with the violation, the status of the sanction, and the conduct department it's assigned to. From here you can download the list to an Excel file or generate a PDF.