Institutional Transcript Note Definitions
Important
Information and features vary according to the roles to which you belong and the permissions associated with those roles. For more information, contact your module manager or your campus support team.
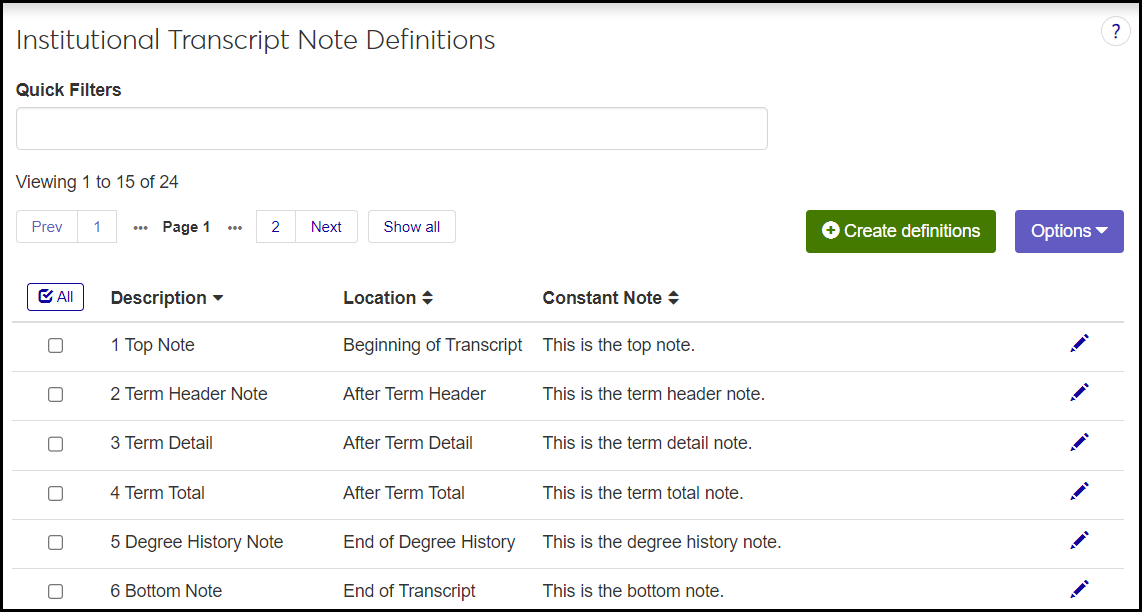
Use this page to define and maintain notes to include on transcripts. Each note is automatically assigned to a specific location on the transcript. Institutional Transcript Notes are also called Constant Notes.
Tip
All the notes defined on this page automatically appear on every transcript.
You can work with institutional transcript notes in Desktop on the Institutional Transcript Notes window.
The definitions are stored on the Transcript Institutional Note Definition table (trns_inst_note_def).
Description: trns_inst_note_def.note_def_desc
Location: trns_inst_note_def.note_loc
Constant Note: trns_inst_note_def.note_text
Sort Order: trns_inst_note_def.note_sort_ord
All the definitions defined on this page appear on every transcript.
Description: Up to 30 characters. Required.
Location: Select an option from the drop-down. Required. The options are provided by Jenzabar.
B - Beginning of Transcript
H - After Term Header
D - After Term Detail
T - After Term Total
G - End of Degree History
E - End of Transcript
Constant Note: Up to 70 characters. Required.
The permission needed is "Can manage institutional transcript note definitions". It's available on the Registrars and Registration Module Manager roles and roles copied from them.
From the Registration Administration hub, click the Hub options drop-down, and select Manage Definitions > Institutional transcript note definitions. The Institutional Transcript Note Definitions page opens.
Tip
Or use the universal search on the top right of the page. Select System Page, and enter "Institutional". Click Institutional Transcript Note Definitions in the results.
To reorder the list, do one of the following:
Click the column headings to reorder the list (ascending or descending) by that column.
Click the Edit order button. The Edit Sort Order pop-up opens.
You can change the order of definitions using either the Sort By and Order By drop-down menus or by dragging and dropping the definitions into your preferred order.
Sort By and Order By:
From the Sort By drop-down, select the column you want to sort by.
From the Order By drop-down, select Ascending or Descending.
Drag and drop:
Hold your cursor over the vertical arrow icon on the left side of the row until the cursor changes to a hand icon.
Click and hold while you drag the definition to the new location.
Release the mouse button.
Click Update. The pop-up closes, and the list order is changed.
To see all the fields, click the Expand icon
 .
.
Click the Create definitions button. The Create Institutional Transcript Note pop-up opens.
Enter information in the fields. All are required. See the Fields information above for guidance.
Click either Save and create another or Create and close.
Click the Edit icon
 on the row of a definition. The Edit Institutional Transcript Note pop-up opens.
You can edit the Constant Note and Location fields. Neither can be empty.
Click Update. The pop-up closes, and your edits are saved.
Delete Institutional Transcript Note Definitions
Every note on this page is automatically added to all transcripts generated in J1 Web. You don't add them on another page.
All notes on this page appear on all transcripts. Delete the note from this page to keep it from appearing on transcripts.
Use Individual Transcript Notes. From a student's Summary page, click the Person options drop-down, and select Student > Transcripts > Individual transcript notes. The student's Individual Transcript Notes page opens, and you can view, create, edit, and delete individual transcript notes. You assign them to a specific division and year/term for the student.