Additional Name Type Definitions
Important
Information and features vary according to the roles to which you belong and the permissions associated with those roles. For more information, contact your module manager or your campus support team.
The Additional Name Type page lets you view, download, and update the Jenzabar-provided degree, legal, married, professional, and transcript name types. Additional name types are used for individuals in the system on the Person Information Details page, Individual tab.
At this time, only additional name type descriptions can be updated. Additional name type definitions cannot be created, deleted, or deactivated.
To manage additional name type definitions, you must belong to a role with Can manage additional name types permission enabled. Jenzabar provides this permission with the Core, Campus-wide Definitions role.
Permissions to view the degree, legal, married, professional, and transcript names for individuals throughout the system and in reports are still managed in J1 Desktop on the Additional Name Types window (Settings, Common). For information about additional name type permissions, see the Additional Name Type help topic linked below.
Additional Name Type definitions can also be managed in J1 Desktop using the Additional Name Types window (Settings, Common). Updates made to the definition description in the Desktop are applied in J1 Web and vice versa.
Additional Name Type definitions are stored in the AlternateNameTypeDefinition table.
The additional name type definitions managed on this page are available as options when working with an individual on the Person Information Details page, Individual tab. These definitions let you track degree, legal, married, professional, and transcript names for an individual.
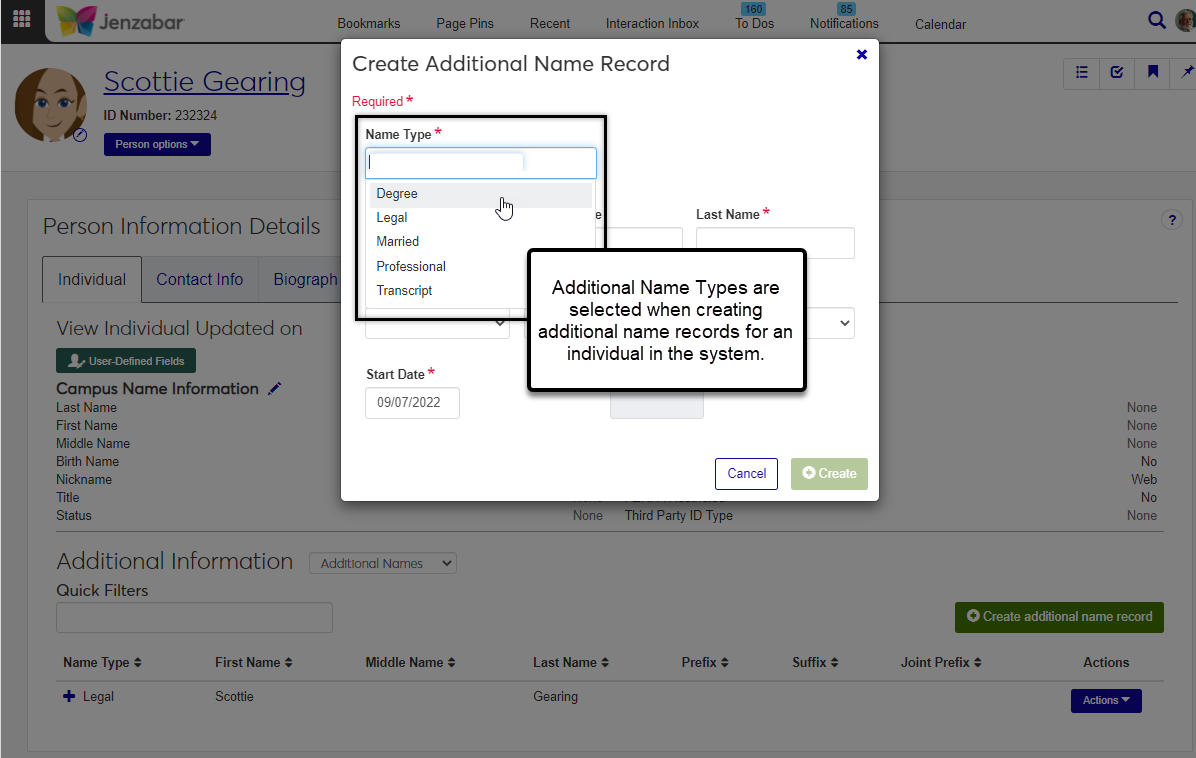
Additional Name Types include degree, legal, married, professional, and transcript names.
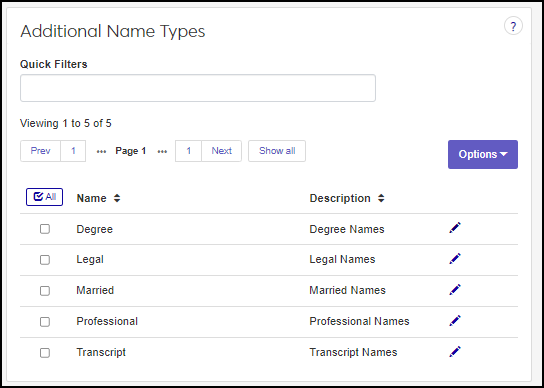
From the Core hub, select Campus-wide Definitions, Additional Name Types.
Click on a column heading to sort in ascending or descending alphabetical order.
To search for a definition, enter a phrase or characters in the Quick Filters field and press the Enter key. To remove a filter, click its remove icon.
Click Create definitions. The Create Additional Name Type Definitions window appears.
In the Name Type field, enter This field accepts up to 30 characters.
In the Description field, enter. This field accepts up to 60 characters.
Click Save and create another. or Create and close Your changes are saved and the Additional Name Type window closes.
At this time, you can only delete additional name types you have created.
Select the checkbox of the additional name type you want to delete.
From the Options drop-down, select Delete. This Delete Definitions? pop-up window appears.
Click OK. Your changes are saved and the Delete pop-up window closes.
At this time, only the description can be updated.
Click the Edit icon next to the definition you want to update. The Edit Additional Name Type window appears.
You can only edit the Description field. This field accepts up to 60 characters.
Click Update. Your changes are saved and the Edit Additional Name Type window closes.
Select the checkboxes next to the rows you want to export.
From the Options drop-down, select Download to Excel. The Download to Excel pop-up opens.
Select options for the Excel format and data columns.
Click Download. Your .xlsx or .zip file is saved in the file location that you have set in your browser settings.