Mass Add Attributes
Important
Information and features vary according to the roles to which you belong and the permissions associated with those roles. For more information, contact your module manager or your campus support team.
Use the Mass Add Attributes page to add attributes to individuals or groups of individuals. Attributes added from this page can be viewed on the Attributes tab of the Person Information Details page for each individual.
You can also add attributes to individuals from the Desktop Manage Attributes window.
Updates made from this page are saved to the ATTRIBUTE_TRANS table.
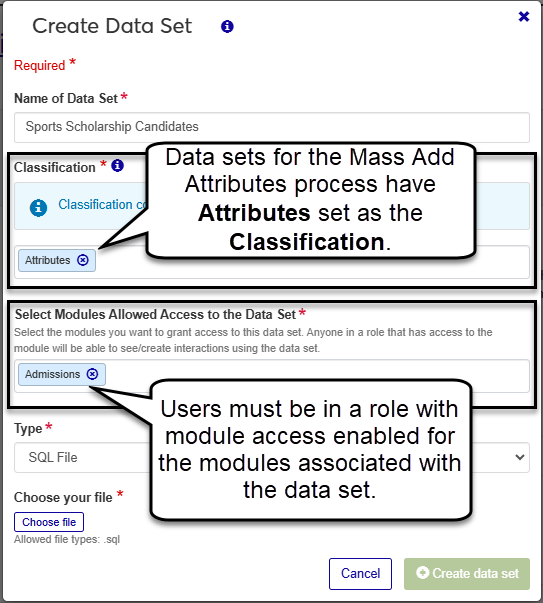
To access this page, you must be in a Core Processes role with the "Can mass add attributes" permission. Additionally, you'll need to be in a Person Management role with Associations enabled for one or more attribute types. If your school uses data sets to add individuals to the list, make sure that you have Module Access enabled for the modules associated with the relevant data sets.
Note
For more information about how associations are used for access to attributes, see Person Management Permissions.
J1 Web uses data sets to query the system for information. Jenzabar doesn't provide any default data sets for the mass add attributes process. However, you can upload SQL or InfoMaker files to J1 Web on the Data Sets page. When you create new data sets from your files, make sure the Classification is set to Attributes and that users who will run the process have Module Access enabled for the modules in the data set.
For detailed information about working with data sets, see Data Sets.
From the Core Processes Hub options menu, click Attributes to expand the drop-down list.
Select Mass Add Attributes. The Mass Add Attributes page opens.
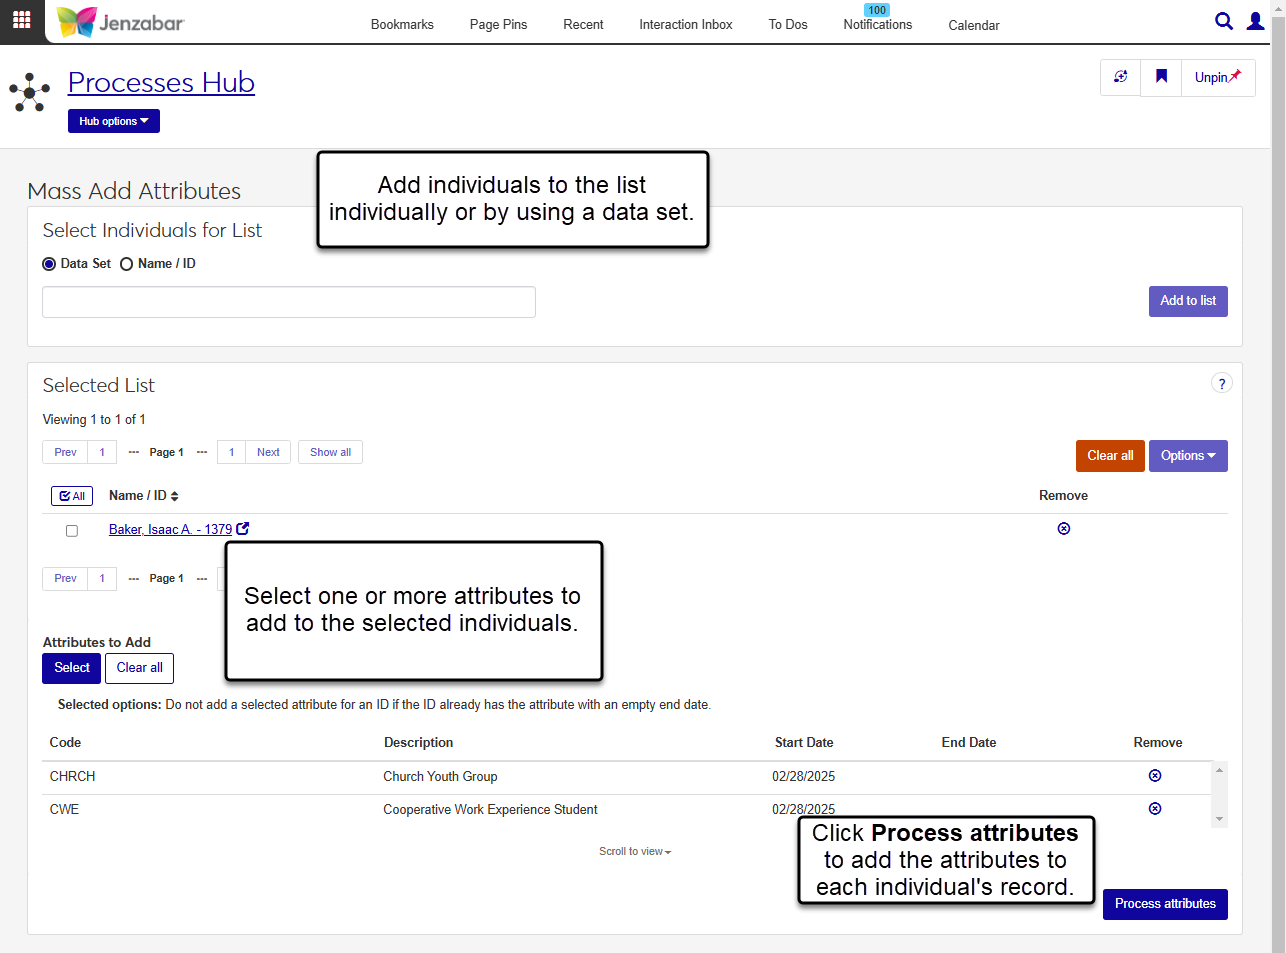
In the Select Individuals for List section, select either the Data Set or Name / ID radio button.
Data Set is the default selection. If your school has created custom data sets for this process, start typing the data set name in the field and select it from the drop-down list.
Select Name / ID to add people to the list one by one. Enter their name or ID number, then select them from the drop-down list.
Click Add to list. The Selected List section updates.
To make updates to the list:
Tip
If you have the appropriate permissions and access, you can click the name link to open the person's summary page in another browser tab.
Remove names from the list with any of the following options:
Click the Remove icon
 for the names you want to exclude from the process.
Select one or more names, click the Options button and select Remove.
Click the Clear all button to remove all names from the list.
To review and select attributes to associate with the listed individuals:
Note
Only active attributes associated with Attribute Types you have access to are displayed.
In the Attributes to Add section, click the Select button. The Attributes to Add pop-up opens.
The Do not add a selected attribute for an ID if the ID already has the attribute with an empty end date. checkbox at the top of the pop-up is selected by default. Deselect it if desired.
Update the Start Date and End Date fields as needed. Today's date is the default. When one or more attributes are selected from the list, click the Add to selected rows button next to either date to apply that date to the selected attributes.
Select the attributes you want to add to individuals.
Tip
Use the Quick Filters field to decide if you want to see attributes that appear on the Campus Portal:
To see all, don't apply a filter.
To see only attributes that appear on the Campus Portal, select Yes.
To see only attributes that do not appear on the Campus Portal, select No.
Review the attribute details and click the editable fields to update the attributes if needed.
Click Select. The pop-up closes and the Attributes to Add list updates with your selections.
Review the attribute list and click the Remove icon
to delete any from the list.Click the Process attributes button. An alert displays at the bottom of the page when the attributes have been associated with the selected individuals.
In the Selected List section of the Mass Add Attributes page, select the checkboxes next to the rows you want to export.
From the Options drop-down, select Download to Excel. The Download to Excel pop-up opens.
Select options for the Excel format and data columns.
Click Download. Your .xlsx or .zip file is saved in the file location that you have set in your browser settings.
Changes to the attribute details are added as rows to the ATTRIBUTE_TRANS table for each individual the attribute is associated with. The ATTRIBUTE_DEF table isn't updated.
You'll only see data sets that are associated with modules you have access to, so you may not have access to the data sets or your school may not have created any data sets for this process. Module access is managed in each role on the Module Access tab. Contact your campus support team for more information.