Grade Comment Definitions
Important
Information and features vary according to the roles to which you belong and the permissions associated with those roles. For more information, contact your module manager or your campus support team.
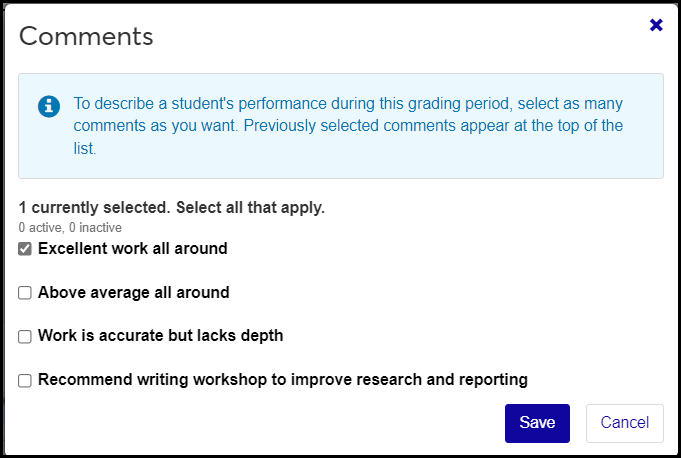
Grade comments are preset notes that instructors can select when they enter grades on the J1 Web Grade Entry page. (In addition to selecting these preset notes, instructors can compose remarks and narratives.)
For each grading period, your school decides whether comments are available to instructors, and whether they're required. These selections are made on the Grading Period Definitions page.
Desktop Location
You can manage grade comment definitions in Desktop, too, on the J1 Web Grade Comments Definition window. (Yes, it's a window in Desktop called "J1 Web . . .".) Grade comments defined in Desktop are available in J1 Web.
Database Location
Grade comments are stored on the Grade Comment Definition table (gradecommentdef.comment).
Instructors select grade comments in J1 Web on the Grade Entry page for a course section. (These comments are not available in J1 Desktop Grade Entry or in the Campus Portal Grade Entry feature.)
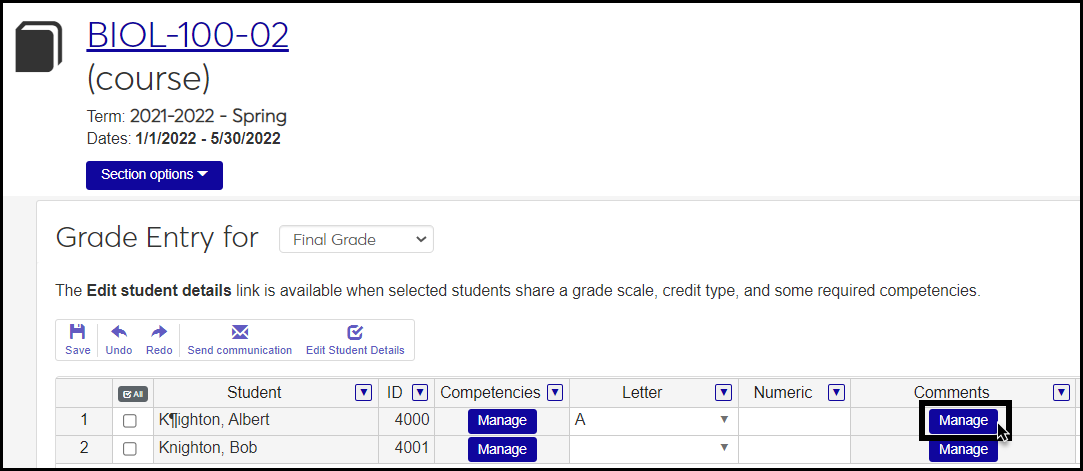
Short Comment: Required. Up to 20 characters. This does not appear on Grade Entry.
Comment: Required. Up to 255 characters. This appears as a selectable comment on Grade Entry and in a student's grade report.
Active: Default is Yes. You can set to No if you don't want the comment to be available for selecting.
Permission to manage grade comment definitions is available in these roles:
Registrar
Registration Module Manager
The permission required is "Can manage grade comment definitions".
From the Registration Administration hub, click Hub options.
Click Manage Definitions, and select Grade comment definitions. The Grade Comment Definitions page opens.
To filter the definitions, enter a phrase in the Quick Filters field. To remove a filter, click its Remove icon
 .
.To temporarily sort the definitions, click the heading of the column you want to sort on. Click once for ascending order and again for descending order. The definitions are sorted for this viewing of the page, but the next time you view or refresh the page, it will return to its default sorting.
Click Edit order. The Edit Order window opens.
You can use the Sort By and Order fields or drag and drop individual definitions.
Sort By and Order:
In Sort By, select a column to sort on.
From the Order drop-down, select Ascending or Descending.
Drag and Drop:
Hover your cursor over the vertical arrow icon
 until the cursor changes to a Hand icon
  .
.Click and hold while dragging the definition to the desired location.
Release the mouse button.
Click Update.
Click the Create definitions button. The Create Grade Comment Definitions pop-up appears.
In Short Comment, enter up to 20 characters. Required.
In Comment, enter up to 255 characters. Required. This is the comment that appears in Grade Entry and in a student's grade report.
In Active, leave the value as Yes if you want the comment to be available to assign to student grades. Otherwise, select No.
Click Create and close or Save and create another.
Click the Edit icon
 on the row of a definition. The Edit Grade Comment Definition pop-up opens.
You can edit the Comment field. Up to 255 characters. This is the comment as it appears in Grade Entry and in a student's grade report.
You can change the Active selection to make the comment available (Yes) or not (No).
Click Update.
Select the checkboxes next to the rows you want to export.
From the Options drop-down, select Download to Excel. The Download to Excel pop-up opens.
Select options for the Excel format and data columns.
Click Download. Your .xlsx or .zip file is saved in the file location that you have set in your browser settings.
No. They're for J1 Web Grade Entry only. (And if your school is using J1 Web Grade Entry, then Campus Portal Grade Entry isn't available.)
Two settings must be set to "Yes" to make a comment available:
Active
On the Edit Grade Comment Definitions page, change the comment's Active value from No to Yes.
Display on Grade Entry
On the Grading Period Definitions page, click the Edit icon
on the row of the appropriate grading period (such as Final). The Editing Grading Period Definition pop-up opens. For Display on Grade Entry, select Yes. Click Update.