Student Housing Session Roster
Important
Information and features vary according to the roles to which you belong and the permissions associated with those roles. For more information, contact your module manager or your campus support team.
The Manage Session Roster page lists all the students who have been added to this session. You can select students on the roster and update details, such as applicant group, commuter/resident status, bedroom assignment, and meal plan.
To access the Manage Session Roster page from the Session summary page, select Housing options > Manage session roster from the Session options drop-down.
Because the Session Roster can be very long, you can use filters or data sets (or both) to narrow the list.
The View Students by Data Set feature lets you select a predefined data set such as "Incoming Freshmen" or "Off-Campus Students." Available options include all data sets with the classification "Session Roster." Data sets are defined on the Data Sets page found in the Campus-wide Definitions hub.
Note
For more details, see Create a Data Set for a Session Roster below. For more information about data sets in general, see Data Sets.
The Student Filter lets you narrow the list by a number of student-related criteria. Select some or all filters, then select values for them. For example, you could search for specific students, students in a particular applicant group, or sophomores who live on campus and have a meal plan.
Tip
If you selected a data set, the filter narrows down the results of that data set. If you don't select a data set, the filter narrows the complete list.
Data sets are created by your school's IT team on the Data Sets page in the Campus-wide Definitions hub. The instructions below are intended for that team. Ask them to create the data sets you need.
Create a data set file using a third-party application such as Bold Reports, InfoMaker, Rest API, Source, or SQL.
Note
The first column must be the ApplicantGroupStudentAppI (an alias is not required). This is the only required column.
From the Campus-wide Definitions hub, select Data Sets from the Hub options drop-down. The Data Sets page opens with the People/Organizations Lists view selected.
Click the Create data set button. The Create Data Set pop-up opens.
In the Name of Data Set field, enter a descriptive name for the data set.
Click in the Classification field and select Session Roster.
In Select Modules Allowed to Access the Data Set, select Student Life.
In the Type field, select the type of file you have made for your data (Bold Reports, InfoMaker, Rest API, Source, or SQL).
The next actions vary depending on the type of file you selected in the Type field:
If you selected SQL, click the Choose file button, select the file you want to use, and click Open.
If you selected InfoMaker, click the PBL field and select the correct option, then select an option from the Query field.
If you selected Source, click in the Select One or More Sources field and choose an option.
When you are done, click the Create data set button. Your data set now appears in the Data Set list under View Students by Data Set on the Session Roster page.
To view the details of your data set, navigate to the the Data Sets page in the Campus-wide Definitions hub, click the Actions drop-down for the row of your data set, and select View Details. The View Details pop-up opens. To download the details, click the Download query syntax button.
The following information is displayed for each student on the roster. Click the plus icon next to a student's name to expand the row and display all columns.
Field | Description |
|---|---|
Student Name | Click the name to open the student's summary page. |
Status in Session | The student's residence status (for example, Bedroom assigned; Checked in; Applied, not assigned; or Hasn't applied0. If the status is Bedroom assigned, Checked in, or Applied, not assigned, the application or check-in date is included. |
Bedroom | The bedroom the student has been assigned to, if applicable. Click the bedroom name to open the Manage Residence Spaces page specific to that room. |
Building | If the student has been assigned to a bedroom, this column displays the building that includes the assigned bedroom. Click the building name to open the building's summary page. |
Action | The options on the Actions drop-down allow you to assign a bedroom and view resident history. If the student has already been assigned to a bedroom, you can assign an empty room slot; clear the current bedroom assignment; check in a resident; or swap the bedroom with another resident. If the student has already been checked in, you can also check the student out from this page. Refer to the How To section below to see instructions for these actions. |
Suite | If the student has been assigned a bedroom in a suite, the name of the suite is displayed here. Click the suite name to open the suite summary page. |
Applicant Group | The applicant group the student has been assigned to. To assign the student to a different applicant group, click the pencil icon, select a new applicant group from the drop-down, and click Save. |
Campus Box Number | The student's campus box number, if one has been assigned. To add or update the number, click the pencil icon, enter the box number in the field, and click Save. |
Classification | The student's classification, e.g., Freshmen or Senior. This value cannot be edited from this page. |
Deposit Received Date | The date the student's deposit was received, if applicable. To add or edit the date, click the pencil icon, use the pop-up calendar to choose the correct date, and click Save. |
Division | The student's division, e.g., Undergraduate or Graduate. This value cannot be edited from the Session roster. |
Meal Plan | The meal plan the student has been assigned, if applicable. To edit the meal plan, click the pencil icon, select another meal plan from the drop-down, and click Save. |
Roommates | The names of the student's roommates, if applicable. Click the roommate's name to open the student's summary page. |
Suitemates | If the student lives in a suite, the names of the suitemates are listed here. Click a name to open the student's summary page. |
Student Type | The student's type, e.g., Resident, Commuter, Online Only, etc. To update the student type, click the pencil icon, select a new student type from the drop-down, and click Save. |
When Copying to Another Session | Indicates what information will be included if you copy this student to another session: Copy student and preserve bedroom assignment, Copy student, but don't preserve bedroom assignment, or Don't copy this student. To edit, click the pencil icon, select a new option from the drop-down, and click Save. |
How To
From the Session summary page, click the Hub options drop-down and select Housing options > Manage session roster. The Manage Session Roster page opens.
To narrow the list of students, use the Student Filter or a data set.
To use the Student Filter:
Click the Filter icon to expand the filter (if it is not already expanded).
Select a filter, then select an option from its drop-down. The contents of the drop-downs vary depending on the filter category.
Select as many filters as you need.
Click the Apply button.
To use a data set, click the Expand arrow icon next to the View Students by Data Set heading.
Click in the Data Set field and select an option.
Click the Select button to apply the data set and narrow the list of students.
On the Manage Session Roster page, locate the student you want to assign to a room.
From the Actions drop-down for the student, select Assign a bedroom. The Update Bedroom Assignment pop-up opens.
Click in the Select a Bedroom with Remaining Room Slot field and type or select the name of the room that has an available slot. This field is required.
If you would like an email notification sent to the student who will be assigned to the room, check the option at the bottom of the pop-up.
Click Update to save the student's room assignment.
On the Manage Session Roster page, locate the student whose room assignment you need to swap.
From the Actions drop-down for the student, select Swap with another resident. The Update Bedroom Assignment pop-up opens.
Click in the Select a Resident / Room Slot field and begin typing the name of the student you want to swap with. Select the correct name when it appears.
If needed, select a Reason for the change or enter a Comment.
If you want an email notification to be sent to the residents affected, select the email notification checkbox at the bottom of the pop-up.
Click Update to save the changes and close the window.
On the Manage Session Roster page, locate the student whose resident history you need to review.
From the Actions drop-down, select View resident history. The View Resident History pop-up opens, displaying the student's room assignment history.
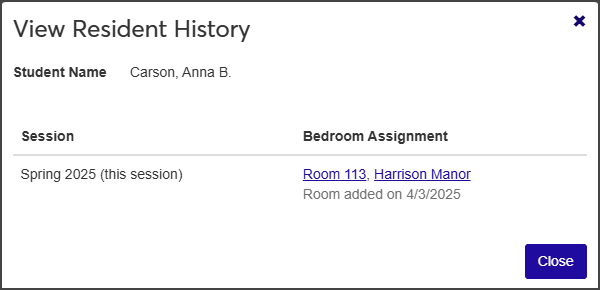
Click the available links in the Bedroom Assignment column to open the session, room, suite, or residence hall summary pages.
When you are done, click Close.
On the Manage Session Roster page, select the checkbox next to each student you want to send the email to.
Select Send communication from the Options drop-down. The Create New Communication window opens
The Communication Type, Interaction Code, Name/Description, From, To, and Contact Type fields autofill with the relevant options. You can edit all fields but the recipients and the contact type.
Enter a Subject. This field is required.
Type your message in the Body text field. Use the editing toolbar as needed to format your text.
To include bedroom assignment information, check the box under Attachments. The email subject and message will be the same for all recipients, but the bedroom assignment information will be specific to each student.
When you are done, click Send.
From the Manage Session Roster page, you can update meal plans for a single student or for multiple students at once.
Note
Resident/Commuter status only affects whether or not a student can be assigned to a resident bedroom. When a student is designated as a commuter, that student cannot be requested as a roommate or be assigned to a bedroom. If a student is already assigned to a bedroom and their status is changed from resident to commuter, they will automatically be removed from the bedroom assignment.
On the Manage Session Roster page, select the checkbox next to each student whose status you need to update.
From the Options drop-down, select Update details for selected students. The Update student details pop-up opens.
From the Select a Detail to Update drop-down, select Student Type.
Select the new student type from the adjacent drop-down.
Click Update to save the change.
You can also update the following details from the Manage Session Roster page:
Applicant Group
Campus Box Number
Deposit Received Date
When Copying to Another Session
To edit, click the plus icon next to the student whose details you need to update, then simply click the pencil icon next to the detail you need to update, select or enter the new information, and click Save when you're done.
Select the checkboxes next to the rows you want to export.
From the Options drop-down, select Download to Excel. The Download to Excel pop-up opens.
Select options for the Excel format and data columns.
Click Download. Your .xlsx or .zip file is saved in the file location that you have set in your browser settings.
Yes! This is simple but requires some extra setup.
On the Session summary page, click the Residence Spaces link on the Housing Application block to open the Manage Residence Spaces page. From here you can set the applicant group for the group you want to make this space available for.
If you are only going to change a small number of spaces, you can click on the plus sign beside the row to expand the details for that space and click the pencil icon next to Applicant Group to make it editable. Select a new Applicant Group and click Save.
If you have a larger number of spaces to change:
Select the checkbox beside each row you want to include.
Select Edit space details from the Options drop-down. The Edit Space Details pop-up opens.
Select Applicant Group Restriction from the Select a Detail to Update drop-down.
Click in the adjacent field and select the applicant group you want the spaces to be limited to. Now only applicants in the group you chose will be able to select these spaces.
Note that you can add multiple applicant groups. For example, if rooms are only available for juniors and seniors, enter those two applicant groups in the residence space details.
Keep in mind that adding the applicant group for certain spaces limits those spaces, but not others. For example, if you have a group of rooms where you want freshmen to be assigned, you will need to assign those spaces to the freshman applicant group (only freshmen can select them), AND assign any other spaces that freshmen are eligible to choose.
Set up meal plans from the Residence Life Administration hub. In the Hub options drop-down, select Manage Meal Plans. From here you can add or remove meal plans that can then be assigned to students. For more information, see Manage Meal Plans