Gender Identity Definitions
Important
Information and features vary according to the roles to which you belong and the permissions associated with those roles. For more information, contact your module manager or your campus support team.
The Gender Identity Definitions page lets you manage gender identity options. These can be associated with individuals in your system to reflect the sex (male or female) assigned to an individual at birth. They can also also be associated with a room such as a bathroom or dormitory room.
Gender identity can be updated from the Gender Identity and Legal Sex fields in the following locations:
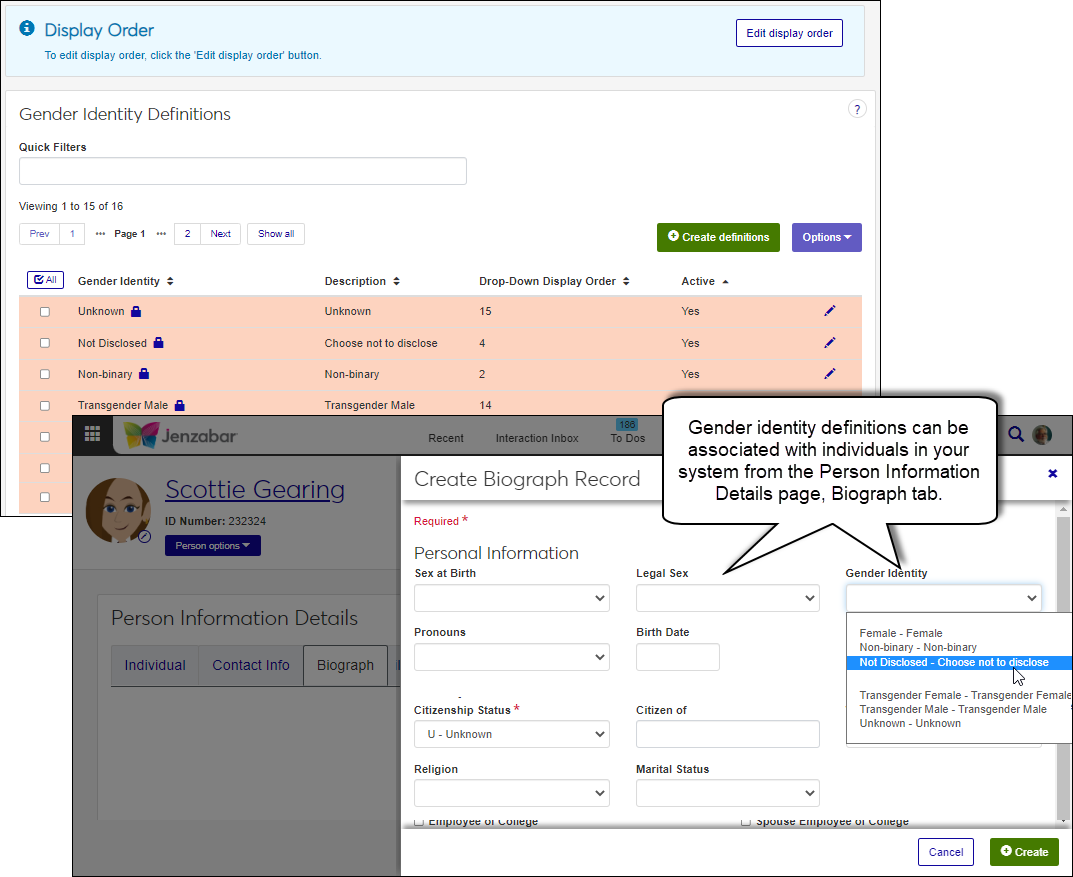
J1 Web, Person Information Details page, Biograph tab
Desktop, Name Entity window, Biograph tab
Campus Portal, FormFlow, Jenzabar-provided Student Identity Update form
The form collects sex at birth, legal sex, gender identity, and preferred personal pronoun information. Information collected using the form is immediately saved to J1 Web and Desktop without requirement the internet submissions process and approval.
To manage gender identity definitions, you must belong to a role with "Can manage gender identity definitions" enabled. Jenzabar provides this permission with the Core, Campus-wide Definitions role, but your school may have created a customized version of this role.
Gender identity definitions can also be managed using the Desktop's Gender Definition window. Changes made in J1 Web are saved in Desktop, and vice versa.
Gender identity definitions are saved in the GenderIdentificationDefinition table.
From the Core, Campus-wide Definitions hub, select Gender Identity Definitions or use the global search in the top right-hand corner of the system. The Gender Identity Definitions page appears.
To search for a definition, enter a phrase or characters in the Quick Filters field and press the Enter key. To remove a filter, click the x icon.
To sort definitions, click on a column heading to sort in ascending or descending order.
From the Core, Campus-wide Definitions hub, select Gender Identity Definitions or use the global search in the top right-hand corner of the system. The Gender Identity Definitions page appears.
Click the Create definitions button. The Create Gender Identity Definitions pop-up window appears.
In the Gender Identity field, enter a recognizable label. This field is limited to 30 characters.
In the Description field, enter a brief description to help others determine which definition should be used when selecting it in the system. This field is limited to 60 characters.
From the Active drop-down, select Yes or No. Inactive definitions cannot be associated with individuals in the system.
To create another definition, click the Save and create another button and repeat steps 3 - 5. If you're finished creating definitions, click the Create and close button.
Note
Gender identity definitions are saved in the GenderIdentificationDefinition table.
Click the Edit order button. The Edit Order pop-up opens.
You can use the Sort By and Order options and/or drag and drop individual definitions.
Sort By and Order:
From the Sort By options, select a column to sort on.
From the Order options, select Ascending or Descending.
Drag and Drop:
Hover over the up and down arrow until it changes to the hand icon.
Click and hold while dragging the definition to the new location.
Release the mouse button.
Click the Update button. The Edit Order pop-up closes and the definitions now appear in your saved order wherever they appear in drop-downs.
Note
Gender Identity and Description information for Jenzabar-provided definitions cannot be updated. You can only activate/deactivate Jenzabar-provided definitions.
From the Core, Campus-wide Definitions hub, select Gender Identity Definitions or use the global search in the top right-hand corner of the system. The Gender Identity Definitions page appears.
Click the Edit icon for the definition you want to update. The Edit pop-up window appears.
Make the needed updates.
Click the Update button. Your changes are saved and the Edit pop-up window closes.
From the Core, Campus-wide Definitions hub, select Gender Identity Definitions or use the global search in the top right-hand corner of the system. The Gender Identity Definitions page appears.
Select the definitions you want to delete.
From the Options drop-down menu, select Delete. The Delete Definitions? pop-up window appears and lists the selected definitions in two categories:
Ready to Delete lists definitions that can be deleted
Unable to Delete lists definitions that can't be deleted, either because they're in use or are protected by the system
Click the Yes, delete button. The definitions are deleted and the Delete Definitions pop-up window closes
Select the checkboxes next to the rows you want to export.
From the Options drop-down, select Download to Excel. The Download to Excel pop-up opens.
Select options for the Excel format and data columns.
Click Download. Your .xlsx or .zip file is saved in the file location that you have set in your browser settings.
Jenzabar-provided gender identity definitions are identified with a lock icon cannot be deleted. They can be deactivated if you no longer need to use them.
To deactivate:
Find the definition you want to deactivate.
Click the Edit icon. The Edit Definition window appears.
From the Active drop-down, select No.
Click the Update button.
No, Sex at Birth drop-down options are managed on the Maintain Table Values page.