Close a Month
Important
Information and features vary according to the roles to which you belong and the permissions associated with those roles. For more information, contact your module manager or your campus support team.
Month close is an accounting process within Jenzabar One General Ledger that finalizes and closes out all financial activity for a business for the selected month, reviewing, documenting, and reconciling all financial transactions for that period.
This process applies all of the transactions for the month to their respective accounts, and affects the balances on the GL Account Master table, budget amounts, variance percentages, and future projections.
Specific functions must be completed in the General Ledger module before you can perform the month end close.
Monthly Adjustments (generate / edit / post)
Batches (edit / post)
GL Transactions (post any remaining)
To complete all steps in the wizard, users would need to have the following permissions:
General Ledger Accounting Processes: Can close a month
General Ledger Accounting ... Batches: Can post, edit, delete, and unlock batches
Month Close Process
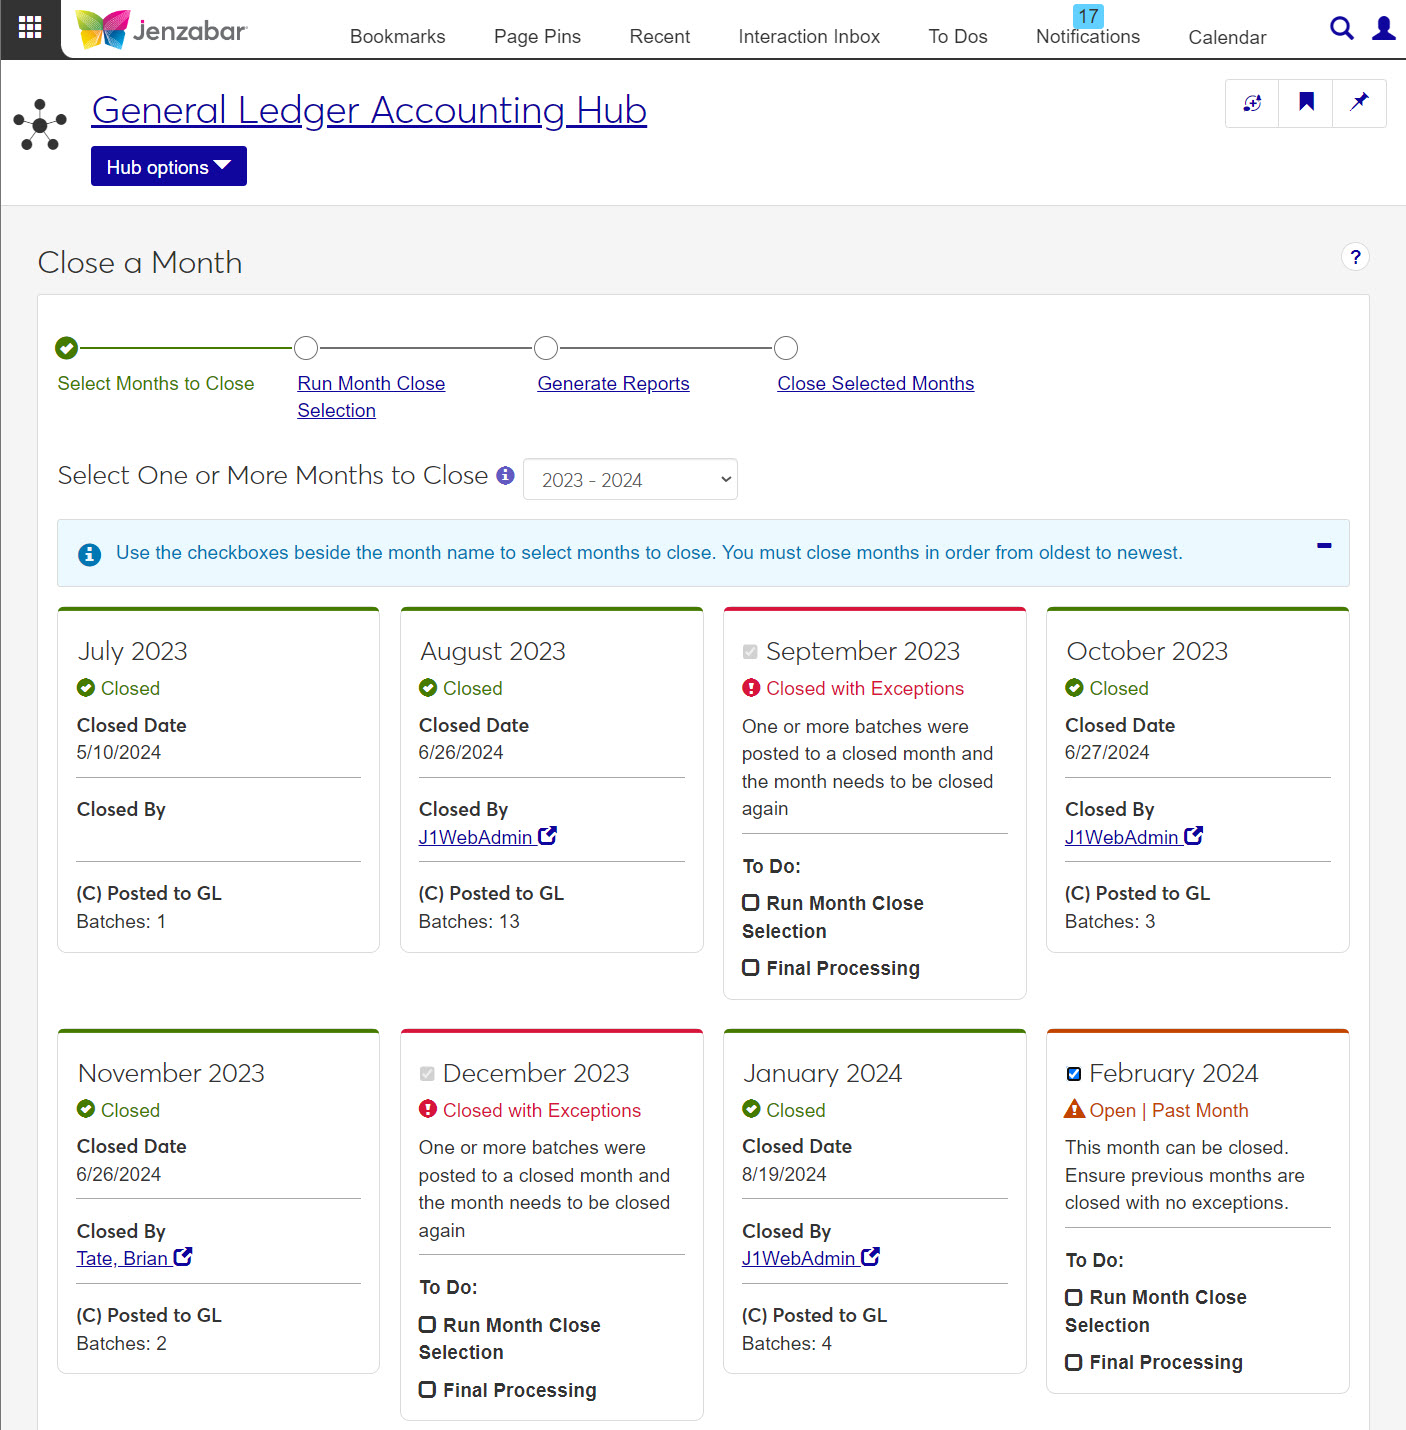
The Month Close process in J1 Web is designed as a wizard. At the top of the page, you will see a progress trail with circles representing steps. Click each link (in the correct order) to move through the process steps. As you complete a step, the circle at the top will be filled with a checkmark, indicating you've completed the step.
Note
There are some important notes for closing a month.
You must close months in order, from oldest to newest.
While a month can be closed with exceptions, you will need to ensure the month is closed again before moving to the next month.
Each month is on a card. Each card will have details to help you know what needs to be done for each month.
In the first step, you will select one or more months by clicking the checkbox next to the month you want to close.
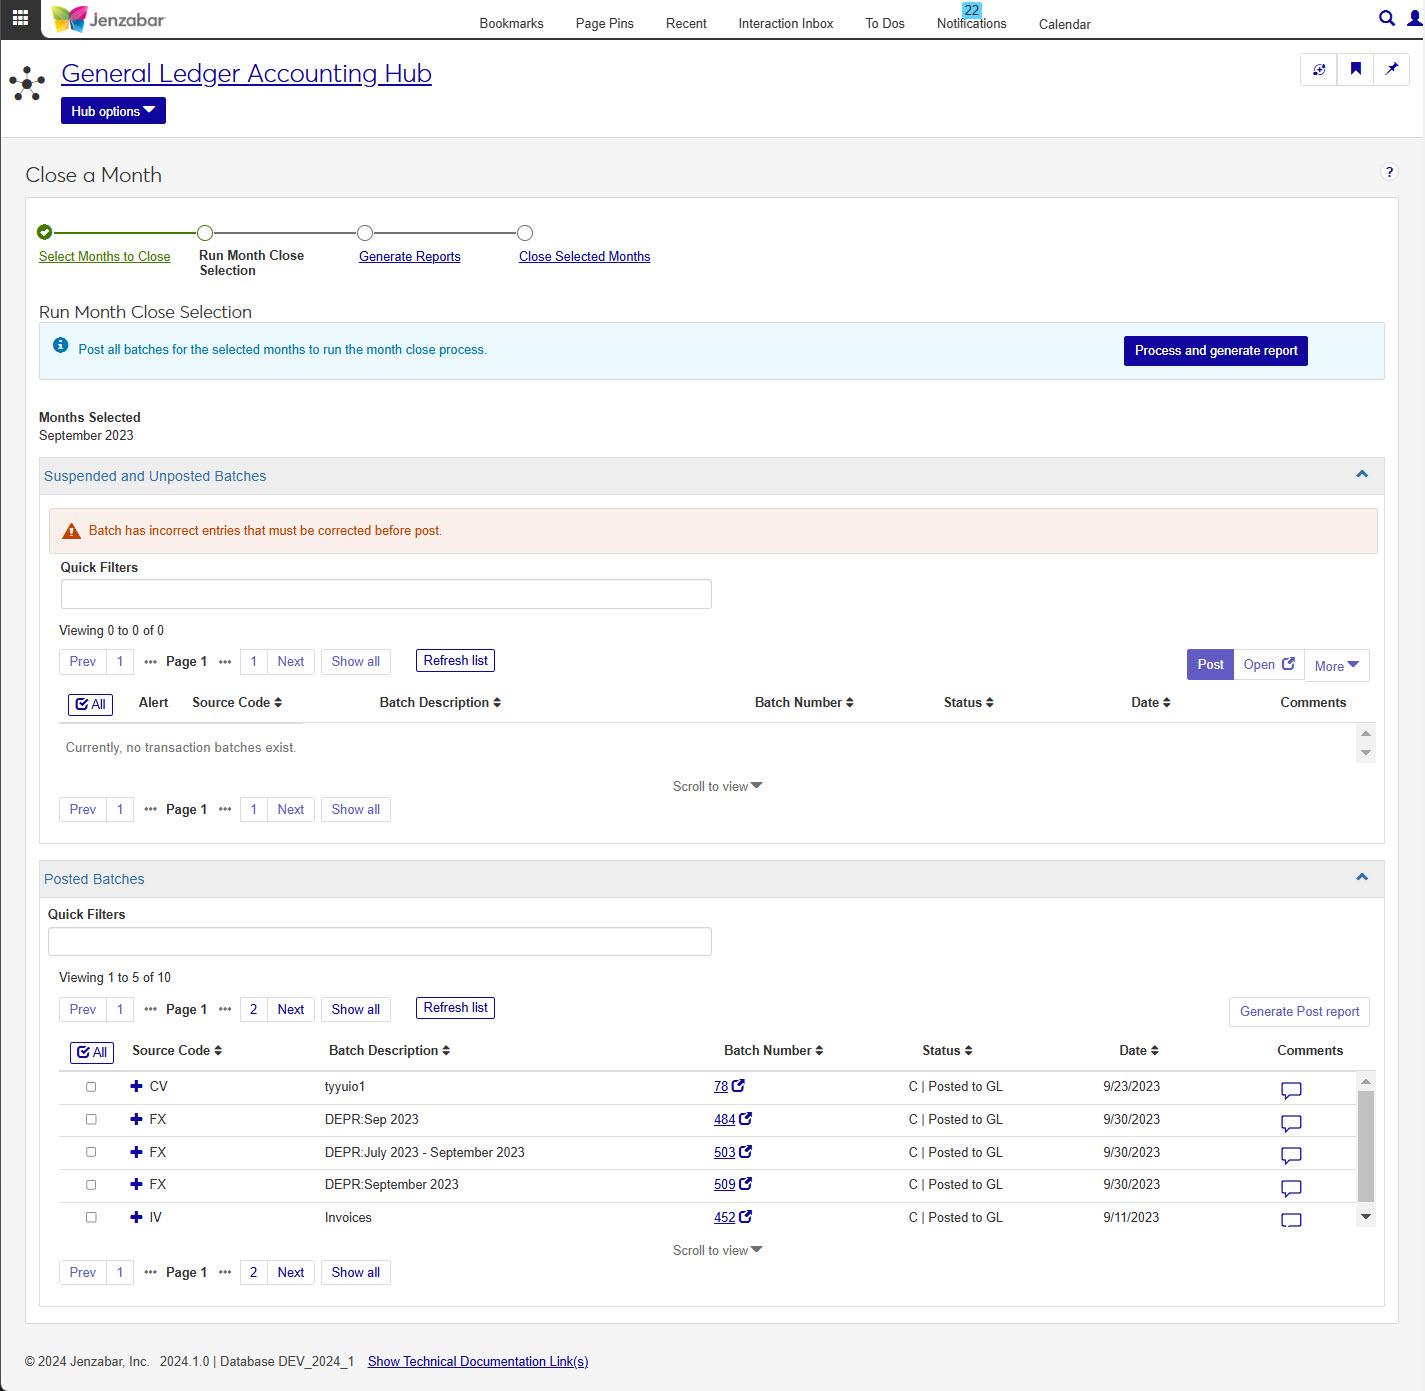
Once you've selected a month, you'll need to make sure all batches are posted and ready for closing.
Suspended and Unposted Batches
Any batches in the Suspended and Unposted Batches section will need to be posted with any errors corrected or removed before continuing. The goal is to have this section empty before running the Month Close Selection report.
From this section, you can quickly view batch details, link out to the batches page to make corrections and add comments. You can also select batches to post. Be sure to click the Refresh List button after making any changes.
Print Edit Report
This report will show you batches and transaction details that you can review to help you make sure all details are correct and ready for posting. If you make changes, be sure to run this report again before the actual posting takes place.
Posted Batches
From this section, you can review the posted batches and generate the Post report. The batches here are the ones that will be included in the Month Close.
Post Report
This report will display the batches and transaction details that have been posted for the selected batches.
Process and Generate Report
Once the Suspended and Unposted Batches section is empty, and you review the Posted Batches section, you're ready to run the Month Close Selection report.
At the top of this page, click the Process and generate report button. You can choose to run the process only or run the process and generate a report.
When the process runs the following will happen:
GL accounts will automatically be recalculated for the selected year and month (determined by the months selected in Step 1)
All posted transactions in the selected month(s)'s Month Close Flag will be updated to 'Y'
There are three reports to generate and review:
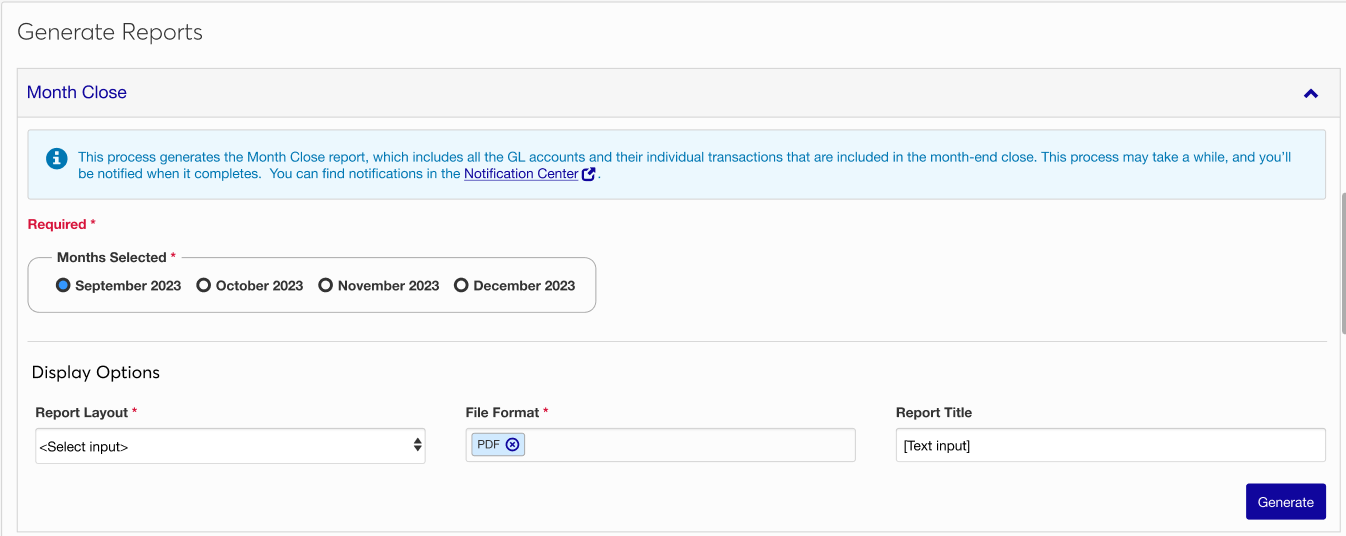
The Month Close report, includes all the GL accounts and their individual transactions that are included in the month-end close. For more information see the Month Close Report page.
Tip
This report is informational only allowing you to see accounts and transactions that will be included in your month close process.
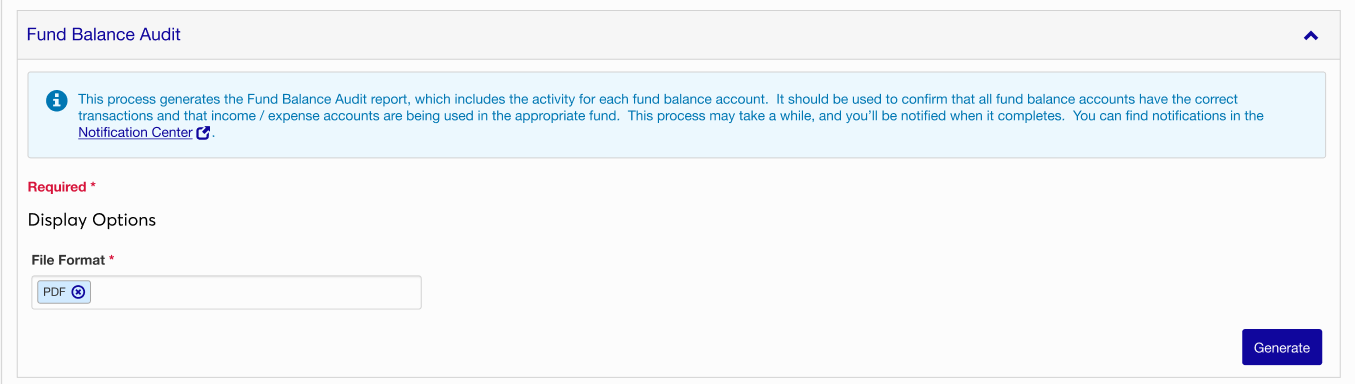
The Fund Balance Audit report, includes the activity for each fund balance account. It should be used to confirm that all fund balance accounts have correct transactions and that income / expense accounts are being used in the appropriate fund. For more information, see the Fund Balance Audit Report page.
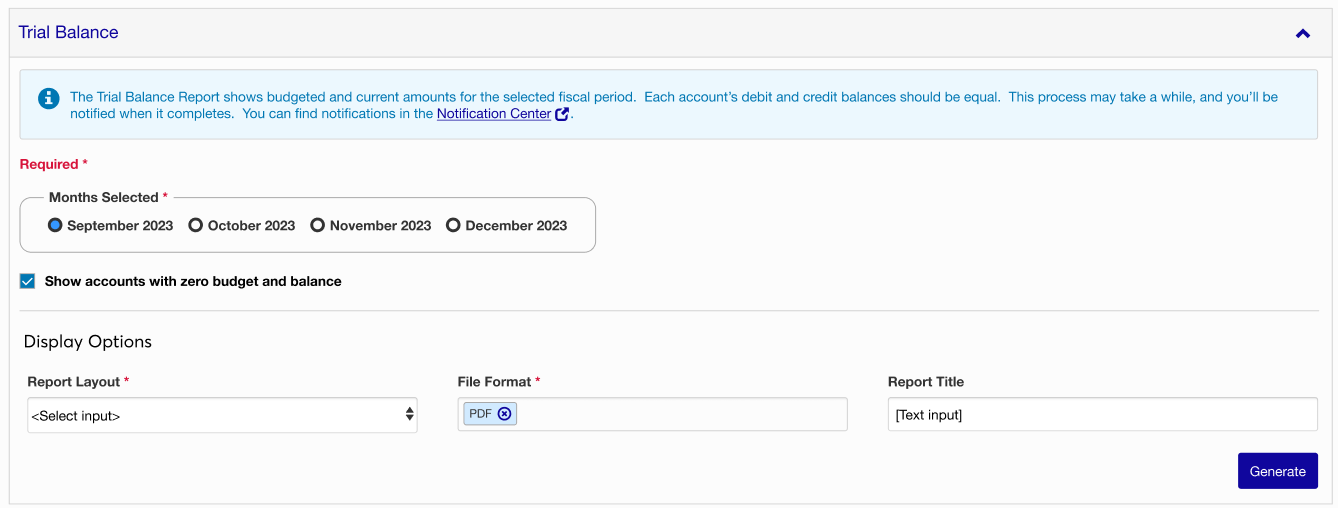
The Trial Balance Report shows budgeted and current amounts for the selected fiscal period. Each account's debit and credit balances should be equal. This is the final step in the Month Close Process. For more information, see the Trial Balance Report page.
Tip
You must complete all the required steps of the Month Close process before running the Trial Balance report. The transactions selected are determined by the Month Close Selection window.
To finalize the closing of a month, you'll need to click the Close [Month] button. This step will show any months that are ready or unable to close.
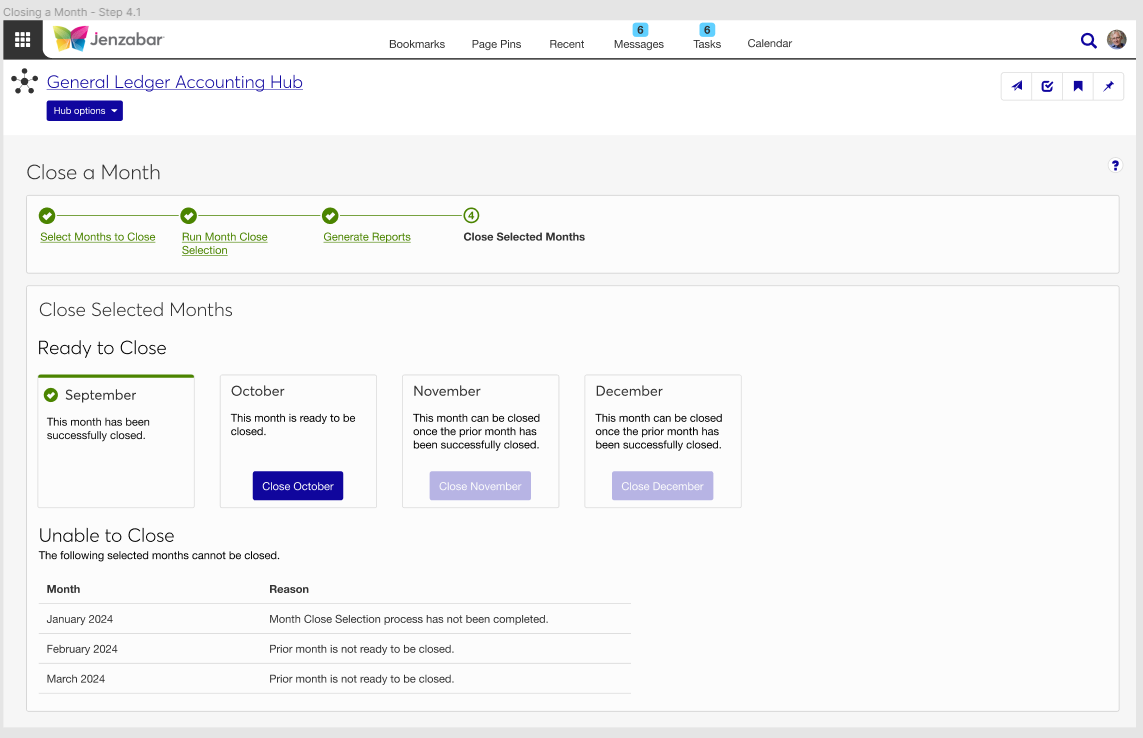
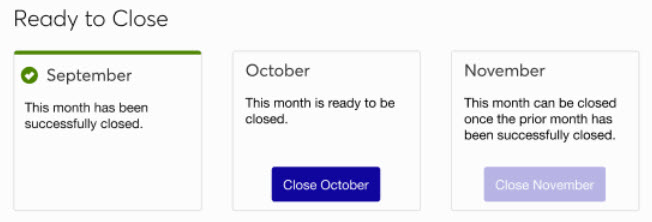
Ready to Close
Months in this section are ready for final processing. Click the Close [Month Name] button. If you're closing multiple months, they must be closed in sequential order. Notice the change in status and options as you close each month. The description for each month will let you know if something needs to be completed.
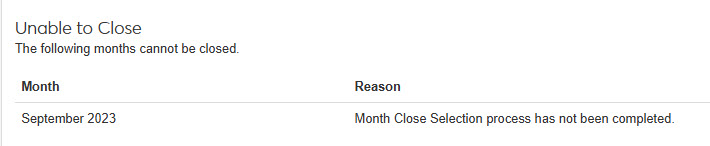
Unable to Close
If a month in the process couldn't be closed, they will appear in this section. There are several reasons a month might not be able to close, and the issue for the listed month will be in the Reason column. Correct any issues with the month and run the Month Close process again.
From the General Ledger Accounting hub, select Close a Month.
From Step 1 Select Months to Close in the wizard:
From the Select One or More Months to Close drop-down, select the year (current or future).
Click checkboxes for the month or months you want to close.
Click the Step 2 Run Month Close Selection link at the top of the wizard.
From Step 2 Run Month Close Selection in the wizard:
Make sure the Suspended and Unposted Batches section is empty. If it's not, make any corrections needed, click Refresh List and Post. You can also generate the Print Edit Report from the More drop-down.
Review the Posted Batches section for accuracy. You can also generate a Post report to help with the review.
Once all batches are posted and verified accurate, click the Process and generate report.
In the Process and Generate Report? pop-up, choose if you want to run the process with or without a report.
Click Yes, process. The pop-up window will close and the process will start automatically. You'll be notified when the process has completed. If you chose to include a report, you will receive a notification when it's ready.
Click the Step 3 Generate Reports at the top of the wizard.
From Step 3 Generate Reports in the wizard, you'll generate three reports:
Generate the Month Close report.
Select a month for the report.
Note
If you're running the Month Close process for more than one month, you'll have to generate this report for each month included.
Choose your Dispay Options: Report Layout, File Format, and Report Title.
Click Generate. This process may take a while, and you'll be notified when it completes. You can find notifications in the Notification Center.
Generate the Fund Balance Audit report.
Choose the File Format options you want for this report.
Click Generate. This process may take a while, and you'll be notified when it completes. You can find notifications in the Notification Center.
Generate the Trial Balance report.
Select a month for the report.
Note
If you're running the Month Close process for more than one month, you'll have to generate this report for each month included.
If you don't want accounts with a zero budget and balance to appear on the report, deselect the Show Accounts with zero budget and balance checkbox.
Choose your Dispay Options: Report Layout, File Format, and Report Title.
Click Generate. This process may take a while, and you'll be notified when it completes. You can find notifications in the Notification Center.
From Step 4 Close Selected Months in the wizard:
From the Ready to Close section, you should see your month included in the Close a Month process.
Tip
If you have more than one month, you'll need to close one at a time in sequentinal order.
Click Close [Month Name].
Confirm you want to continue, click Yes, close [Month].
Repeat the process for each month that is ready to close.
On Step 2 Run Month Close Selection, you need to remove the batches form the Suspended and Unposted Batches section before continuing. If you need to delete a batch, follow these steps:
Select the checkbox for any batch you want to delete.
Click More.
Click Delete.
Confirm with Yes, delete.
As you work through the Month Close process, you will see each step display any errors or issues that need corrected. If you get to the final step to Close Selected Months and one or more row cannot be closed, you will see a Unable to Close section with a table with the month and the reason for the error.
Make sure all prior months are closed first. Months must be closed in seqential order. Each month should have a note of "This month is ready to close." or "This month can be closed once the prior month has been successfully closed."
Month Close Selection Report: This report is run BEFORE the Month Close report, and will determine which transactions will be part of close process. When this report is generated, the process will also update GL selected flag to 'Y' on posted transactions.
Month Close Report: This report details all GL accounts including the beginning balance, current balance, transactions, encumbrances and any variance information within the month for each account. The transactions selected are determined by the Month Close Selection report. The fiscal month should be the same as the month you are closing.