Class Rank Report
Important
Information and features vary according to the roles to which you belong and the permissions associated with those roles. For more information, contact your module manager or your campus support team.
Use this page to create a class rank report for the selected year/term and the selected students. The report depends on the Class Rank Update process, so run that process first to make sure your report will be up to date.
First you select a year/term, and then you build the list of students to report on.
The report lists the selected students with the following information:
Division
Class
Rank
ID
Name
Major
Career GPA Hours
Career GPA
Note
These fields are included in the Original layout. If you select a different layout, you may see different fields.
You can build the list of students in any combination of these ways:
Student: You can add students by searching for them one at a time, entering their name or ID.
Filters: You can add students using any combination of these filters:
Academic Honors (as defined on the Academic Standing Definitions page)
Classification (as defined on the Classification Definitions page)
Degree (as defined on the Degree Definitions page)
Division (as defined on the Division Definitions page)
Major (as defined in Desktop on the Major/Minor Definition window)
Data Set: You can select a data set to find students based on specified criteria.
Note
Data sets use InfoMaker to query the database and determine which students are included. Queries are managed in InfoMaker, and updates made there are reflected in J1 Web.
The Original data set is provided by Jenzabar. Your school can define others.
Data sets are called queries in Desktop.
Display Options
You can add a subtitle to the list, and you can select a layout. The Original layout (d_class_rank_rpt) is provided by Jenzabar, but your school can create other report layouts.
You can run the reports in Desktop, too, on the Class Rank Report window.
Permission to generate class rank reports is available in the Reports section of these roles:
Registrar
Registration Module Manager
Registration Reporting Module Manager
The permission required is "Can generate class rank reports".
Before you run the report, run the Class Rank Update process to make sure your information is up to date.
In the Registration Reporting and Processes hub, click Hub options.
In the Student reports section, select Class rank report. The Class Rank Report page opens.
In Term, enter a year. The matching year/terms appear. Select one.
To build the list of students for the report:
Select a radio button.
Student lets you enter students one at a time by name or ID.
Filters let you create a number of filters to find students.
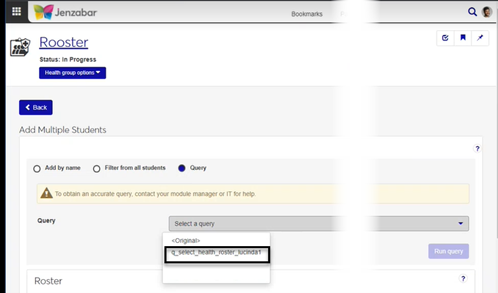
Data Set lets you find students with a data set (called a query in Desktop).
Enter information in the fields that appear when you select a radio button.
Click Add students.
You can add more students using the same radio button or different ones to find more students, and then click Add students again.
In Display Options, you can enter a Subtitle and/or select a Layout if your school has created one. The Original layout (d_class_rank_rpt) is selected by default.
Click Generate PDF. The report opens in a new tab.
Important
Access to the folders where Jenzabar-provided original reports are stored is controlled by your institution. For more information, contact your campus support team or see Working with Reports in J1 Web.
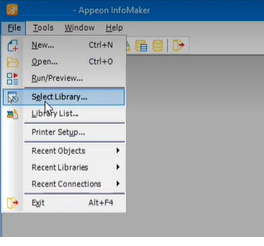
Open InfoMaker.
Click File > Select Library.
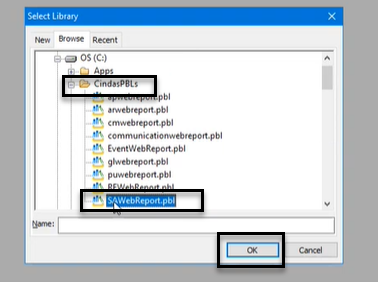
On the Select Library pop-up, navigate to the shared folder where Jenzabar-provided original reports and queries are stored.
Select the PBL (PowerBuilder Library) file that contains the report or query you want to customize.
Click OK.
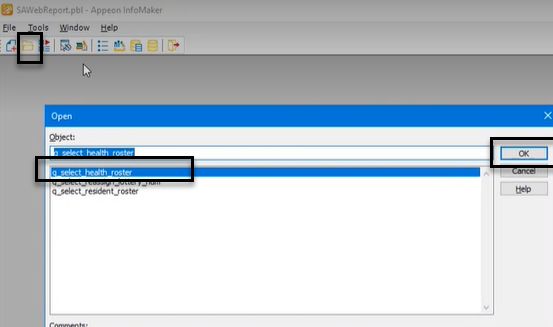
Click the Open icon.
On the Open pop-up, in the Object section, select the report or query you want to customize.
Click OK.
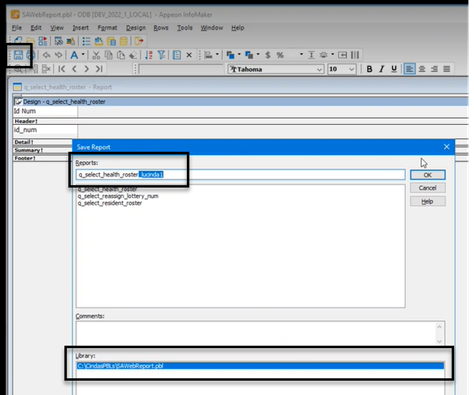
Customize the report or query as needed.
Save the customized version in the shared folder by adding a unique, easily identifiable extension to the file name.
Tip
By default, InfoMaker saves the customized version in the same folder that you opened the original version from. Confirm the file path is correct in the Library section.
On the corresponding report page in J1 Web:
Customized versions of queries will display in the Query or Data Set drop-down.
Customized versions of reports will display in the Report Layout drop-down.
Unranked students may be missing a value in the Class Code column on the Student Term Summary by Division table (stud_term_sum_div.class_cde). The Class Code is visible on the Student Inquiry window, Summaries tab, Division subtab, Classification column.
Make sure students have a Class Code value, and then run Class Rank Update again before running this report again.
In most cases, yes. Customized versions of the report created in Desktop before your school started using J1 Web should be available as options in the Report Layout drop-down. If your school created new customized layouts in Desktop and copied them to the appropriate location on the J1 Web server, those reports are also available in the drop-down.
However, certain reports were modified to be used in J1 Web (i.e., the base report for J1 Web is different from the base report in Desktop). In those cases, the customized versions from Desktop will not work even when they are moved to the correct location on the J1 Web server. You'll need to re-customize those reports from the original version of the J1 Web report by following the instructions to Customize Reports for J1 Web.
See the help for each report page for guidance about customizing a specific report.
For the customized versions of the report created in Desktop to appear as choices in the Report Layout field drop-down, your campus support team needed to complete certain steps as part of the installation process. For more information, contact your campus support team or see Working with Reports in J1 Web.
Tip
Only custom versions of the report created in Desktop before J1 Web installation will appear as choices in the Report Layout field drop-down. Reports customized in Desktop after you've installed J1 Web are not available in the drop-down unless they have been copied over to the appropriate location on the J1 Web server.
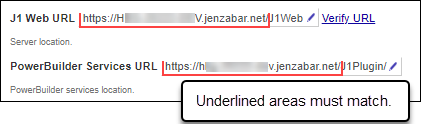
Verify the PowerBuilder Services URL is entered correctly in System Administration, System Settings, Product Installs and Sign page.
The URL must use HTTPS and not HTTP
The URL subdomain and domain must match the J1 Web URL
If the location where you store J1 Web reports is not the default installation location (C: > Jenzabar > Reports), verify the J1 Web server has permission to access the location. Detailed steps are available in the help topic Working with Reports in J1 Web.