Manage Student Leaves of Absence
Important
Information and features vary according to the roles to which you belong and the permissions associated with those roles. For more information, contact your module manager or your campus support team.
Use this page to manage a student's leaves of absence. Information for each leave includes dates requested, approved, start, and end, as well as the reason and comments.
You can also add comments, edit or delete a leave, and create a new leave.
Desktop Location
You can manage leaves of absence in Desktop, too, on the Leave of Absence window.
Database Location
A student's leaves of absence are stored on the Leave of Absence table (leave_of_absence).
Absence Reason: Options are defined on the Leave of Absence Definitions page. Required.
Leave Start / End Dates: Not required, but if provided, then the start date must be before the end date.
Comments: Click the Comment icon to view or add comments.
Requested Date: Not required.
Approved Date: Not required.
Returned Date: Not required.
Number of Days: Calculated from the Leave Start / End Dates.
Cross-Table Student Information Update
Leave of Absence affects several tables, so when you create or edit a leave of absence for a student, you have options for updating the tables.
Note
Cross-Table Student Information Update fields appear only if the Display cross-table student information update pop-up window checkbox is selected on the Enrollment Settings page.
On the Create and Edit pop-ups, when you enter or edit dates, you can populate the Special Status information on the NSC Student Master table (nslc_student_mast) with these fields:
Special Status Start Date: The checkbox is selected by default and populated with the Leave Start date. If you deselect the checkbox, the information is not copied to NSC Student Master.
Special Status End Date: You can select the checkbox and enter a date if you want the special status to expire on a particular date.
Special Status: The checkbox is selected by default, and the field is populated with the Leave of Absence value from above. You can deselect the checkbox if you don't want this status in the NSC Student Master table.
If the Display cross-table student information update pop-up window checkbox is unselected on the Enrollment Settings page, this is what happens:
The Cross-Table Student Information Update fields don't appear.
The following cross-table updates happen behind the scenes on NSC Student Master
Special Status is populated with Leave of Absence.
Special Status Start Date is populated with the Leave Start Date.
No update is made to Special Status End Date.
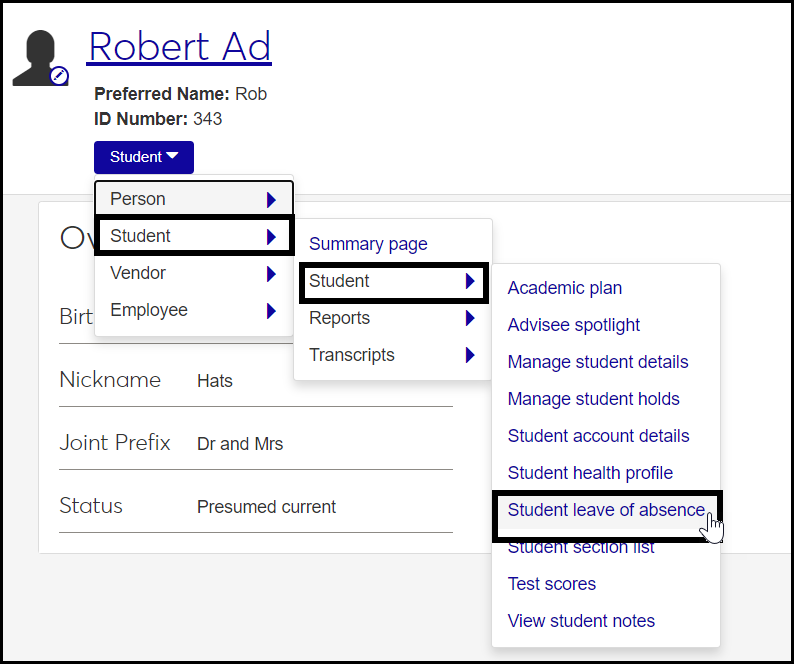
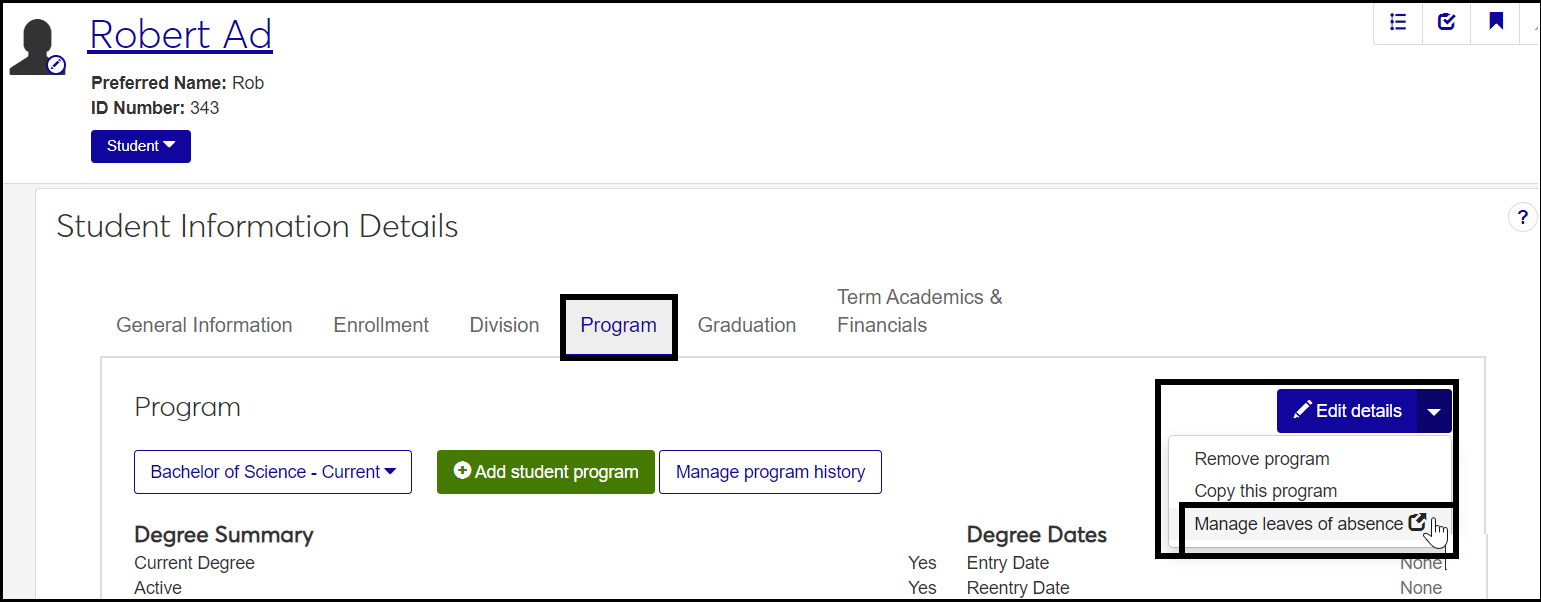
Access the Manage Student Leaves of Absence page either of these ways:
From a student's Summary page, click the Student drop-down, and select Student, Student, and Student leave of absence.
From a student's Student Information Details page, Program tab, click the Edit details drop-down, and select Manage leaves of absence.
Each leave of absence is a row in the list. To see more fields in the row, click the Expand
 icon.
icon. To view or add comments, click the Comment icon.
To edit a leave of absence, click the Actions button, and select Edit. The Edit Leave of Absence window pops up.
You can edit each of the fields except Absence Reason.
If you edit dates, the Update NSC Special Status Information fields appear. Select the checkboxes and enter or edit dates to share the dates with the NSC Student Master table.
Click Update.
To delete a leave of absence, click the Actions button, and select Delete. The Delete Leave of Absence window pops up. If you're sure you want to delete, click Yes, delete.
On a student's Manage Student Leaves of Absence page, click Create Leave of Absence. The Create Leave of Absence pop-up opens.
Enter information in the fields.
Absence Reason: Select from the drop-down. Options are defined on the Leave of Absence Definitions page. Required.
Requested Date: Click in the field, and select a date from the date picker. Not required.
Approved Date: Click in the field, and select a date from the date picker. Not required.
Leave Dates: Click in the fields to select start and end dates. Not required, but if you select dates, then the Leave Start date must be before the Leave End date.
Returned Date: Click in the field, and select a date from the date picker. Not required.
Under Update Special Status Information, select the checkboxes and enter values if you want to update the NSC Student Master table.
Click Create and close or Save and create another.
The Leave End Date is used with the Leave Start Date to calculate the Number of Days value. The Returned Date is useful for marking the first day of the student's resumed attendance, such as the first day of the next term.