Review Application Logs Page
The Review Application Logs page shows you the application log information for various modules. You can see what processes were run and when, if they failed or succeeded, and who initiated the process. The View details option lets you see each record impacted by the process and if there were any errors. This information can be helpful for troubleshooting efforts.
Note
Rows are written to the Application Log and Application Log Details tables each time one of these processes is run.
To access this page, you must belong to a System Administration role with the Can manage application logs permission enabled.
Application log information comes from the APPLICATION_LOG table.
Date and time show when the process was last run
Process
Action
Status
Failure
In Progress
Success
Log ID
Username
Job Name
Application Log Details
From the Review Application Logs drop-down, select the module and use the filters and column sort buttons.
Filters:
To show filter options, click the Filter applied link.
Select as many filter options as you want to narrow down your search results and click Apply.
To remove the filters and view the full list of codes, click Clear all and then click Apply.
Click the buttons at the top of the column to sort by ascending/descending order.
Access the Review Application Logs page.
From the Review Application Logs drop-down, select the module you want to review the application logs for.
Use the filter and sort options to find the application log.
Click the + icon. General information such as who ran the log and the job name is shown.
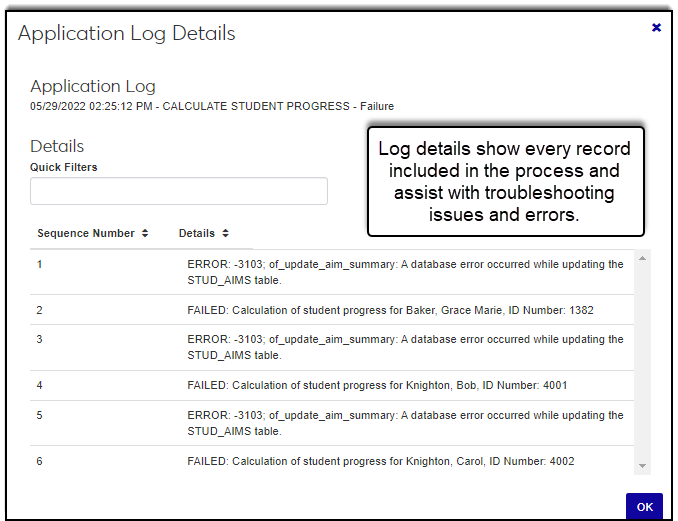
To view detailed information such as a list of the updated records, click the View details button. The Application Log Details window appears.
Note
Details will vary according to the process that was run.
Note
If the application log is used in process history or submission information, it cannot be deleted.
Access the Review Application Logs page.
From the Review Application Logs drop-down, select the module you want to delete the application log for.
Use the filter and sort options to find the application log you want to delete.
Select the checkbox for that application log.
From the Options menu, select Delete.
Select the log checkbox and Click the + icon. General information such as who ran the log and the job name is shown.
To view detailed information such as a list of the updated records, click the View details button. The Application Log Details window appears.
Note
Details will vary according to the process that was run.
Select the checkboxes next to the rows you want to export.
From the Options drop-down, select Download to Excel. The Download to Excel pop-up opens.
Select options for the Excel format and data columns.
Click Download. Your .xlsx or .zip file is saved in the file location that you have set in your browser settings.
Access the Review Application Logs page.
From the Review Application Logs drop-down, select the module you want to generate a PDF for.
Use the filter and sort options to find the appropriate application logs.
Select the checkboxes of the application logs you want to include in the PDF.
From the Options menu, select Generate PDF. A new tab opens showing the PDF with download and print options.
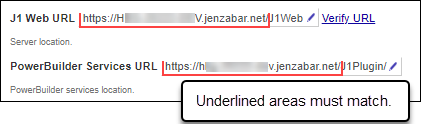
Verify the PowerBuilder Services URL is entered correctly in System Administration, System Settings, Product Installs and Sign page.
The URL must use HTTPS and not HTTP
The URL subdomain and domain must match the J1 Web URL
If the location where you store J1 Web reports is not the default installation location (C: > Jenzabar > Reports), verify the J1 Web server has permission to access the location. Detailed steps are available in the help topic Working with Reports in J1 Web.