Product Installs
Note
Information and features vary according to the roles to which you belong and the permissions associated with those roles. For more information, contact your module manager or your campus support team.
These settings determine where your school has installed other Jenzabar products that are integrated with J1 Web. Setting up these URLs provides seamless access to additional information and allows users to easily link to other services from To Do and message features.
Note
Permissions and limitations established in these tools will be honored in J1 Web. For example, if Hermione Granger has limited access to at risk students in Jenzabar Retention, she will have limited access to them in J1 Web as well.
Tip
J1 Web online help is registered with the cloud server through the J1 Web URL. If the URL is changed, the updated URL is automatically registered with the cloud server to ensure there is no disruption to help access.
Jenzabar allows schools with unique configuration needs to override J1 Web global settings. For example, a school with a single J1 database but 2 distinct JICS instances.
An IT Administrator can tailor the following JSON file settings: JicsBaseUrl, ITContactEmail, ITContactPhone, MessageAndTaskNotificationFromEmailAddress, and PbPluginBaseUrl.
If the IT Administrator updates the JSON file, the equivalent settings in J1 Web are disabled.
Locate the product URL to be added to J1 Web.
Click the Edit icon .
J1 Web URL is typically configured with an internal name by the installer when J1 Web is first installed. For schools using Communications Plus with SendGrid and Twilio, the J1 Web server must be publicly available to the internet and this URL must be your public facing address.
Note
The J1 Web URL must start with https:// and be your school's public-facing URL.
JICS can be used as a proxy to J1 Web; however, this prohibits access to the site from mobile devices and introduces request delays. It also means recipients cannot unsubscribe from email communications. For more information, see the JICS Proxy Alternative help topic linked below.
PowerBuilder Services URL points J1 Web to where your school's PbPlugin is installed. This ensures InfoMaker can function in J1 Web.
If your school uses Retention, enter the standard JICS URL in the Jenzabar Retention URL field. This lets the system know Retention is in use and allows information to be exchanged between J1 Web and Retention. For example, https://portal.myschool.edu/ics.
The system appends "/rms" to the URL for you.
JICS URL points J1 Web to your Campus Portal (JICS) instance.
For the connection to be established, a valid SSL certificate must be installed on your Campus Portal (JICS) web server.
Your JICS URL should start with HTTPS for security purposes and does not need to end with a forward slash.
For example, https://yourcoolschool.school.edu/ics.
If your school has a Jenzabar Unity Platform integration license, the Jenzabar Unity Platform URL field appears.
This URL points to your Jenzabar Unity Platform URL server location and facilitates the connection to Emsi Career Coach.
In the URL field, enter the web location for the product for which the link is being created.
Click Save.
To ensure the link works properly, click Verify URL.
These settings connect J1 Web with Jenzabar Financial Aid. This association lets your school leverage data sets that include financial aid information to select communication recipients and include personalized information using placeholders.
Click Edit settings. The Jenzabar Financial Aid Connection Settings window appears.
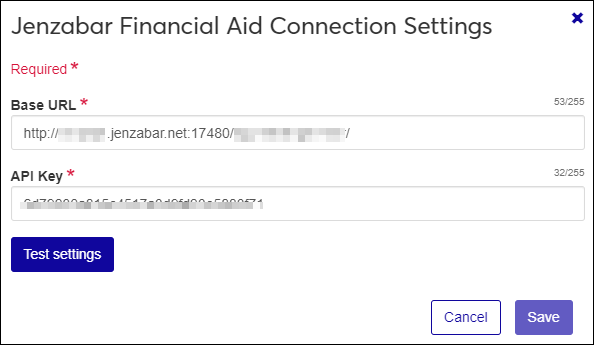
In the Base URL field, enter the web location for Jenzabar Financial Aid. This field can be up to 255 characters.
In the API Key field, enter your Jenzabar Financial Aid API key. This field can be up to 255 characters.
Click Test settings to verify the connection works.
Click Save.
J1 Web Workflow lets workflow participants officially sign documents using digital signatures. This digital signature verifies the signee's identity, certifies the authenticity of the signature, and generates an audit trail.
DocuSign is Jenzabar's integrated digital signature provider. Before establishing a connection to DocuSign, you must first purchase an API Usage Plan and set up your J1 Web account in DocuSign. During set up, you'll be provided with the information you must enter in J1 Web.
Log in to J1 Web with System Administrator permissions.
Access the System Administration hub, System Settings, Product Installs and Sign In page.
From the Product Installs, DocuSign setting, click Edit settings. The DocuSign Settings pop-up window appears.
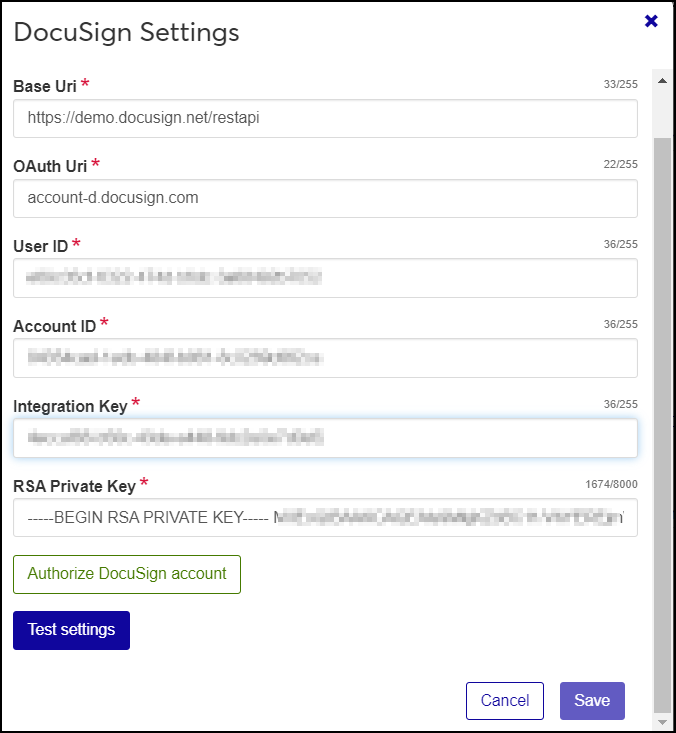
Copy the DocuSign integration information and credentials created during the Manage DocuSign Configurations steps and paste them into the DocuSign Settings window.
Base Uri: After entering the Base URI you copied from DocuSign, add a forward slash and restapi to the end. For example your base Uri might look like this: https://demo.docusign.net/restapi
OAuth Uri:
For your test or play environment, enter the following: accountd.docusign.com
For your live or production environment, enter the following: account.docusign.com
User ID is found on the DocuSign dashboard under My Apps and Keys.
Account ID is found on the DocuSign dashboard under API Account ID.
Integration Key was created when you generated the RSA Keypair. This should have been copied and saved in a file.
RSA Private Key was created when you generated the RSA Keypair. This should have been copied and saved in a file.
Click the Authorize DocuSign account button. DocuSign opens in a new web browser tab indicating J1 Web is requesting access. Grant access from your DocuSign account.
Click the Test settings button.
Click the Save button.
Note
Removing a URL means users will no longer be able to access or review information from related products.
Locate the install URL to be removed.
Click the Edit icon.
Clear or delete the URL information.
Click Save.
No, but J1 Web interacts with other products such as Campus Portal (JICS) features and Jenzabar Retention to provide important information. Establishing these URLs ensures a more seamless transfer of information between systems.
Not a problem, product URLs are not required. You can add the URLs for just those products your school has installed and is using.
This URL is used when assigning To Dos or sending messages from a page within J1 Web. The task or message includes a link to the page and references the URL configured here.
Enter the public-facing URL of your J1 Web website in this field. It needs to start with https:// and your port 80 must be open.
Verify a valid Secure Sockets Layer (SSL) certificate is installed on your Campus Portal (JICS) web server.
Ensure the Campus Portal (JICS) is configured to point to J1 Web by checking the J1 Web root API URl setting (Campus Portal, Site Manager, ERP Settings page).
Try rerunning the Web Application Services installer for your current release on the JICS instance to ensure information is shared properly between both systems. See MyJenzabar for installers and installation steps: https://www.myjenzabar.net/ICS/Downloads/Jenzabar_One/Application_Downloads/
Contact your supervisor or campus support team.
The PowerBuilder Services URL points to your school's PbPlugin, which provides the resources needed for InfoMaker to work correctly in J1 Web.