Manage Room Change Reasons
Users with the necessary permissions can define and edit the reasons for room changes. The room change reasons you define here populate the Reason drop-down menu when you change a student's room assignment.
To access the Room Change Reason Definitions page, select Session options > Manage room change reasons from the Hub options drop-down menu on the Residence Life Administration Hub page.
You can also access this page from the main navigation menu by selecting Student > Residence Life Administration > Session options > Manage room change reasons.
To create and edit room change reason definitions, users must have the permission Can manage sessions enabled. This permission is included in the default Residence Life Administrator and Student Life Module Manager roles.
You can manage room change reasons on J1 Desktop from the Room Assignments by Room or Room Assignments by Student windows.
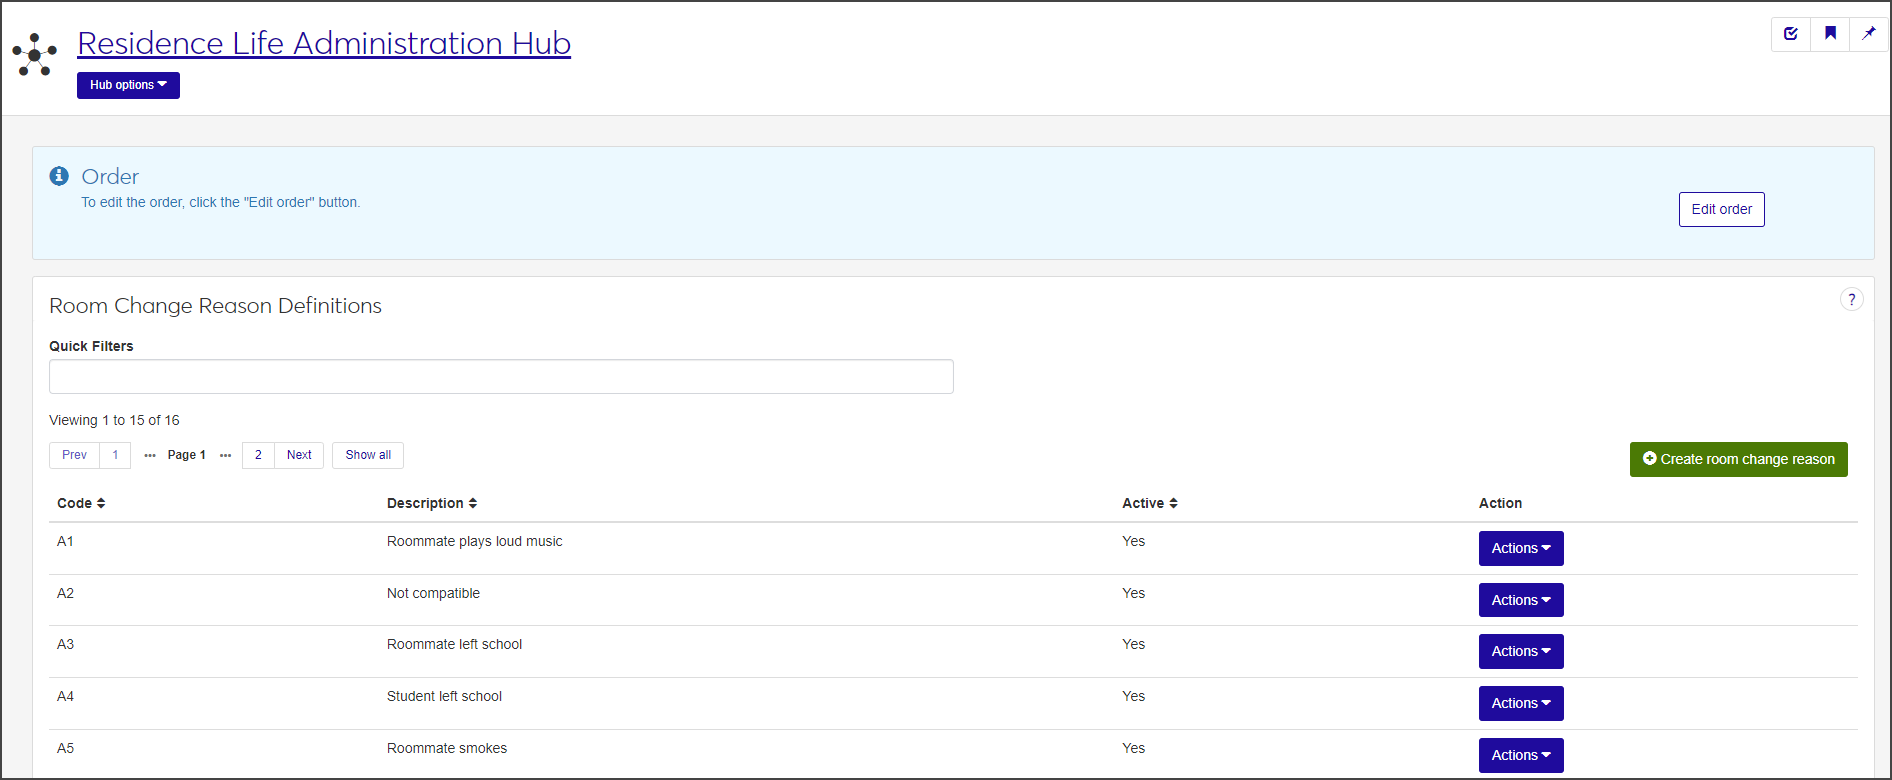
The Room Change Reason Definitions page lists all room change reasons that have been defined for the session.

For each room change reason, the list displays the code, a brief description, and whether or not the room change reason is active. Each row also includes an Actions drop-down menu that allows you to edit or delete the definition.
By default room change reasons are listed in the order they were created, with the most recent listed first. If you want them to be listed in a specific order, click Edit Order at the top of the page. The Edit Order drawer opens.
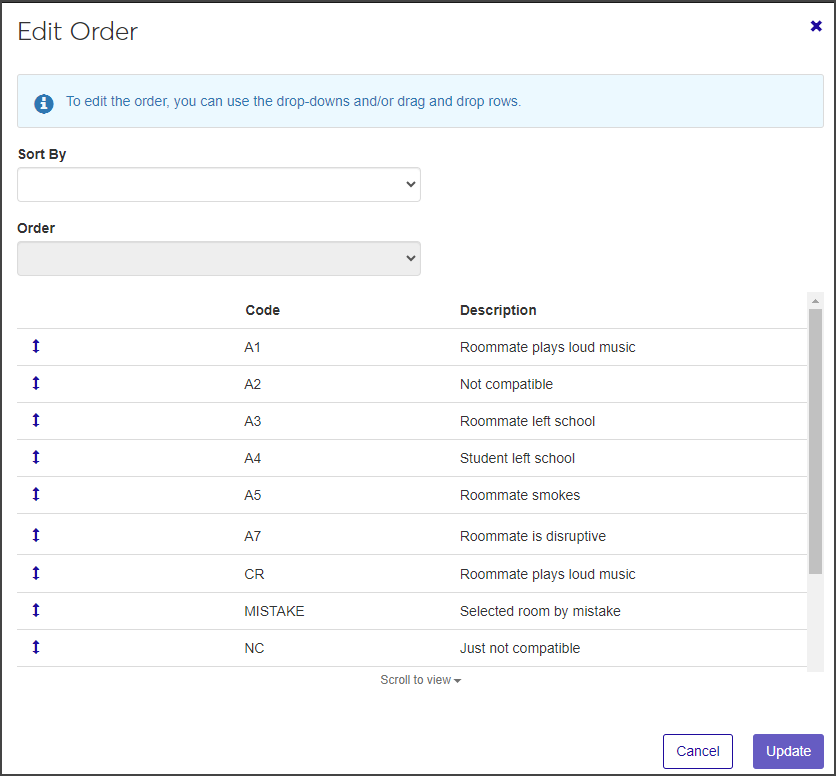
Select Code or Description from the Sort By drop-down menu.
Select Ascending or Descending from the Order drop-down menu. You see a preview of the new order.
Click Update to save your preferences and close the drawer.
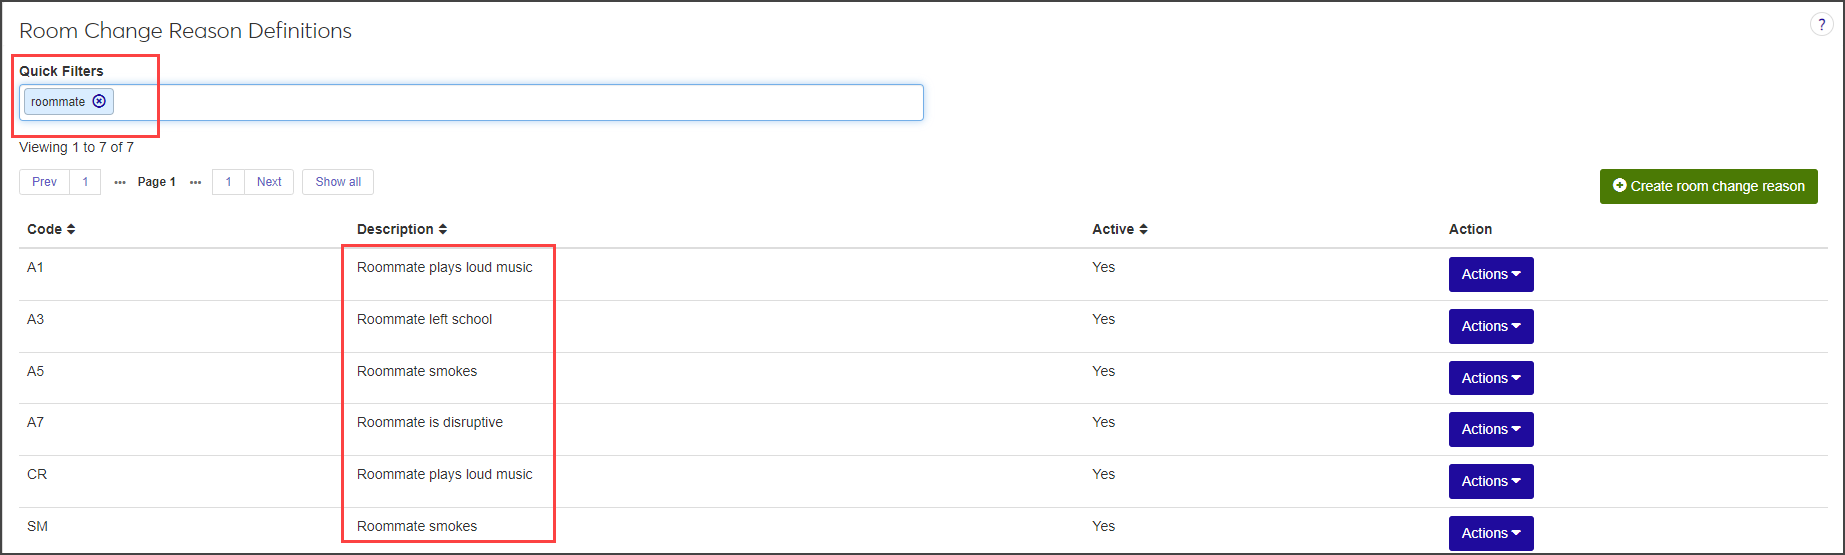
To filter the items on the list, begin typing the keyword you want to use as a filter in the Quick Filters field. When the correct keyword appears, select Add 'keyword' to apply the filter.
For example, to filter the list so it only shows room change reasons with the word "roommate" in the description, type "roommate" in the Quick Filters field and select Add 'roommate' when it appears. The list now only displays reasons that include the word "roommate" in the description
Click the Create room change reason button. The Create Room Change Reason pop-up opens.
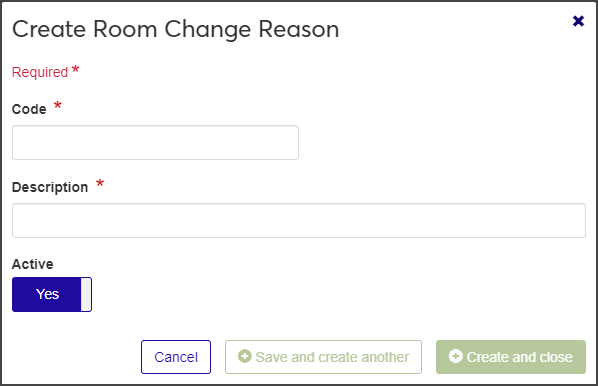
Enter a unique code in the Code field. The code can have a maximum of 10 characters. This field is required.
Enter a brief description of the room change reason in the Description field. You can enter a maximum of 30 characters. This field is required.
The room change reason is active by default. If you do not want it to be active at this time, click the Active option to change it to No.
Click Save and create another or Create and close to save the definition and close the window. The new definition is now included in the definition list.
You can edit the description and the active status for a room change reason definition. You cannot edit the code.
Select Edit from the Actions drop-down menu for the definition you need to edit. The Edit Room Change Reason pop-up opens.
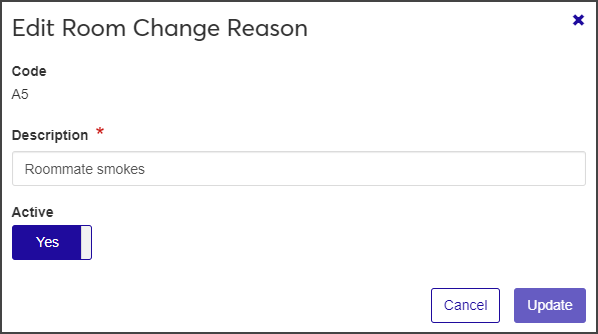
Make changes as needed.
Click Update to save the changes and close the window.
Select Delete from the Actions drop-down menu for the definition you want to delete. The Delete Room Change Reason? pop-up opens.
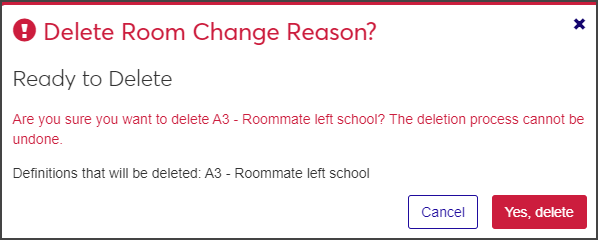
If the definition can be deleted, you see the heading "Ready to Delete." Click Yes, delete to delete the definition and close the window. The room change reason is removed from the list and will no longer appear in any lists or tables where it was included.
If the definition is in use or is protected by the system and cannot be deleted, you see the heading "Unable to Delete." Click OK to close the window.