Browse Locations in Facilities
Important
Information and features vary according to the roles to which you belong and the permissions associated with those roles. For more information, contact your module manager or your campus support team.
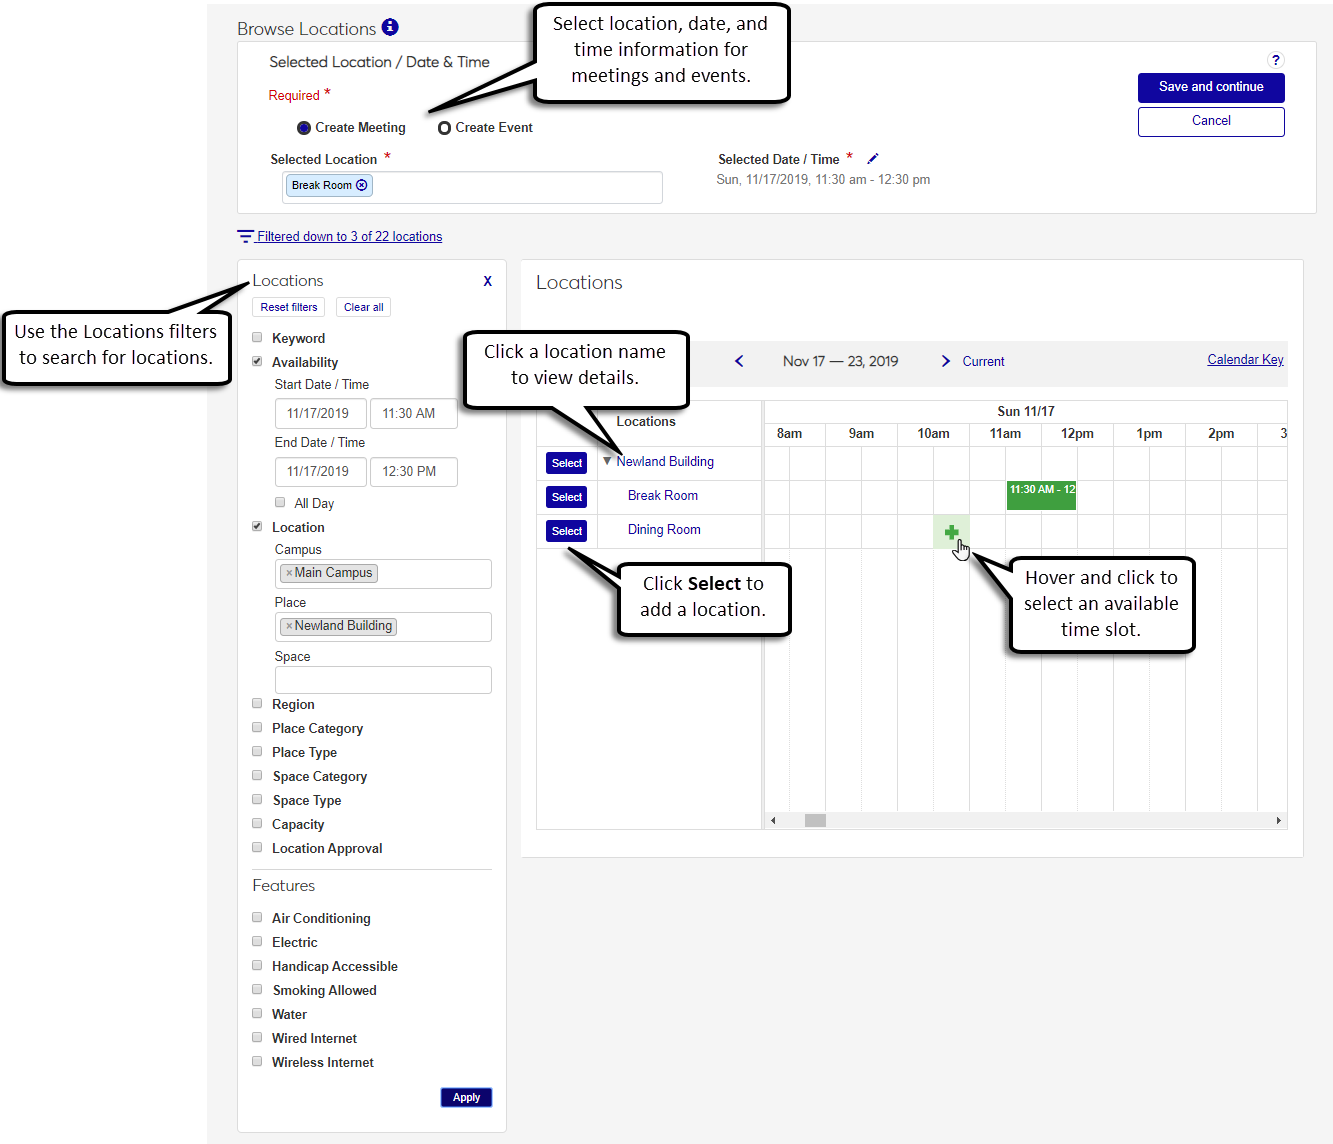
Use this page to search for available locations by location name, scheduling availability, region on campus, and features like wireless internet. The location calendar allows you to view schedules for multiple locations simultaneously so you can select the location, date, and time for your meetings and events. When you save location, date, and time information, you can finish the scheduling process on the appropriate pages for meetings and events.
Navigate to the Browse Locations page from either the Events or Facilities Hubs.
Click the Filter icon to display the Locations Filter. You can filter locations using the following criteria:
Keyword - Searches Campus, Place, Space, Region, Area, Place Type, and Space Type.
Availability - Filters locations by specific date and time criteria.
Note
When the recurring event checkbox is selected in the Date and Time, the Browse Recurring Locations page includes the Location Availability filter.
Location - Filters places by the campus, place, and space. Selecting a campus is optional but selecting one or more campuses will restrict the Place drop-down to just the places in those campuses. Selecting one or more places will display a Space drop-down, from which you can select one or more spaces.
Tip
Clicking the Apply button with a Place selected will display all spaces inside that Place. If you only want to display specific spaces, click the Space drop-down and select them, then click Apply.
Region - Filters by the region the place is located in. If no regions are defined, this filter option will not display.
Place Category - Filters by place classifications, like buildings and parking facilities.
Place Type - Filters by the type of place as designated by your institution (e.g., an athletic or administrative building).
Space Category - Filters by space classifications, like classrooms and offices.
Space Type - Filters by the type of space as designated by your institution. For example, a classroom or a lecture hall.
Capacity - Filters by the minimum and maximum capacity per the fire marshal.
Location Approval - Filters by whether or not location approval is required when booking the location for an event.
Features (Air Conditioning, Electric, Handicap Accessible, etc.) - Filters by whether or not the place or space has the amenity, such as air conditioning.
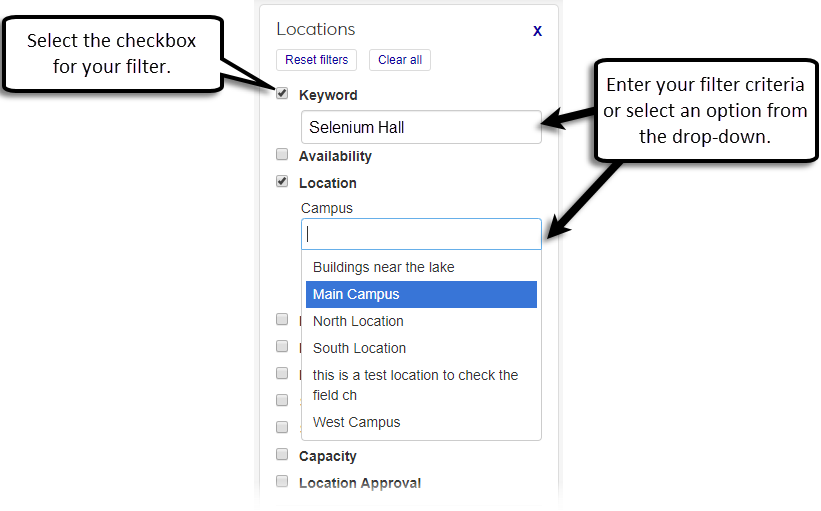
Select the checkbox for the search criteria you want to filter by.
Click the field below the checkbox and either select from the drop-down or enter your search criteria.
Click Apply to apply the filter to the page.
Use the location scheduler's navigation buttons to view the location's scheduling availability.

Note
General is the default Category. You can change the category to Advising meeting, but the space/place location information will be cleared and replaced with the requester's office as the default location.
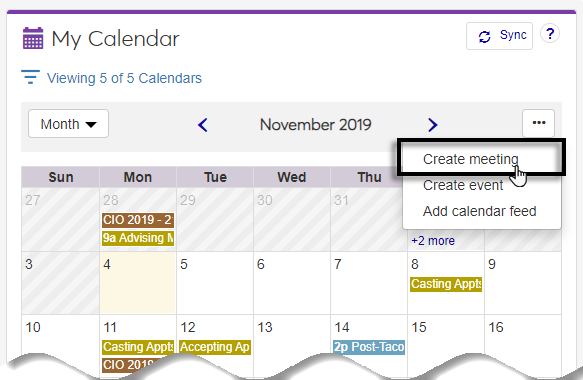
Select Create meeting from the calendar drop-down or by clicking a timeslot in the calendar.
Enter the required Subject and optional Description on the Meeting basics page.
Click Save and continue.
Select a Location from the Selected Location field or with the Locations filter.
Choose the date and time from the location's calendar or from the Selected Location/Date & Time section.
Enter the Start and End Date/Time or select the All Day checkbox
Select Save to close the Date and Time pop-up.
Click Create meeting.
Note
If you chose a meeting location that requires scheduling approval before it is reserved:
Your meeting request is sent to the facilities administrator responsible for approving scheduling requests. After it is approved, the meeting is scheduled and the location reserved. If your request is denied, you'll receive a notification message, and you can update your meeting information for another day/time/location.
Until your location is approved, the meeting is not scheduled and appears on your calendar as Awaiting Location Approval.
If you are in a facilities administrator role with calendar administrator privileges, your meeting is automatically approved.
See the Facilities Help for more information about location approval.
This feature is only available if you are licensed for J1 Web Events. Select Create Event in the Selected Location/ Date & Time section, and click Save and continue to open the Create event wizard.
Tip
The location, date, and time are not required to create an event from Browse Locations. However, if you select this information before saving to continue, the location, date, and time will be used in the Create Event wizard.
Note
You can make location, date, and time changes to events that are not scheduled. If an event is scheduled, it must be postponed before any location, date, or time changes can be made.
Make changes to recurring events and individual occurrences from the Manage event occurrences page.
Click the Edit location, date, or time link or the edit icon for the Location / Date/ Time.
Tip
These options can be accessed from the main event page or from the Review Event Details page.
To make location changes:
Remove a location by clicking the x next to the location's name.
Add a new location in the Selected Location field or select one with the Locations filter.
To make changes to the date or time:
Click the Selected Date/Time edit icon or select a time slot in the calendar.
Enter the Start and End Date/Time or select the All Day checkbox.
Click Select to save changes.
Click Save to save all location and date/time changes.
Events and meetings display on the calendar with different color codes to indicate their status.
| Striped shading indicates a day is in the past or unavailable. |
| Light yellow shading indicates the current day. |
| Light pink shading indicates a Google event invitation has not been accepted. |
| Pink shading indicates a Google calendar event. |
| Light blue shading indicates a meeting location is awaiting scheduling approval. |
| Dark blue shading indicates a scheduled meeting (location has been approved, if required). |
| Mustard shading indicates a scheduled advising appointment or advising cycle milestone. |
| Light teal shading indicates an event is awaiting proposal or location approval and is not yet scheduled. |
| Dark teal shading indicates an event is scheduled (location has been approved, if required). |
| Gray shading indicates a class is scheduled during this time period. |
| Brown shading indicates a leave request or deadline within J1 Web Employee. |
| Red shading indicates an event that has a scheduling conflict that needs to be resolved. |


There are several reasons a location may not appear in your search:
The space or place is no longer active. For spaces, the parent place may not be active.
The place or space's availability may have expired.
It may not match the search criteria you entered. For example, if you searched for a location that can accommodate 100 people, any locations that have been identified as holding fewer than 100 people do not show up.
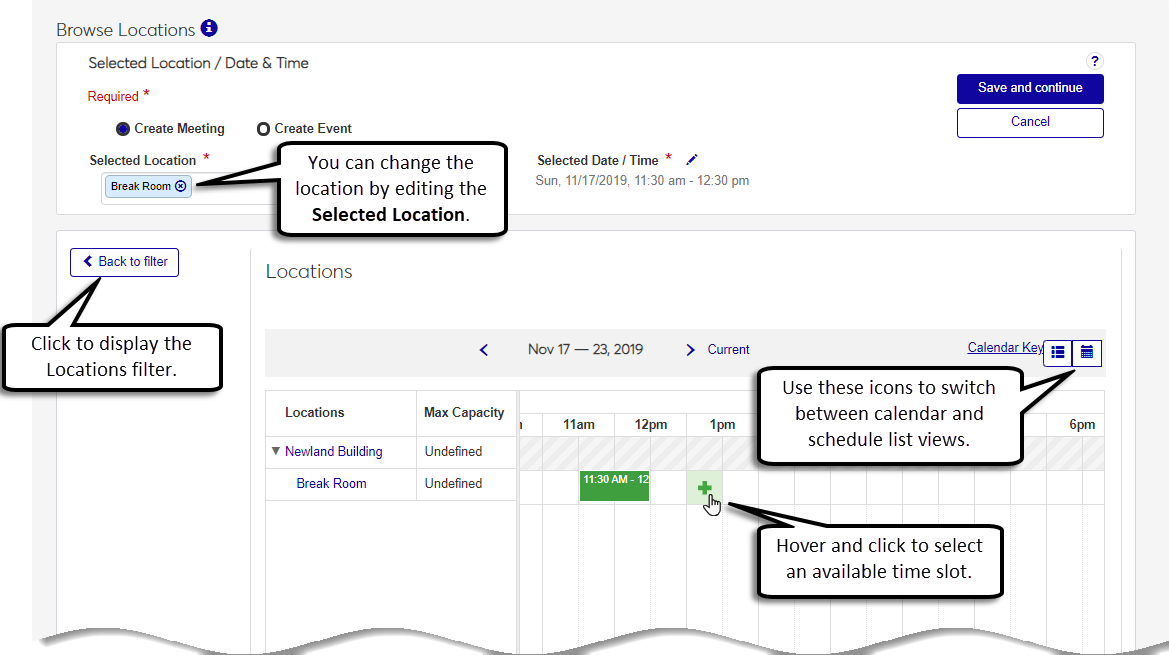
Depending on what you have selected, either the focused scheduler list view or calendar view displays. To change your view, click the calendar icon to display the calendar view for the location, or click the list icon to display the scheduler list view. If you are viewing a focused view and want to go back to the original view displaying the Locations filter, click the Back to filter button.
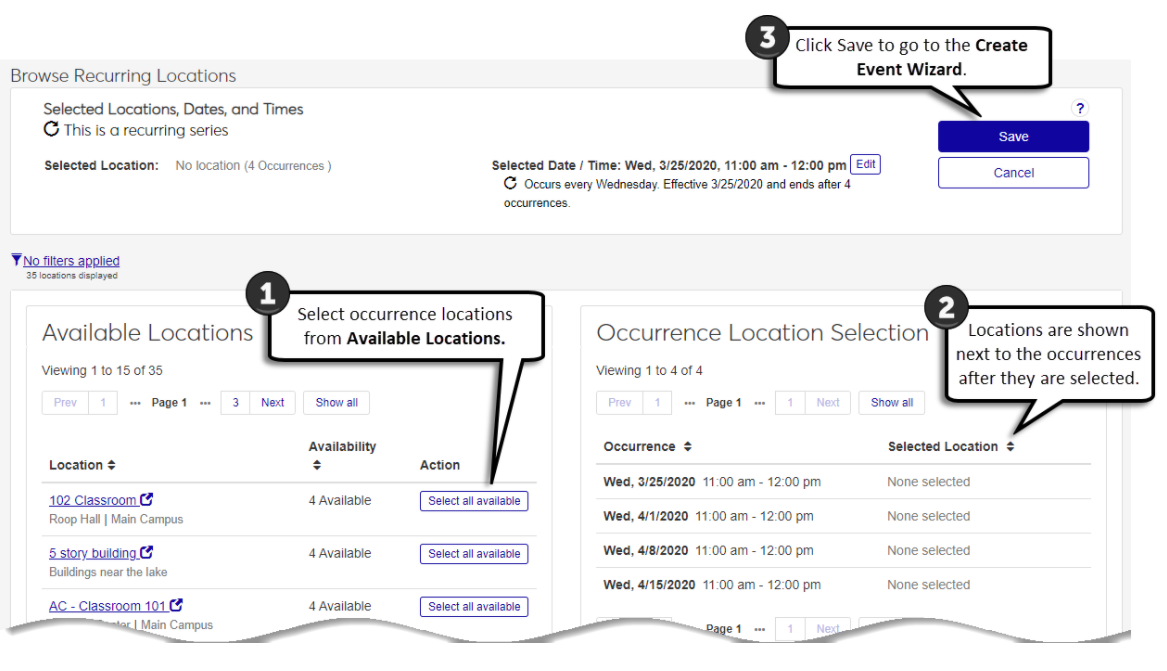
Yes. Click the Selected Date/Time Edit icon and select the Recurring Event checkbox. When you click Save and Continue, your selections are saved to the Create Event Wizard. You can make changes to the location, date, or time for your recurring series later in the wizard or from the Manage event occurrences page.
Recurring meeting functionality is not available at this time.
You can change general meetings to advising meetings by switching the meeting Category. If you have already selected a location for your general meeting, it will be removed when you change the category to an Advising meeting. See the Advising hub for more information about creating advising meetings.