Source Code Definitions
Use this feature to create, delete, or edit source codes and source code attributes. A source code is assigned to a transaction to identify the office in which they originated and to identify the type of transactions contained within a batch.
Tip
Jenzabar One uses 2-character source codes to identify the transaction type and originating office for batches.
To access and work with the Source Code Definitions page, users will need the Can manage source code definitions on the General Ledger Administration role.
The following list shows the pre-defined source codes with their description and the office that generates the transaction; however, you can add additional source codes to meet your institution's needs at any time.
Batch Type | Associated Source Codes |
|---|---|
Accounts Payable | IM - Immediate check invoices IV - Regular check invoices MN - Manual check invoices RF - Refunds to vendors VD - Void check invoices |
Adjustment | JL - Journal entries MA - Monthly adjustments |
Charge | CG - Student charges (automatically created) FC - Finance charges IT - Interest earned TP - Tuition paid in advance |
Conversion | CV - Conversion necessary |
Customized | Any custom source codes your school creates. |
Development | GF - Development gifts |
Disbursement | DB - Disbursements |
Financial Aid | FA - Financial Aid LD - In-House Disbursement LO - Financial Aid Loan |
Fixed Asset | FX - Fixed assets |
GST Credits | TX - Goods and services tax credits |
Miscellaneous | MS - Miscellaneous transactions |
Payroll | FR - Fringe benefits LB - Labor distribution |
Preliminary | @C - Preliminary student charges @F - Preliminary financial aid |
Receipt | RC - A/R Receipts |
Access the Source Code Definitions page from the General Ledger Administration hub.
Click the green Create definitions button.
On the Create Source Code Definitions pop-up, enter the required details.

Click either Save and create another to add more new source codes, or Create and close to finish.
Your new source code(s) will appear in the definitions list.
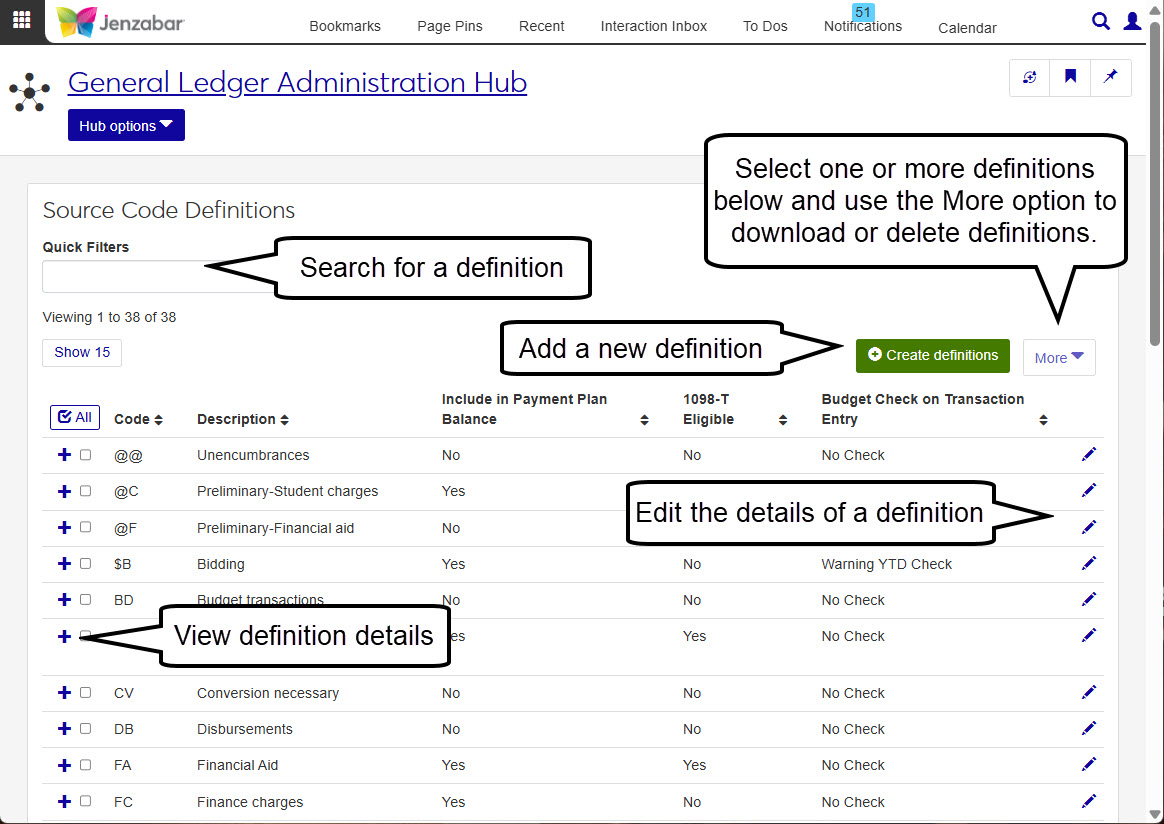
From the Source Code Definitions page in the General Ledger Administration Hub you can see the list of defined source codes.
Click into the Quick Filters box and type a word or partial word.
Once you've typed what you want to search, click the word to add it to the filter.
Your results will appear in the list of definitions.
From the Source Code Definitions page in the General Ledger Administration Hub you can see the list of defined source codes.
Locate the source code you want to edit in the definitions list, then click the Edit
 icon.
icon. 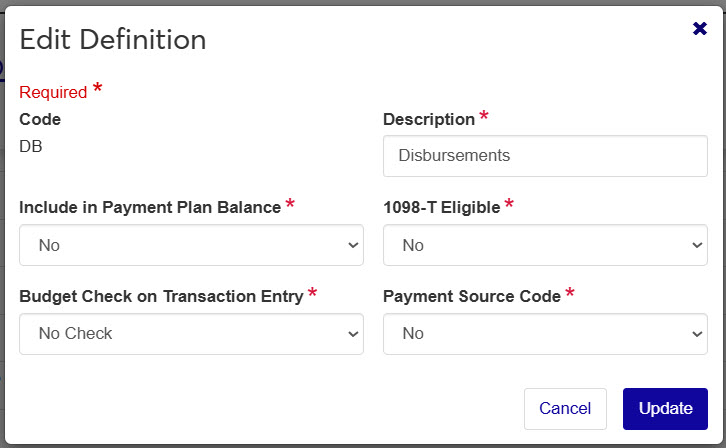
From the Edit Definition pop-up, you can make changes to any of the fields, except the Code field.
When you're sure you want to apply the edits you've made, click Update.
Tip
You cannot delete the default source codes provided by Jenzabar.
From the Source Code Definitions page in the General Ledger Administration Hub you can see the list of defined source codes.
Select one or more checkboxes on the source code definition entry you want to delete.
Click the More drop-down button, and select Delete.
The Delete Definitions? pop-up lists the selected definition in two categories:
Ready to Delete: Definitions that can be deleted.
Unable to Delete: Definitions the can't be deleted, either because they're in use or are protected by the system.
If you decide not to delete one of the source codes listed in the Ready to Delete section, click the Remove
 icon to remove them from the list.
 When you're sure you want to delete all the rows listed under Ready to Delete, click Yes, delete.
From the Source Code Definitions page in the General Ledger Administration Hub you can see the list of defined source codes.
Select one or more checkboxes on the source code definition entries you want to download.
Click the More drop-down button, and select Download.
From the Download to Excel pop-up, choose the worksheet options, columns, and format.
Click Download.