Student Housing Room Assignment Tab
Important
Information and features vary according to the roles to which you belong and the permissions associated with those roles. For more information, contact your module manager or your campus support team.
In the Room Assignment tab on the applicant group summary page, you can view the students in the applicant group, review or change room assignments for students, email all or selected students in the applicant group, and edit meal plans and other details.
From the Session options drop-down menu on the Session summary page, select Housing options > View applicant groups.
Click the link to the applicant group you want to view. The applicant group's summary page opens.
From the Applicant group options drop-down menu, select Manage housing application and assignment. The housing process page opens.
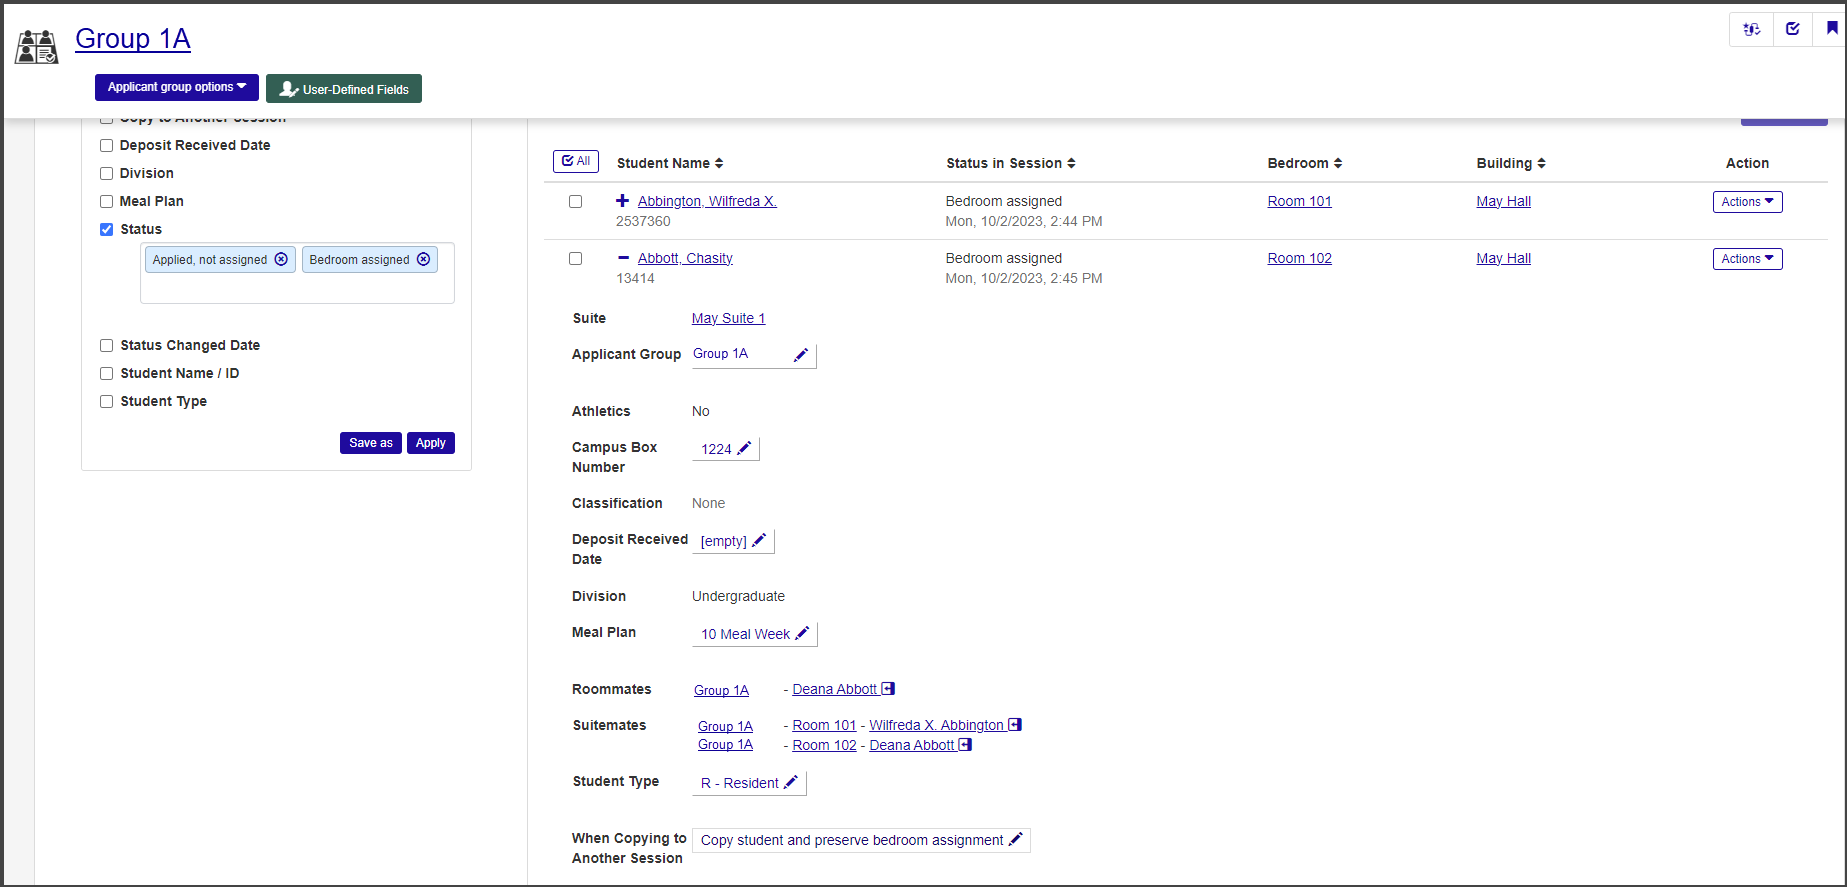
Click the Room Assignment tab to see the Applicant Group Roster.
Click the plus sign next to a student's name to expand the row and see a summary of that student's housing-related information for the session, including the suite or room the student is assigned to; roommates or suitemates assigned to the same room, if any; and whether the student is a resident, commuter, or online. You can also edit several types of information directly from the summary, including the meal plan, applicant group, and student type.
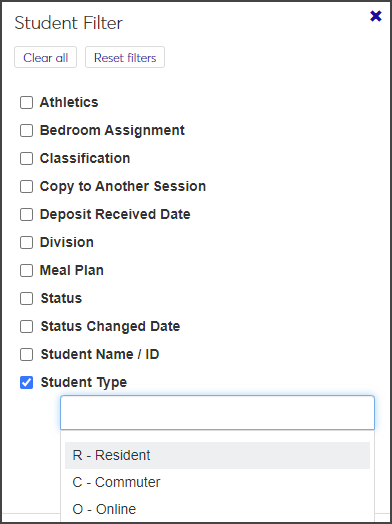
You can filter the applicant group roster by any of the student information included in the roster. This is especially useful if the roster is long or if you only want to view students in a particular group, such as commuter students or those with a specific meal plan.
Check the filter you want to sort by (for instance, Student Type). An additional field appears.
Click in the new field and select the value you want to sort by.
Select additional filters as needed.
When you are done, click Apply. The roster is narrowed to show only those students who match the selected criteria.
To save a filter that you will use frequently, click Save as, enter a name for the filter, and click Save. If you would like this to be the default filter, check Set as default before saving.
In addition to using filters, you can view the students in the applicant group by data sets.
Click the down arrow next to View Students by Data Set at the top of the Applicant Group Roster to expand the row.

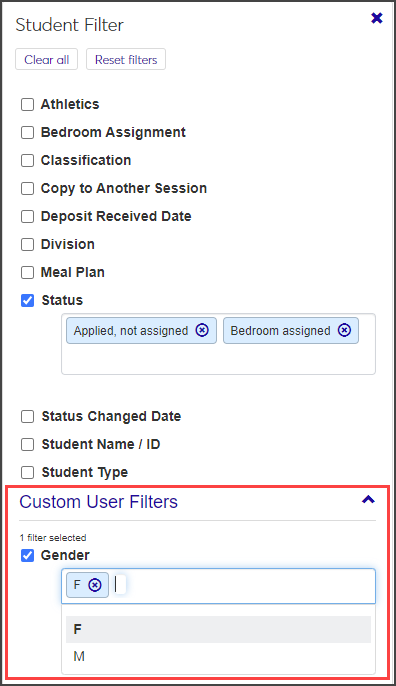
Click in the Data Set field to display a list of all data sets created with a classification of "SessionRoster".

Select the data set you want to use and click Select. The roster is narrowed to show just those students in the selected data set. In addition, new Custom User Filters are added so you can sort the list by criteria within the data set.
On the Session summary page, click the Session options drop-down and select Housing options > View applicant groups. The View Applicant Groups page opens.
From the applicant group list, click the student's applicant group. The group's summary page opens.
From the Applicant group options drop-down, select Manage housing application and assignment.
Select the Room Assignment tab.
From the Actions drop-down for the student, select Assign a bedroom. The Update Bedroom Assignment pop-up opens.
Click in the Select a Bedroom with Remaining Room Slot field and type or select the name of a room that has an available slot. This field is required.
If you would like an email notification sent to the student who will be assigned to the room, check the option at the bottom of the window.
Click Update. The student's room assignment is saved.
On the Applicant Group Roster page, select Swap with another resident from the Actions drop-down for the student. The Update Bedroom Assignment pop-up opens.
Swap with another resident is automatically selected in the Room Change field.
Click In the Select a Resident / Room Slot field and begin typing the name of the student you want to swap with. Select the correct name when it appears.
If needed, select a reason for the change or enter a comment.
If you want an email to be sent to the residents affected, select the email notification checkbox at the bottom of the window.
Click Update to save the changes and close the window.
On the Applicant Group Roster page, select the checkbox next to all students you want to send the email to.
Select Send communication from the Options drop-down. The Create New Communication window opens.
The Communication Type, Interaction Code, Name/Description, From, To, and Contact Type fields autofill with the relevant information, but you can edit all but the recipients and the contact type.
Enter a Subject. This field is required.
Type your message in the Body text field. Use the editing toolbar to format your text.
To include bedroom assignment information, check the box under Attachments. The email subject and message will be the same for all recipients, but the bedroom assignment information will be specific to each student.
When you are done, click Send.
From the Applicant Group Roster page, you can update meal plans for a single student or for multiple students at once.
To update a single student's meal plan:
Click the plus sign next to the student's name to expand the row.
Click the pencil icon next to the meal plan.
Select a new meal plan from the drop-down and click Save.
To update multiple students' meal plans:
Select the checkbox next to each student whose meal plan you need to update.
From the Options drop-down, select Update details for selected students. The Update student details window opens.
Select Meal Plan from the Select a Detail to Update drop-down.
Select the new meal plan from the adjacent drop-down.
Click Update to save the changes.