Manage Student Type Definitions
Important
Information and features vary according to the roles to which you belong and the permissions associated with those roles. For more information, contact your module manager or your campus support team.
Overview
Student Types allow you to categorize groups of students within Student Life sessions. Some students will be residents, while some may need to be included in the session but will commute rather than live in student housing. Other possible student types might include hybrid or online students, or residents in off-campus student housing. Resident and Commuter student types are provided by default and cannot be changed, but you can create as many other types as needed.
Student type definitions are stored in the SAStudentTypes table.
Student Type definitions are used primarily in Residence Life sessions on the following pages:
Session Roster
Roommate Requests
Applicant Group Roster
Session Submit Application
Lottery Number Assignment
Update Applicant Information
In order to manage Student Type definitions, you must belong to a J1 Web role with the "Can manage sessions" permission turned on. This permission is included in the default Residence Life Administrator and Student Life Module Manager roles, but your school may have created a customized version of these roles. Work with your campus support team to determine the permissions that you need.
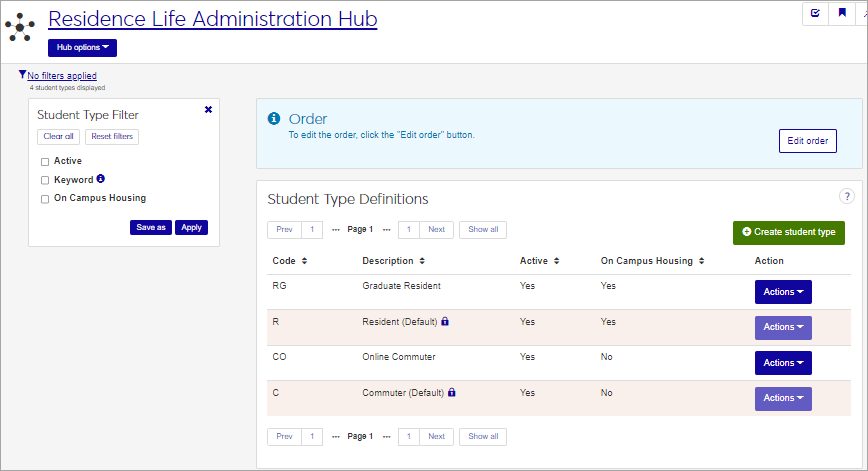
For each Student Type, the list displays the Code, a brief description, whether or not the student type is active, and whether or not this student type is in on-campus housing.
To access Student Type definitions from the Residence Life Administration hub, click the Hub options menu and select Session options > Manage student types.
To filter the list, check an option under Student Type Filter, select criteria from the resulting drop-down menu or enter text in the field, and click Apply. For example, if you want to view only active student types, check the Active filter and then select "Yes" from the drop-down menu that appears.
Click a heading to sort the list by that column.
Resident and Commuter student types are provided by default. To create additional student types, follow these steps.
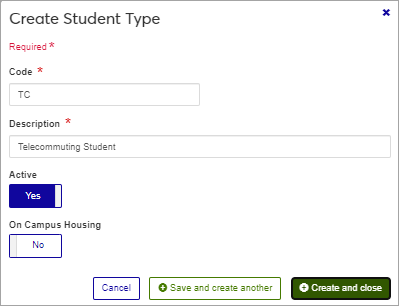
On the Student Type Definitions page, click the Create student type button.
Enter a unique Code. The code can have up to 5 characters. This field is required.
Enter a brief Description of the student type. You can enter up to 100 characters. This field is required.
The Active option defaults to Yes. If you do not want this student type to be active, click the option to change it to No.
If you select No, this student type will not appear in related drop-down menus.
The On Campus Housing option defaults to No. If this student type will use on-campus housing, click the option to change it to Yes.
When No is selected, housing-specific details such as roommate request and lottery number assignment will not be applied for this student. This value can be changed for individuals or groups of selected students later in the process.
Click Save and create another or Create and close.
Note
The default student types, Resident and Commuter, are locked and cannot be edited or deleted.
On the Student Type Definitions page, select the Actions drop-down button, and click Edit. The Edit Student Type window opens.
The Code cannot be edited once it has been created, but all other fields may be edited.
Edit the available fields as needed. See Create Student Type Definitions for details about each field.
Click Update to save your changes.
The Edit Order options let you set the order in which definitions appear in drop-down menus.
Click the Edit Order button. The Edit Order window opens.
You can change the order of definitions using either the Sort By and Order By drop-down menus or by dragging and dropping the definitions into your preferred order.
Sort By and Order By:
From the Sort By drop-down, select the column you want to sort by.
From the Order By drop-down, select Ascending or Descending.
Drag and drop:
Hold your cursor over the vertical arrow icon
 on the left side of the row until the cursor changes to a hand icon.
Click and hold while you drag the definition to the new location.
Release the mouse button.
Click Update.
After you click Update, your changes are saved in the following ways:
The definitions are listed in the saved order whenever they appear in drop-down menus (where a user selects from the list of definitions).
If the definitions are used in calculations or rules where priority matters, the definitions are now in your saved order of priority.
The definitions page is now sorted according to your changes.
Default Student Type definitions cannot be deleted.
On the Student Type Definitions page, select Delete from the Actions drop-down in the row you want to remove. The Delete Student Type? pop-up opens, asking if you're sure you want to delete this definition.
Click Yes, delete to remove the definition.
There are several ways to designate a student's type.
When creating an Applicant Group, you can designate the Student Type for all students in the group. You can change these later.
On the Session Roster page, you can update individual student types by expanding the row for the student and editing the Student Type field.
On the Session Roster page, you can update the student type for multiple students at once by selecting the students you want to edit, and choosing the Update details for selected students from the Options drop-down menu above the roster. In the Update Student Details pop-up, select Student Type as the detail to update, and then select the type you want to assign to these students.