Activity Club Definitions
Important
Information and features vary according to the roles to which you belong and the permissions associated with those roles. For more information, contact your module manager or your campus support team.
Activity Club Definitions are only used in the Events module to allow an event to be sponsored on behalf of a student club or group.
Note
If you need to track sports and activities, use Activity Definitions and related pages.
You can access the Activity Club definitions page from the main navigation menu or from the Student Activities Administration Hub:
From the navigation menu, select Student > Student Activities Administration > Activity club definitions.
On the Student Activities Administration Hub, select Activity club definitions from the Hub options drop-down.
The Activity Club Definitions page displays a list of all existing activity clubs. From here, you can edit and delete clubs and download the list to an Excel spreadsheet.


To create and edit activity club definitions, you must be in the Student Life Module Manager (or a role copied from it) with the permission "Can manage activity club definitions" enabled.
You can manage Activity Club definitions in Desktop on the Activity Club Definition window. Definitions edited in J1 Web are changed in Desktop and vice versa.
On the Activity Club Definitions page, click the plus icon next to the Code to expand the row and see the details associated with this club.
To narrow the list of definitions displayed, check one or more filters in the Activity Club Filter block, enter the criteria for each filter you selected, and click Apply.
To save a filter that you use often, select the criteria, click Save As and enter a name for the filter at the prompt. Check Set as default if you would like this to be the default filter, then click Save.
Click a heading to sort the list in ascending order by the values in that column. To sort in descending order, click the heading again.
Tip
You can also use the page search in the upper right corner of J1 Web. Just start typing the name of the definition page you want, and select it in the results.
On the Activity Club Definitions page, click the Create definitions button.
Enter a unique Code. You can enter a maximum of 8 characters. This code will be used throughout the system for this activity club. For example, you might create codes like DRAMA or VOLLEYB. Try to choose a code that will be easily understood by others using the system. Once it is saved, the code cannot be changed. This field is required.
Enter a Name for the activity club, such as Theater Club or Volleyball Team. This field is required.
Select a type of activity, such as Activity, Fraternity, or Organization, from the Type drop-down menu. This field is optional.
Tip
Activity types can be created and maintained in J1 Desktop, in the Student Life - Activity Type Maintain Table Values window.
Select Yes or No from the Active drop-down menu. The field defaults to Yes. This field is required.
If applicable, enter the minimum and maximum number of members allowed. Optional.
In the Sponsor 1 Name / ID field, begin typing the name or ID of the staff in charge of this club and select the correct name when it appears in the list. If there is more than one sponsor, repeat in the Sponsor 2 Name / ID field. Optional.
If the activity has a Gender Restriction, select it from the drop-down menu. If not, choose Ignore.
If scholarships are associated with this activity, enter the number available in the Number of Scholarships field.
Enter a Description for the activity club. Optional.
When you are done, click Save and create another or Create and close.
You can edit one definition at a time or multiple definitions at the same time. When you edit multiple definitions, you can only edit one detail at a time, and that detail is changed for all the selected definitions.
Select Edit from the Actions drop-down menu for the definition you need to edit. The Edit Activity Club Definition pop-up window opens.
Edit the fields as necessary. You can edit all fields except the Code.
Click Update to save your changes.
On the Activity Club Definitions page, select the checkbox next to each definition you want to edit.
Select Edit selected from the Options drop-down. The Edit Activity Club Definitions pop-up opens.
From the Select a Detail to Update drop-down, select the detail you want to edit.
In the adjacent field, select or enter the updated value.
Note
Remember, the detail you edit will be updated for all the definitions you selected.
If you want to edit another detail, click the Add another detail link and repeat steps 3 and 4.
When you are done, click Update.
Users with the necessary permissions can add and edit user-defined fields that allow you to track records, build forms, customize reports, and track other unique information not captured by the standard fields. User-defined fields are managed by the System Administrator, but other users can edit them.
To configure or edit user-defined fields, the "Can configure user-defined fields" permission must be enabled in the Campus-wide Definitions Only School Definitions role.
Note
User-defined fields are configured in the Campus-wide Definitions Hub. To access the hub from the main navigation menu, select Core > Campus-wide Definitions > User-Defined Fields. From there, click Configure for the relevant row.
To learn how to configure user-defined fields, see User-Defined Fields.
Select User-Defined Fields from the Actions drop-down menu for the relevant definition. The User-Defined Fields window opens.
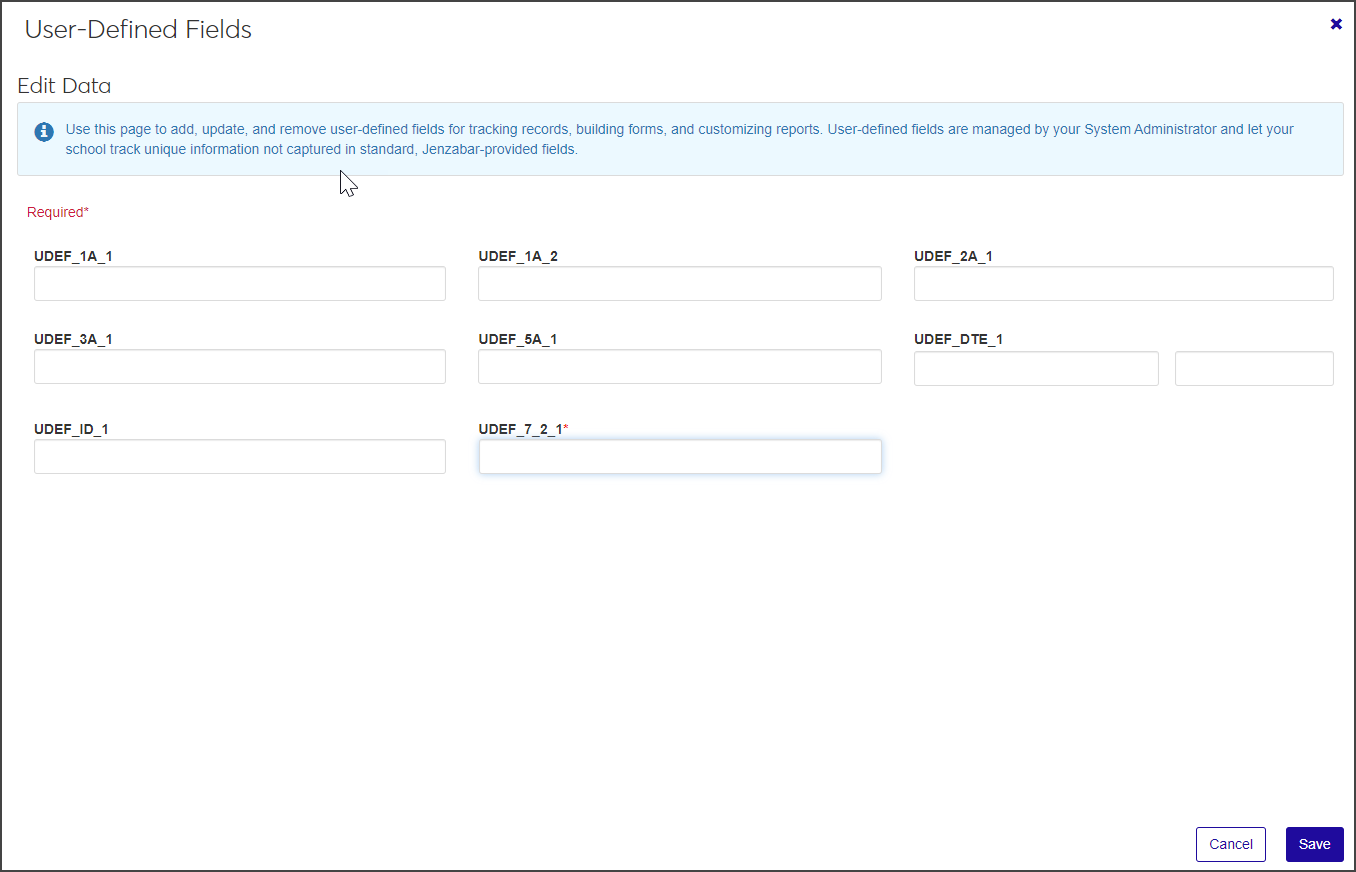
Edit the existing user-defined fields as necessary.
When you are done, click Save.
Select the checkboxes next to the rows you want to export.
From the Options drop-down, select Download to Excel. The Download to Excel pop-up opens.
Select options for the Excel format and data columns.
Click Download. Your .xlsx or .zip file is saved in the file location that you have set in your browser settings.