Step 1: Select Invoices
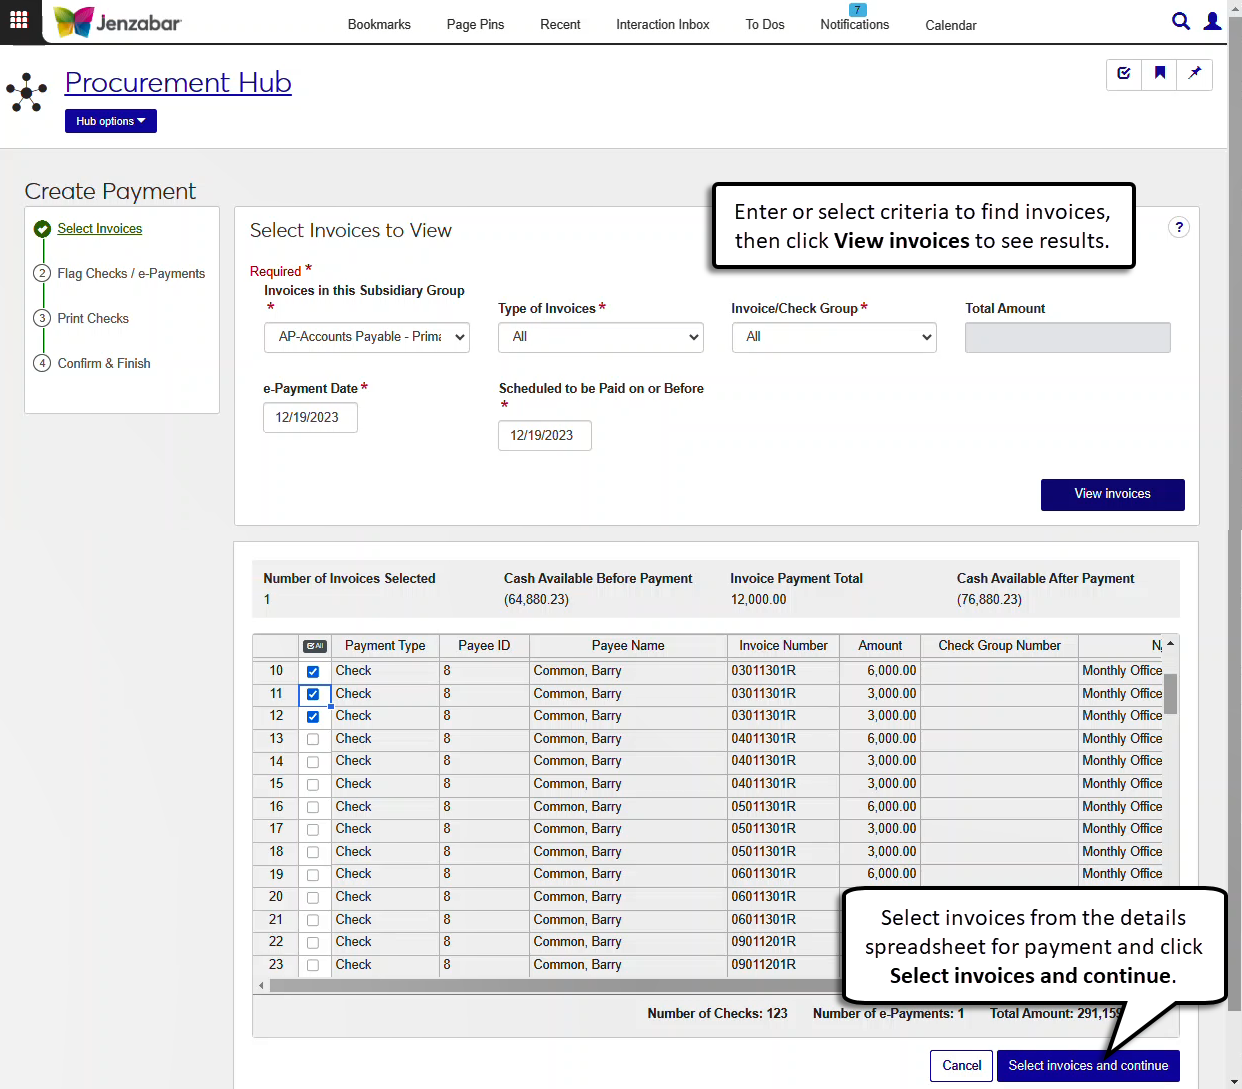
In the first step, select the invoices to be paid based on specified criteria. After the required information is entered, click View invoices to review invoices. In the invoice spreadsheet, select the invoices to flag for payment, then click Select invoices and continue.
The invoices spreadsheet displays a separate row for each invoice line item. When a line item is selected, the other line items on that invoice are automatically selected (i.e., rows with the same invoice number and vendor ID number or with the same ID number and check group number are automatically selected when one is selected).
Similarly, when a credit memo is selected for payment, the system automatically selects the line items for the invoice the credit memo was made against if the original invoice hasn't already been paid.
From the Finance, Procurement options, select Payments. The Payment List page opens.
Click Create payment. The Create Payment page opens to Step 1.
Select an option from the Invoices in this Subsidiary Group drop-down. Required. Available options are maintained on the Desktop Subsidiary Group Control window.
Select the Type of Invoices to be paid from the following options. Required.
All (default)
Financial Aid checks
Accounts Payable checks
Accounts Receivable checks
Select an Invoice/Check Group from the drop-down. Required. "All" is the default selection, with "Greater than" and Less than" as the other options.
The Total Amount is enabled when "Greater than" or "Less than" is selected for the Invoice/Check Group. Optionally, enter a dollar amount with up to 2 decimals.
The default e-Payment Date is today's date, and this can be changed if needed. Required.
The default Scheduled to be Paid on or Before date is today's date, and this can be changed if needed. Required.
Click View invoices. The invoice list appears as a spreadsheet below.
Select one or more invoice transactions from the spreadsheet.
Note
The fields above the spreadsheet update based on the selections.
Number of Invoices Selected
Cash Available Before Payment
Invoice Payment Total
Cash Available After Payment
The fields below the spreadsheet indicate the total number of checks and e-Payments resulting from the entered criteria.
Number of Checks
Number of e-Payments
Total Amount
Click Select invoices and continue to move to Step 2.