Graduation Report
The Graduation Report shows advisees' progress toward graduation. It's available from the Manage Advisees page.
The report lists selected advisees one by one, with each advisee starting a new page. For each advisee, the following information is included:
General
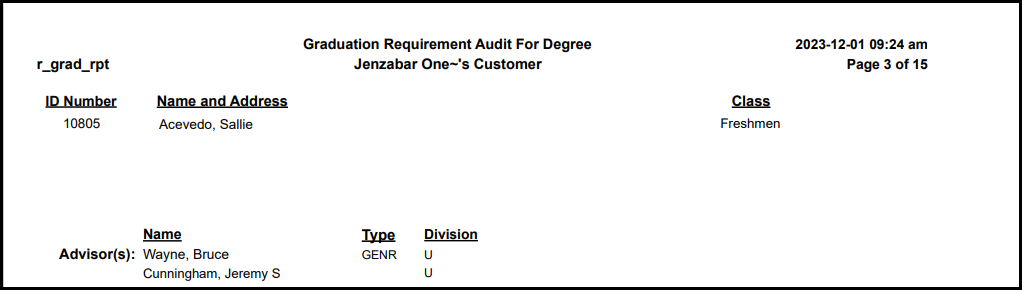
ID Number
Name and Address
Class (classification, such as Sophomore)
Advisors
Division
Requirements Summary

Aim
Requirement
Year
Description
Hours Needed
Hours Earned
Hours in Progress
Count Needed
Actual Count
Quality Points
GPA
Status (Met or Not Met)
Requirements Detail
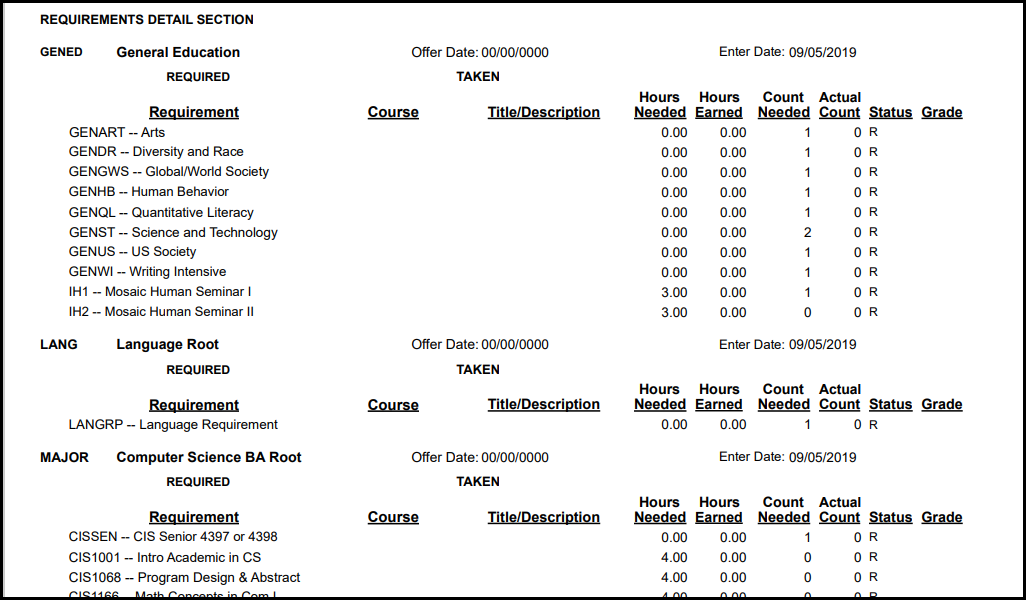
Requirement
Offer Date: Typically the date the program was first offered or the date the curriculum was last updated. Your school may use it differently.
Enter Date: Populated automatically when aims are assigned because programs are entered on the Student Information window, Degree tab. Typically the date the student declared their major, but your school may use this differently.
Course
Title / Description
Hours Needed
Hours Earned
Count Needed
Actual Count
Status: This column lists initials for an aim's statuses. An aim can have more than one status at once.
I = In Progress
L = Local Detail
M = Met
N = Not Met
O = Override
R = Required
S = Substitution
T = Transfer
Grade
On the Manage Advisees page, select one or more advisees.
In the Reporting and Processes drop-down, select Graduation. The Graduation Report pop-up opens with the selected advisees listed with their Classification and Major.
To remove any of the selected advisees from the report, click the Remove icon
 .
.Click in the Reports field, and select a report. The <Original> report (r_grad_rpt) is provided by Jenzabar, but your school may have others.
Click Generate PDF. If there are only a few records to process, the report opens in a new tab. If there are many records, the report may take a while to process. You'll be notified when it's ready, and you can find a link to the report in the Notification Center.
Use your browser's options to print or save the report.
Important
Access to the folders where Jenzabar-provided original reports are stored is controlled by your institution. For more information, contact your campus support team or see Working with Reports in J1 Web.
Open InfoMaker.
Click File > Select Library.
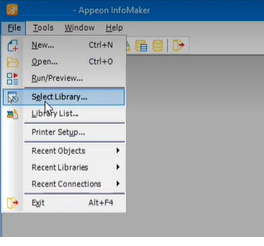
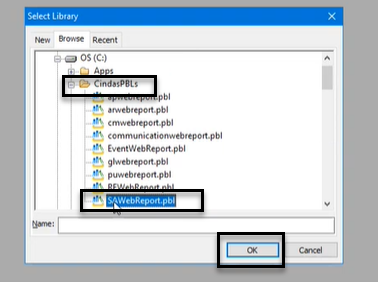
On the Select Library pop-up, navigate to the shared folder where Jenzabar-provided original reports and queries are stored.
Select the PBL (PowerBuilder Library) file that contains the report or query you want to customize.
Click OK.
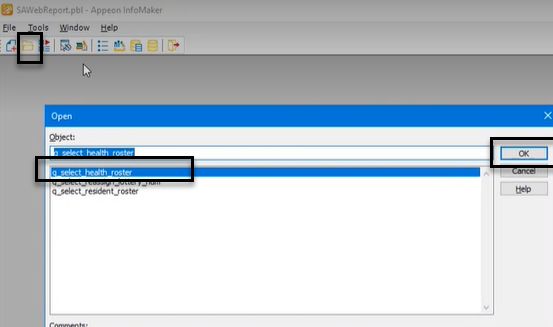
Click the Open icon.
On the Open pop-up, in the Object section, select the report or query you want to customize.
Click OK.
Customize the report or query as needed.
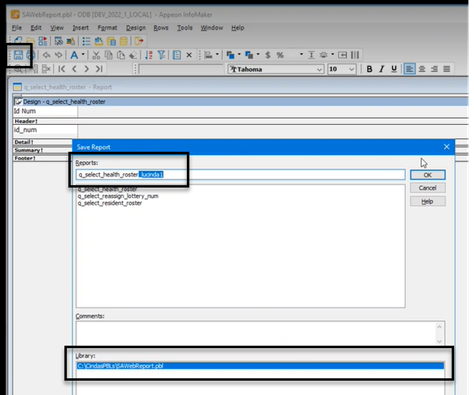
Save the customized version in the shared folder by adding a unique, easily identifiable extension to the file name.
Tip
By default, InfoMaker saves the customized version in the same folder that you opened the original version from. Confirm the file path is correct in the Library section.
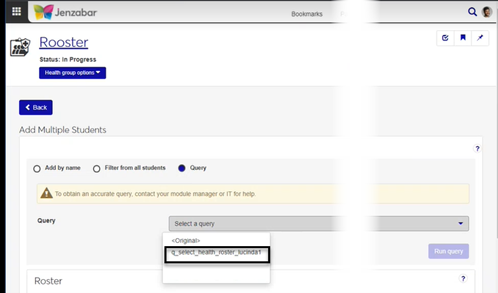
On the corresponding report page in J1 Web:
Customized versions of queries will display in the Query or Data Set drop-down.
Customized versions of reports will display in the Report Layout drop-down.
In most cases, yes. Customized versions of the report created in Desktop before your school started using J1 Web should be available as options in the Report Layout drop-down. If your school created new customized layouts in Desktop and copied them to the appropriate location on the J1 Web server, those reports are also available in the drop-down.
However, certain reports were modified to be used in J1 Web (i.e., the base report for J1 Web is different from the base report in Desktop). In those cases, the customized versions from Desktop will not work even when they are moved to the correct location on the J1 Web server. You'll need to re-customize those reports from the original version of the J1 Web report by following the instructions to Customize Reports for J1 Web.
See the help for each report page for guidance about customizing a specific report.
For the customized versions of the report created in Desktop to appear as choices in the Report Layout field drop-down, your campus support team needed to complete certain steps as part of the installation process. For more information, contact your campus support team or see Working with Reports in J1 Web.
Tip
Only custom versions of the report created in Desktop before J1 Web installation will appear as choices in the Report Layout field drop-down. Reports customized in Desktop after you've installed J1 Web are not available in the drop-down unless they have been copied over to the appropriate location on the J1 Web server.
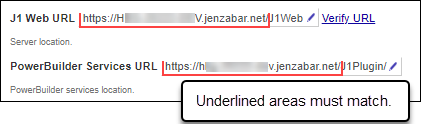
Verify the PowerBuilder Services URL is entered correctly in System Administration, System Settings, Product Installs and Sign page.
The URL must use HTTPS and not HTTP
The URL subdomain and domain must match the J1 Web URL
If the location where you store J1 Web reports is not the default installation location (C: > Jenzabar > Reports), verify the J1 Web server has permission to access the location. Detailed steps are available in the help topic Working with Reports in J1 Web.