Maintain Table Values
Important
Information and features vary according to the roles to which you belong and the permissions associated with those roles. For more information, contact your module manager or your campus support team.
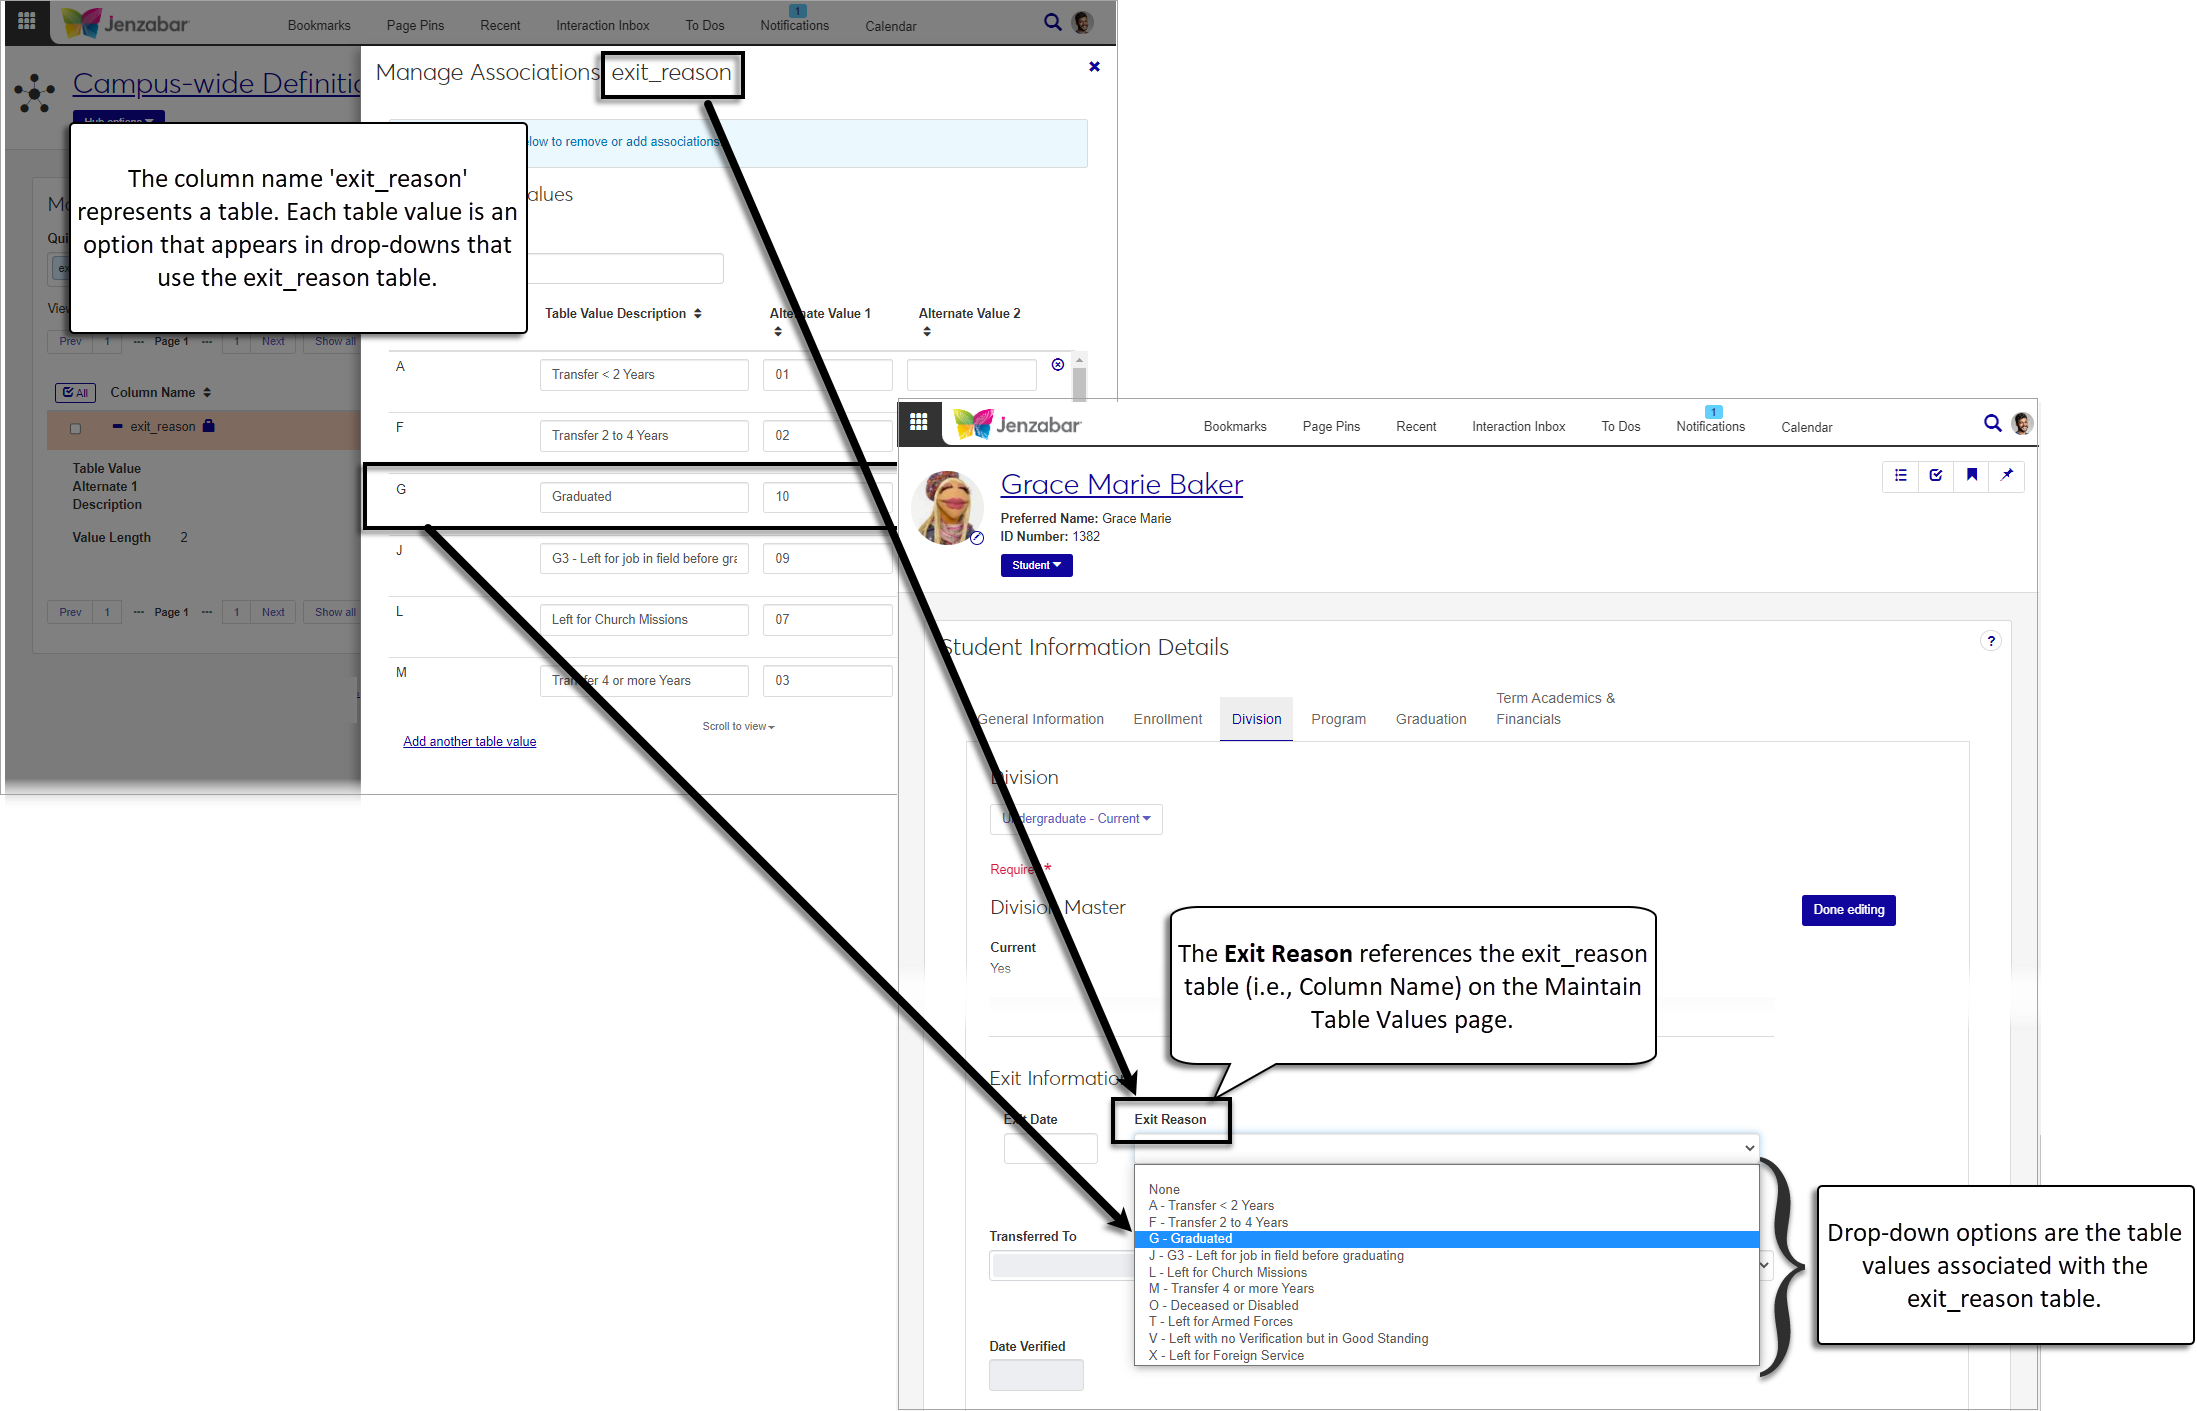
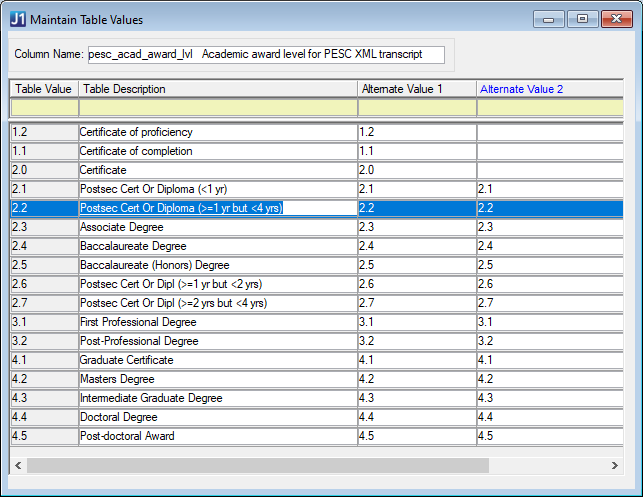
The Maintain Table Values page lets you manage many of the tables and values that are used throughout the system. Each Column Name represents a table, and the Associated Values (also referred to as table values) are the drop-down options available on the pages that use that table.
Several tables and their associated values are provided as default data and identified with a lock icon. Tables (i.e., Column Names) with a lock icon cannot be deleted or have properties like name and description updated; however, the associated values for that table may be editable. Associated Values (i.e., table values) with the lock icon cannot be deleted.
Many of the processes that use the Alternate Value 1 and Alternate Value 2 fields are still accomplished in Desktop. The table below outlines the column names and processes that use Jenzabar-provided alternate values. If you add table values, be sure to use the appropriate alternate value field. For additional information, see the Desktop help for Alternate Value 1/Alternate Value 2.
Report or Process | Column Names | Alternate Value Used |
|---|---|---|
Calculating Satisfactory Progress |
| Alternate Value 1 |
IPEDS Reporting for HR |
| Alternate Value 1 |
IPEDS Reporting for Registration |
| Alternate Value 1 |
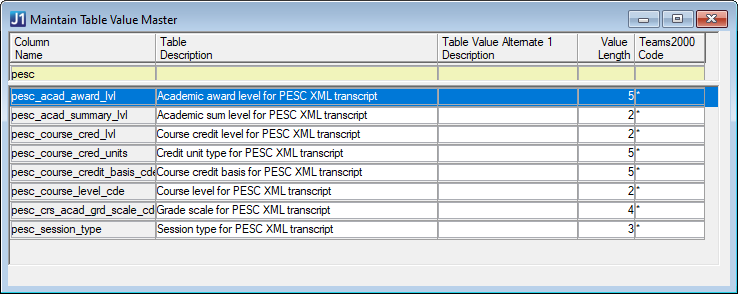
PESC Transcript (XML) |
| Alternate Value 1 |
PESC Transcript (EDI) |
| Alternate Value 2 |
Satisfactory Progress Details |
| Alternate Value 1 |
State Reporting | Column names vary depending on your state's reporting requirements. | Alternate Value 2 |
SEVIS Reporting |
| Alternate Value 1 |
New table definitions are saved to the TABLE_MASTER table. New table values are saved to the TABLE_DETAILS table.
To manage table values, you must belong to a role with Can view table values, Can manage table values, or Can manage associated values permissions enabled. Jenzabar provides these permissions with the Core, Campus-wide Definitions role, but your school may have created a customized version of this role.
From the Core, Campus-wide Definitions Hub options, select Maintain Table Values.
Tip
You can also use the global "System page" search to quickly access the Maintain Table Values page.
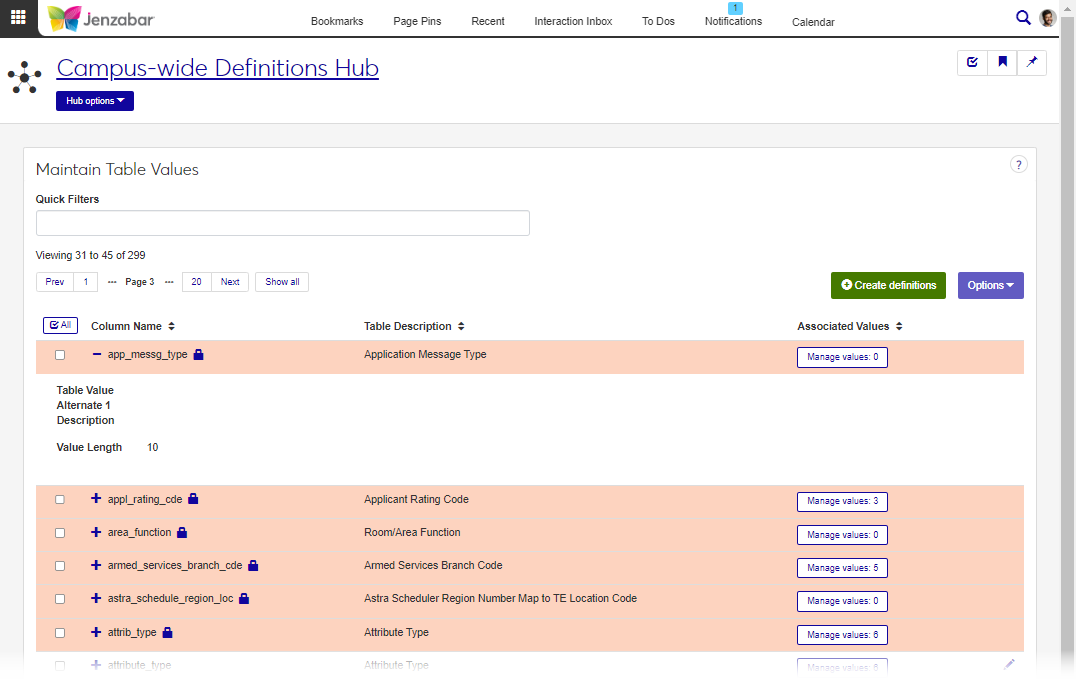
On the Maintain Table Values page, use Quick Filters and column sorting to find table names.
Use the Expand icon to view additional details about each column name.
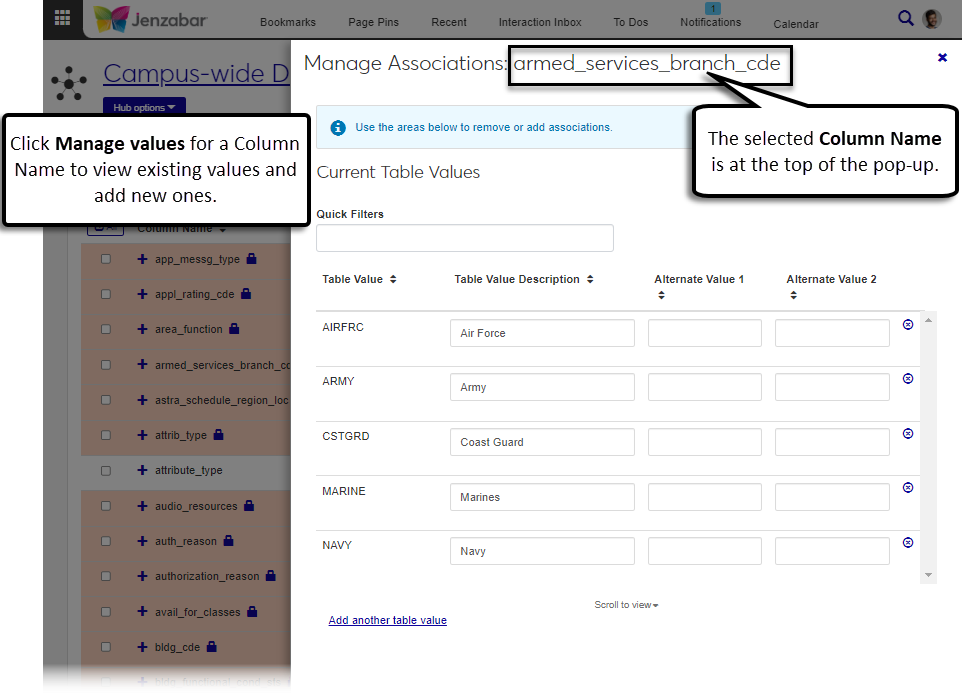
Click the Manage values button to view table values associated with the selected column name.
From the Maintain Table Values page, click Create definitions. The Create Table Definition pop-up opens.
Enter a unique Column Name (up to 30 characters). Required, and cannot be updated after the definition is saved.
Enter an informative Table Description (up to 60 characters). Not required, but identifies how the table is used.
Enter a Table Value Alternate 1 Description (up to 60 characters). This field isn't used by Jenzabar One, but schools can use it to customize information for their own needs (e.g., reports, data exports, etc.).
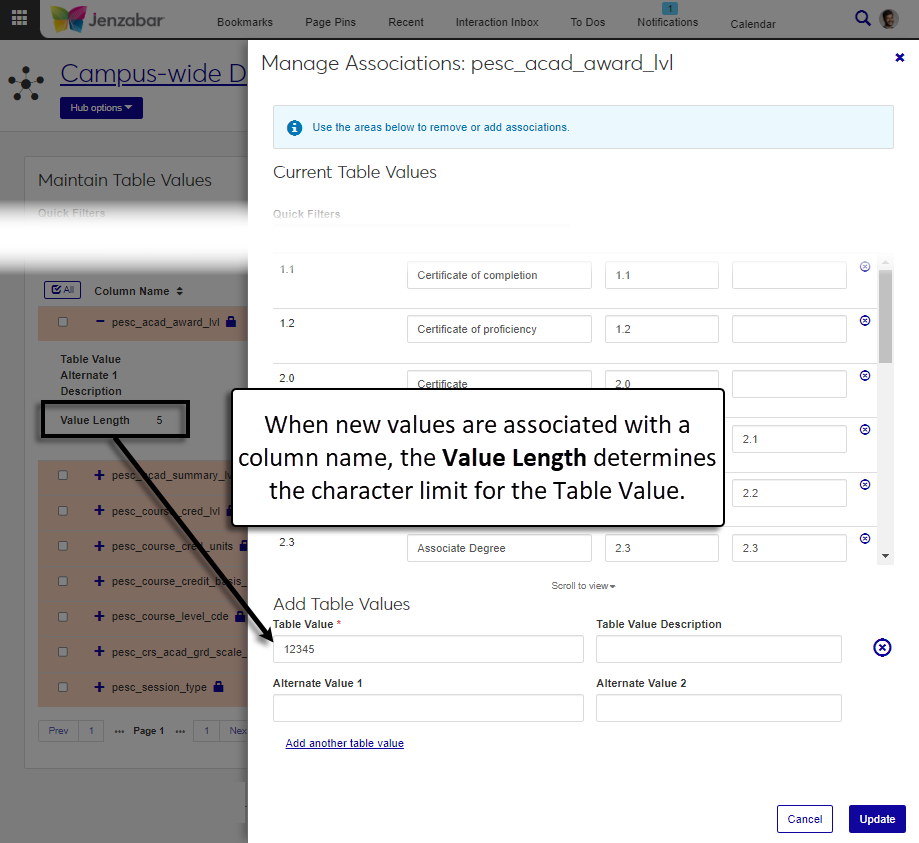
Enter a positive integer Value Length to define the character limit for table values added via the Manage values button. Required.
Click Save and create another or Create and close.
Properties for Jenzabar-provided tables (e.g., description) cannot be edited.
From the Maintain Table Values page, click the table's Edit icon. The Edit Table Definition pop-up opens.
Enter your updates to the Table Description, Table Value Alternate 1 Description, and/or Value Length.
Click Update.
Jenzabar-provided tables cannot be deleted.
On the Maintain Table Values page, click the Manage values button for a table. The Manage Associations pop-up opens.
Click the Add another table value link.
Enter a Table Value to identify the value that appears in drop-down menus. Required. The character limit is the Value Length defined for the table, and the value cannot be changed after saving.
Caution
Certain table values are used in reports and other system processes and must be in a particular format. Jenzabar-provided values are in the correct format, but the system doesn't restrict or validate new values that are added. To ensure the values are in the appropriate format, reference resources like irs.gov (1098-T reporting), the IPEDS website, and the online help for specific processes. If you need assistance, contact your campus support team.
Enter a Table Value Description (up to 60 characters). Not required, but helps identify the option when it is displayed in drop-downs.
Enter an Alternate Value 1 and/or Alternate Value 2. Not required, but certain processes use these values. See the Working With Alternate Values section for more information.
To add more values, repeat Steps 2 - 5.
Click Update.
On the Maintain Table Values page, click the Manage values button for a table. The Manage Associations pop-up opens.
Use Quick Filters and column sorting to find a table value.
Make changes to the Table Value Description, Alternate Value 1, and/or Alternate Value 2.
Click the Remove icon to delete table values.
Note
When a Jenzabar-provided table value has a Lock icon, it can be edited, but not removed.
Click Update.
From the Maintain Table Values page, select the rows you want to export to activate the Options button.
From the Options drop-down, select Download to Excel. The Download to Excel pop-up opens.
Select options for the Excel format and data columns.
Click Download. Your .xlsx or .zip file is saved in the file location that you have set in your browser settings.
Any new tables you define from the Maintain Table Values page cannot be used with existing Jenzabar One functionality (i.e., they won't appear on pages or pop-ups). Most schools create tables and add values to use in customized InfoMaker reports or to provide drop-down options for user-defined forms. For additional information about InfoMaker, see the InfoMaker Resource Center on MyJenzabar: https://www.myjenzabar.net/ICS/Resource_Center/Jenzabar_One/Third-Party_Reporting/InfoMaker_Resource_Center/
Jenzabar One is in the transition process to bring the Desktop functionality to J1 Web, and there are efforts to use definition tables to better manage information in the database. Because Desktop relies heavily on the Maintain Table Values functionality, the first phases of the transition mirror that functionality to allow data entered in J1 Web to be visible in Desktop.
For additional information about where the system uses Maintain Table Values and where it uses definition tables, see the help for the page or definition you want to use. If you need additional assistance, contact your campus support team.