GL Accounts
Every aspect of a General Ledger relates to accounts. The GL Accounts page allows you to search, edit, and create accounts.
 |
To work with GL Accounts, users will need to be assigned to a role with some combination of the following permissions:
Role | Role Permissions |
|---|---|
General Ledger Accounting GL Account Alternate Code Access > GL Account Management | Can view GL accounts Can edit GL accounts Can create GL accounts Can delete GL accounts Can download to Excel |
Account Number
Description
Type
Fund Type
Available for Budgeting
Available for Purchasing
Fixed Asset Account Type
Fund Balance Account Number
GL Account Components
Balances Not Equal
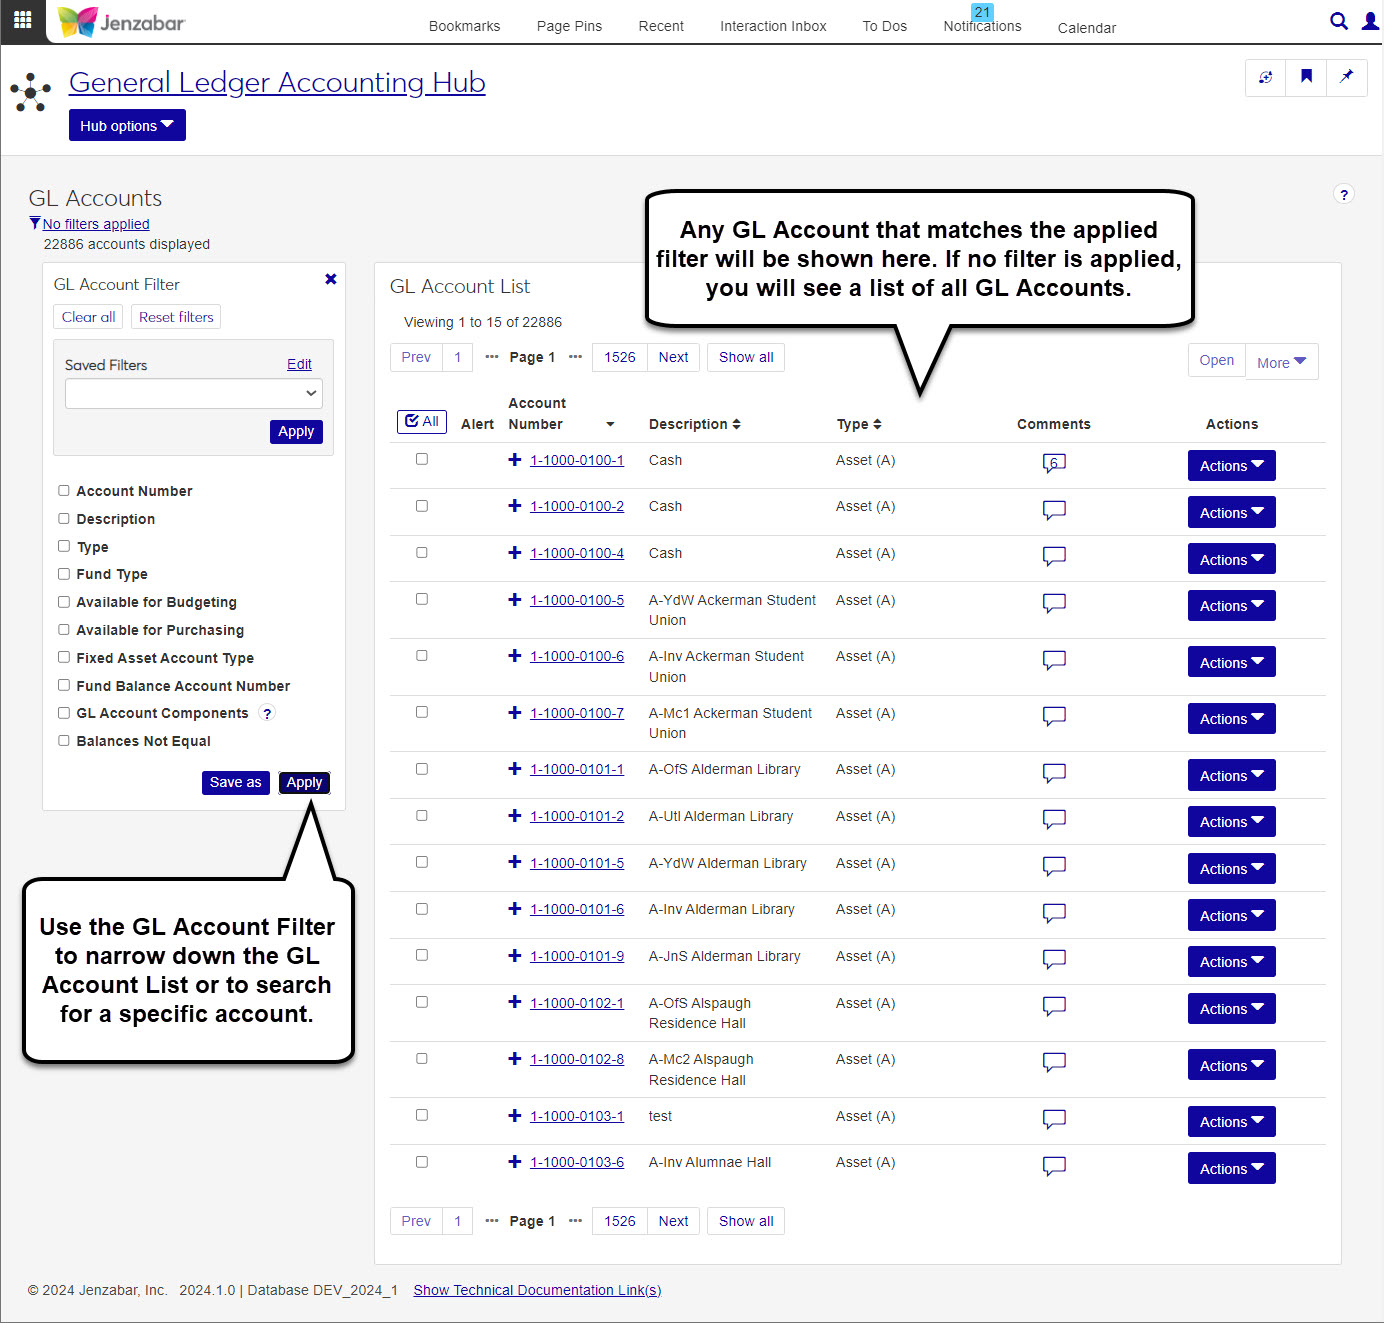
The GL Account List page allows you to view and manage all the accounts you have permission to access.
All accounts are associated with an Account Type, which is assigned based on the purpose of the account. Using account types allows the system to calculate the fund balances and assets so they can be summarized in the income statements and balance sheets.
Balance Sheet: Assets = Liabilities + Fund Balances
Income Statements: Fund Balances = Income - Expenses + Auxiliary
Code | Description | Type |
|---|---|---|
A | Assets | Balance Sheet |
L | Liabilities | Balance Sheet |
F | Fund Balances | Balance Sheet |
M | Not Active | Balance Sheet |
I | Income | Income Statement |
E | Expenses | Income Statement |
X | Auxiliary | Income Statement |
N | Not Active | Income Statement |
This can be useful when you're creating a few accounts. You can enter account information directly or paste GL account information into the system from an external source like Microsoft Excel or Google Sheets.
Navigate to the Create GL accounts page. From this page, use the 4-step wizard to create new GL accounts.
Tip
At any point in the wizard process, you can click the Save and Finish Later button to pause work on the GL Accounts. You will need to enter a name for the save so you can access your progress when you can return. Your progress save will be available for up to 30 days, and can be accessed from the main Create GL Accounts wizard and selecting the Continue where you left off option on Step One.
STEP ONE: How to Create GL Accounts
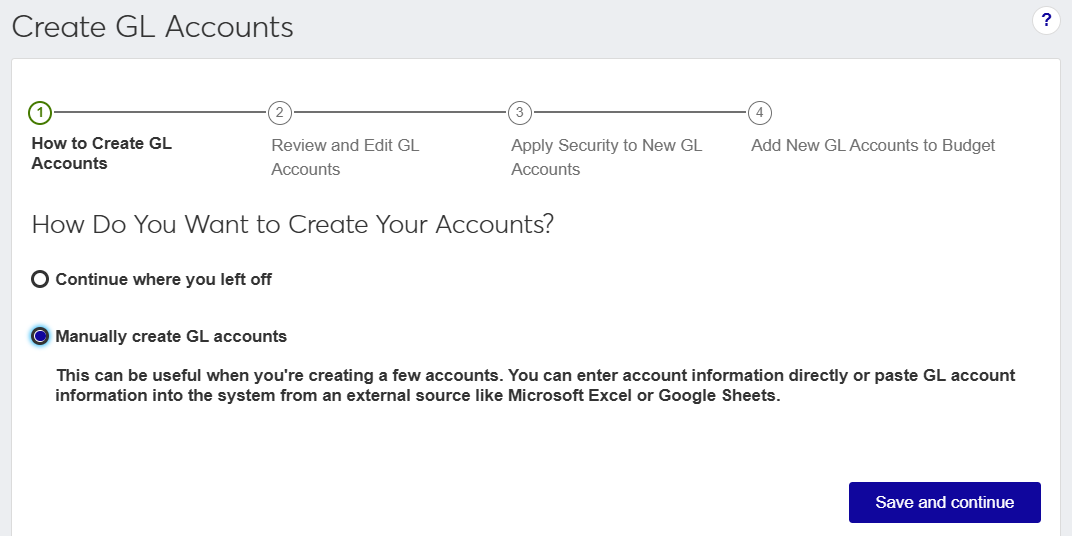
Select Manually create GL accounts button.
Click Save and continue.
STEP TWO: Review and Edit GL Accounts
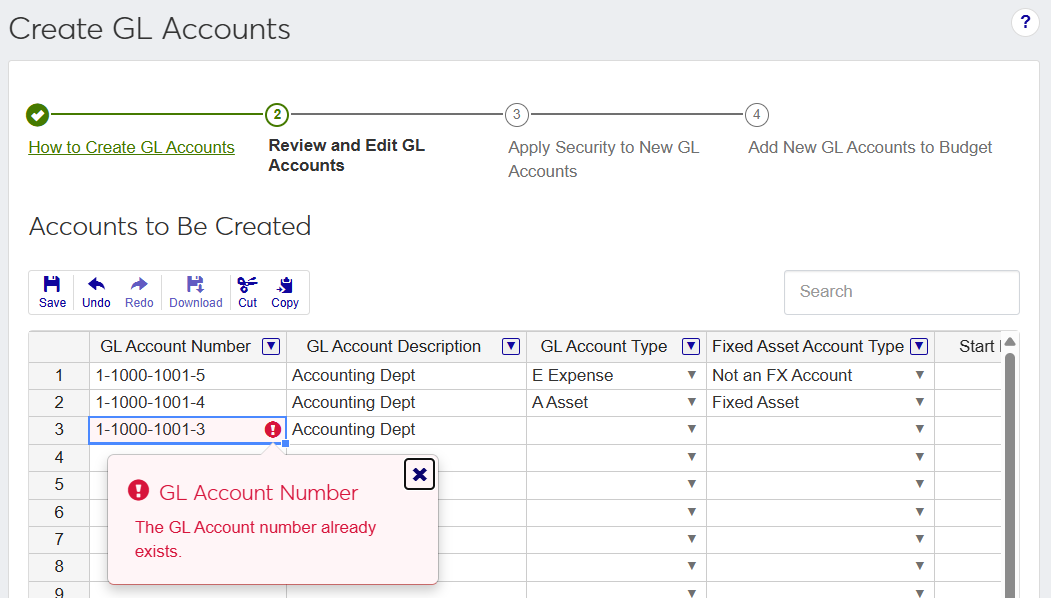
This step is where you'll add, review, and edit GL accounts by entering the new account information into the spreadsheet.
There are two ways you can add accounts to the spreadsheet:
Type the account information directly into the spreadsheet.
Paste from Excel (using Ctrl + C and Ctrl + V).
Verify the account information.
Click the Save icon
 in the upper left corner of the worksheet to see if there are any errors or warnings that appear for the newly entered rows.
Click Save and continue.
STEP THREE: Apply Security to New GL Accounts

From this step, you can select roles and components to manage the accounts.
When this section opens, you will notice that the accounts are labeled with a warning icon
 and under the Security column is the "Not assigned, no users have access" message, which means you need to choose who will be able to access the accounts being added.
Using the checkboxes next to the accounts and the Add component security or Add alternate security buttons, you can quickly assign users to the accounts.
Component Security: allows you to select predefined roles giving permission to any user assigned to the role access to the selected accounts.
Alternate Security: allows you to select a predefined security code that will provide users assigned to that code access to selected accounts.
Click Save and continue.
STEP FOUR: Add New GL Accounts to Budget
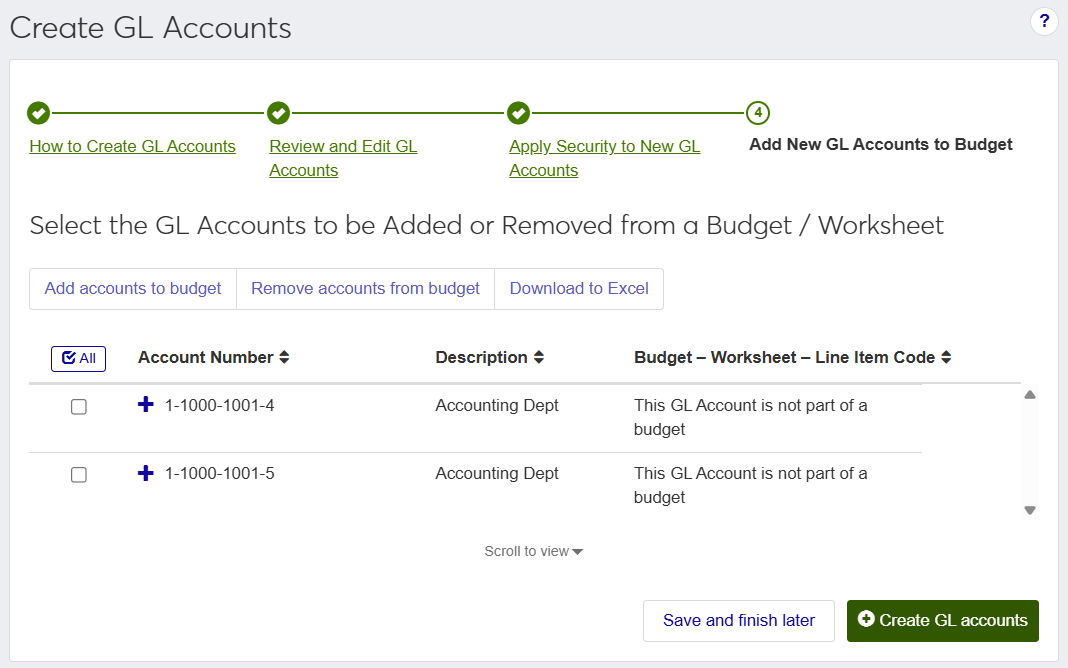
In this step, if any of the new accounts need to be part of a budget, you can use the checkboxes and the Add accounts to budget button.
Once you have all the new accounts added, verified, secured, and applied, you can click the Create GL accounts button. After a quick pause to make sure you want to complete the process, you will be redirected to the GL Account List page.
While you have the best intentions, occasionally you'll need to take a break or end for the day. In the Create GL Accounts wizard, when you use the Save and Finish Later option at the bottom of any step, you will be asked to name the save and you can refer back to it at a later time. These saves allow you to pick up where you left off in a previous session.
Open the Create GL Accounts wizard.
Select the Continue where you left off option.
In the Select Saved Create GL Account Wizard drop-down, choose the saved version you want to continue working on.
Warning
You can return to a saved wizard session for up to 30 days. After 30 days your save will be removed and you'll need to start over with the Manually Create GL Accounts option.
The wizard will open to step where you left off, and you can continue working with the wizard steps to completion.
Select the checkboxes next to the rows you want to export.
From the Options drop-down, select Download to Excel. The Download to Excel pop-up opens.
Select options for the Excel format and data columns.
Click Download. Your .xlsx or .zip file is saved in the file location that you have set in your browser settings.