Case Management
Important
Information and features vary according to the roles to which you belong and the permissions associated with those roles. For more information, contact your module manager or your campus support team.
On the Case Management page in the Student Conduct Hub, users with the necessary permissions can view existing cases, edit the case status, and reassign cases to a different conduct department. They also have access to the summary page for individual cases.
Users in the Student Conduct - Assistant Director Access by Department role (or a role copied from it) with the "Can view assigned cases" permission can view cases assigned to them.
Users in the Student Conduct - Director Access by Department role (or a role copied from it) with the "Can view all cases" permission can view all cases assigned to departments they have permission to see.
On the Cases page, you can view a list of all cases or just those assigned to you, depending on your permissions.
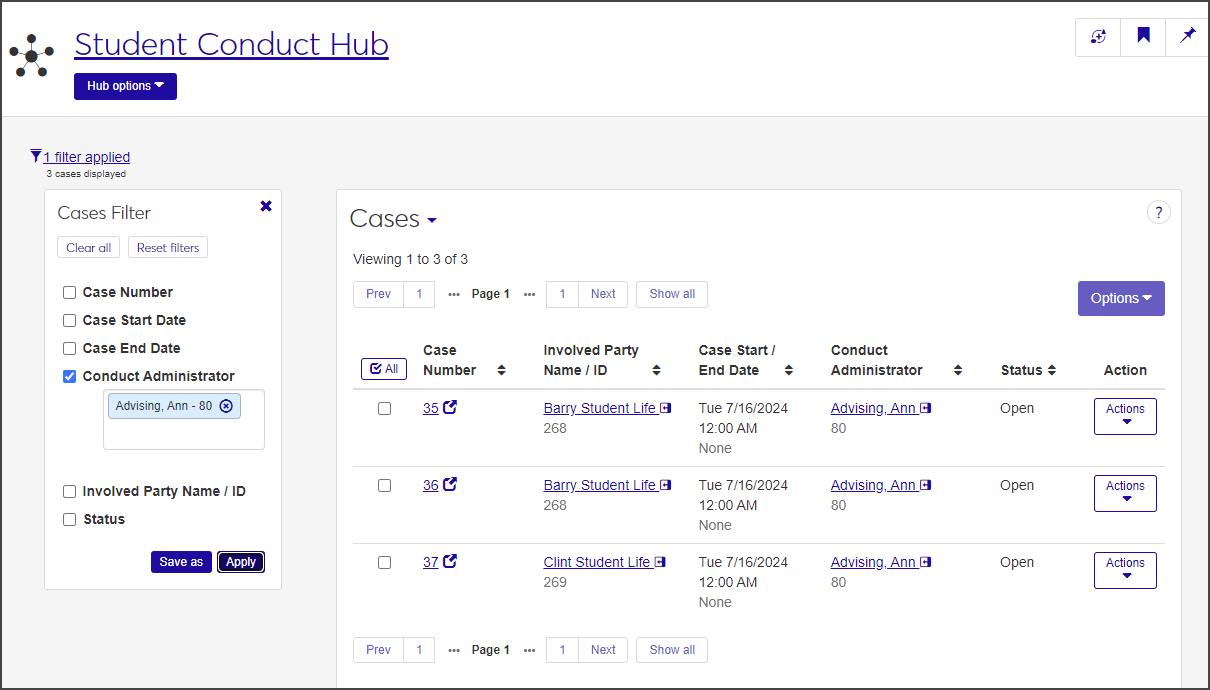
For each case, the page displays the case number, the involved party name and ID, the case's start and end dates, the conduct administrator, and the case's status.
Narrow the list using the Cases Filter:
Select the checkbox for one or more filter options from the Cases Filter.
Select or enter the criteria by which you want to filter the list.
Click Apply.
To edit a case's status, you must be in one of the following roles with the specified permissions:
Users in the Student Conduct Assistant Director Access by Department role (or a role copied from it) with the "Can edit assigned cases" permission enabled can edit the status of cases assigned to them.
Users in the Student Conduct - Director Access by Department role (or a role copied from it) with the "Can edit all cases" permission enabled can edit the status of all cases.
You can edit the status for cases individually or in a batch.
To edit the status of an individual case:
On the Case Management page, select Edit case status from the Actions drop-down for the case you need to edit. The Edit Case Status pop-up opens, displaying the case number, case start date, and name and ID of the involved party for the selected case.
The Select a Detail to Update field displays Status by default and cannot be changed.
Select a new status from the drop-down next to the Select a Detail to Update field.
Click Update to save the change and close the pop-up.
To edit case statuses in a batch:
From the Case Management page, select the checkbox next to each case you need to edit. Click All to select all cases on the list.
Select Edit cases status from the Options drop-down. The Edit Cases Status pop-up opens, displaying the case number, case start date, and name and ID of the involved parties for each case selected.
The Select a Detail to Update field displays Status by default and cannot be changed.
Select a new status from the drop-down next to the Select a Detail to Update field. This status will be applied to all the cases you selected.
Click Update to save your changes and close the pop-up.
Users with the necessary permissions can reassign cases to another conduct department or conduct administrator (or both).
To reassign cases, you must be in a Student Conduct - Assistant Director Access by Department or Student Conduct - Director Access by Department role (or a role copied from one of those roles) with the "Can reassign cases" permission enabled.
You can reassign cases individually or in a batch.
To reassign an individual case:
On the Case Management page, select Reassign case from the Actions drop-down for the case you need to reassign. The Reassign Case pop-up opens, displaying the case number, current conduct department, and case start date for the case.
From the Select a Detail to Update drop-down, select Conduct Department or Conduct Administrator.
From the drop-down next to the Select a Detail to Update field, select a new conduct department or conduct administrator.
To update another conduct department or administrator, click Add another detail and repeat steps 2 and 3.
Click Update to save the changes and close the pop-up.
To reassign cases in a batch:
On the Case Management page, select the checkbox next to each case you need to reassign.
Select Reassign cases from the Options drop-down. The Reassign Cases pop-up opens, displaying a list of the cases you selected.
If you need to remove a case from the list, click the Remove icon for that case.
From the Select a Detail to Update drop-down, select Conduct Department or Conduct Administrator.
From the adjacent drop-down, select a new conduct department or conduct administrator, depending on the detail you chose.
To add another conduct department or administrator, click Add another detail and repeat steps 4 and 5.
Click Update to save the changes and close the pop-up. All selected cases are now assigned to the new department or administrator.
Users with the necessary permissions can add and edit user-defined fields that allow you to track records, build forms, customize reports, and track other unique information not captured by the standard fields. User-defined fields are managed by the System Administrator, but other users can edit them.
To configure or edit user-defined fields, the "Can configure user-defined fields" permission must be enabled in the Campus-wide Definitions Only School Definitions role.
Note
User-defined fields are configured in the Campus-wide Definitions Hub. To access the hub from the main navigation menu, select Core > Campus-wide Definitions > User-Defined Fields. From there, click Configure for the relevant row.
To learn how to configure user-defined fields, see User-Defined Fields.
Select User-Defined Fields from the Actions drop-down menu for the relevant definition. The User-Defined Fields window opens.
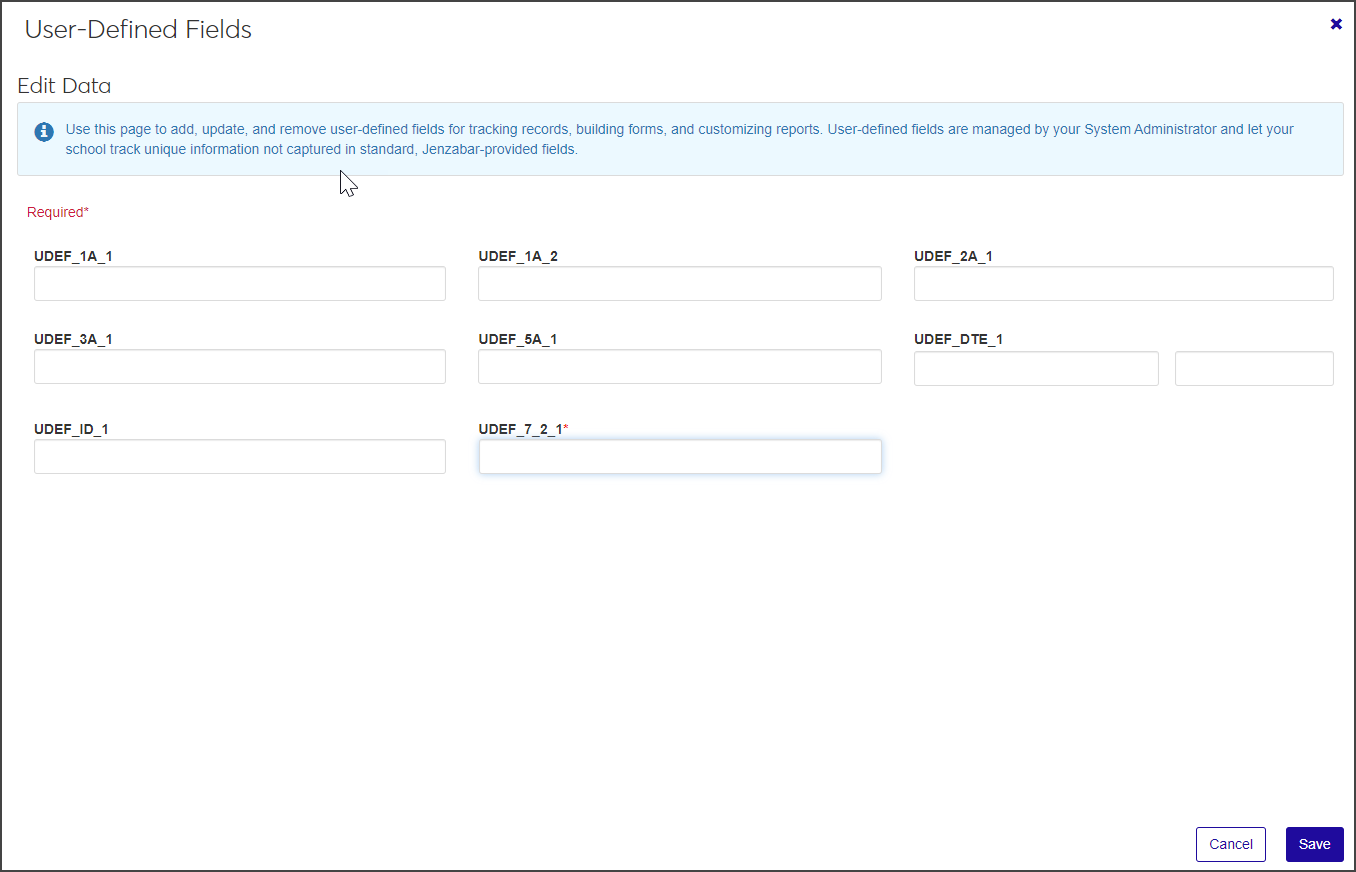
Edit the existing user-defined fields as necessary.
When you are done, click Save.