Create Miscellaneous Charges
Important
Information and features vary according to the roles to which you belong and the permissions associated with those roles. For more information, contact your module manager or your campus support team.
Use the Create Miscellaneous Charges page to manually add fees to student records. You can access the page from the Receivables Management Hub navigation or by clicking Create MS charges on the Miscellaneous Charges list page.
To create MS charges, you must be in a Receivables Management role with the "Can create miscellaneous charges" permission.
You can also add miscellaneous charges from the Desktop A/R Charge Entry window (accessed from the Miscellaneous Charges window).
There are several columns displayed by default in the transaction spreadsheet. You can use the Column Selector in the toolbar to display or hide columns.
Column Name | Description |
|---|---|
Billing Fee Code | Identifies a predefined miscellaneous charge. Required. Prepopulated with the code entered at the top of the page. |
Billing Fee Code Description | Autofilled with the selected Billing Fee Code's description. |
ID Number | Indicates the ID number of the person associated with the charge. Required. |
Name | Autofilled with the name for the selected ID Number. |
Transaction Amount | The amount associated with the selected fee code. Required. If the Billing Fee Code defines the fee amount, the field is autofilled. |
Comments | Used to provide additional information about the transaction. This column is disabled until the MS charge is created. |
Folio | Provides additional information about the transaction that can be used for future reference (e.g., in customized reports for your school). |
Transaction Description | Autofilled with the description from the selected billing fee code and can be manually updated (up to 40 characters). |
Transaction Date | Prepopulated with the Date in the header and can be manually updated. Required. If there are multiple transactions in the MS charge, all transactions must have dates within the same month. |
AR Subsidiary Code | Prepopulated with the AR subsidiary code associated with the selected billing fee code. |
Financial Aid Period Code | Indicates the academic term and payment period associated with the transaction. |
Financial Aid Period Description | Autofilled with the description defined on the Financial Aid Period Definition. |
Third Party ID | Identifies the third-party responsible for the payment. Required when there's a third party amount. |
Third Party Name | Autofilled with the name of the selected Third Party ID. |
Third Party Amount | The amount to be paid by a third party. |
1098-T Eligibility Flag | Indicates how the transaction will be flagged for 1098-Ts. If the selected Billing Fee Code has a 1098-T value associated with it, this column is autofilled with that value. The value can be changed as needed. Available options include: |
1098-T Eligibility Description | Describes the selected 1098-T eligibility flag. |
Billing Period Identifier | Indicates the billing period associated with the transaction. |
Billing Period Description | Autofilled with the description from the Billing Period definition when the Billing Period Identifier is entered. |
1098-T Academic Year / Term | Indicates the year and term the charge is for. Required. |
Project Code | Indicates the project the transaction is associated with. Available options are determined by your Project Access role and permissions. |
Project Code Description | Autofilled from the Project Master based on the selected Project Code. |
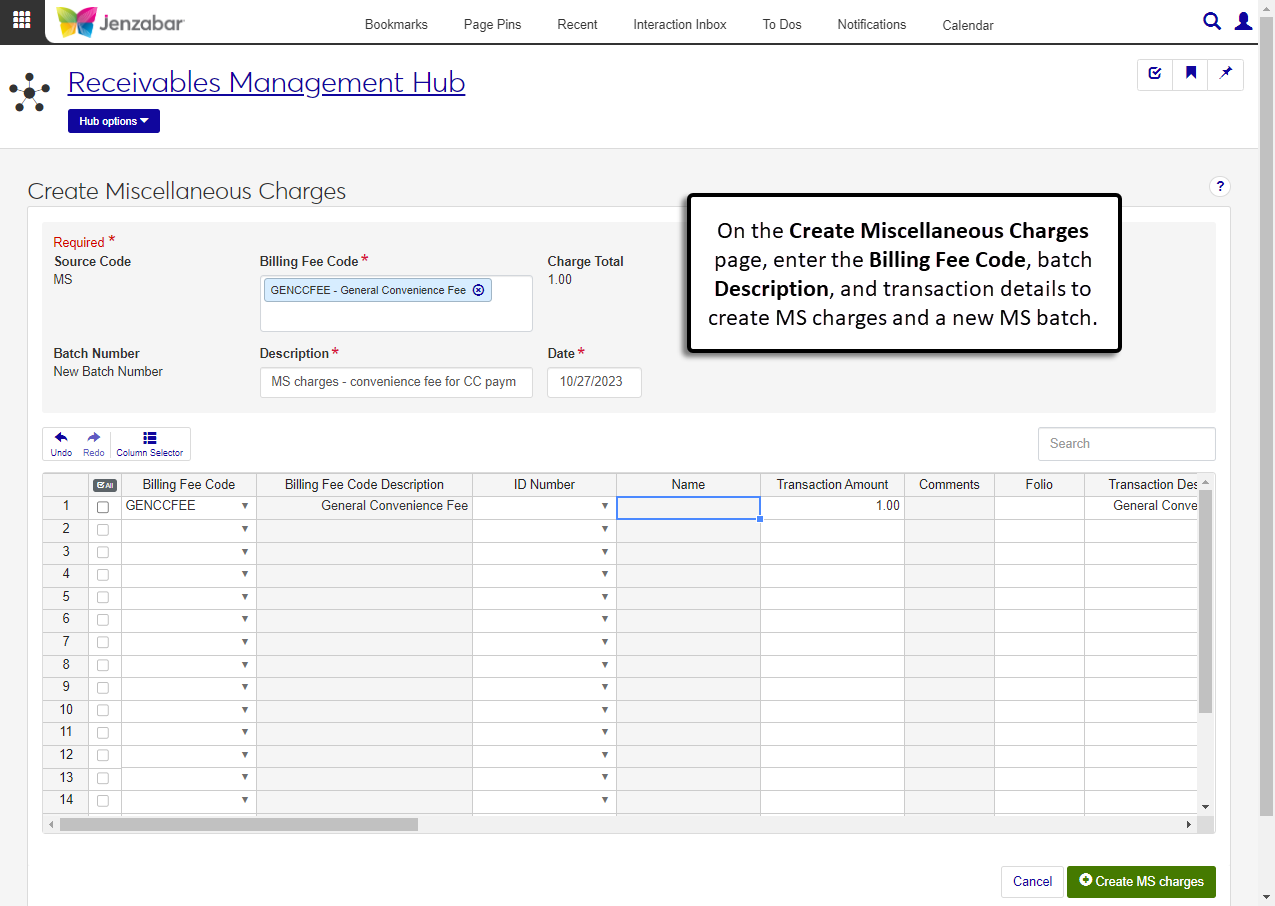
Open the Create Miscellaneous Charges page from the Miscellaneous Charges list or the Receivables Management Hub navigation.
Click in the Billing Fee Code field and select an option from the drop-down. Required.
Enter a charge Description. Required.
The Date is set to today's date by default, and you can update it if needed.
In the transaction spreadsheet, enter or select information for the following required columns.
Billing Fee Code (prepopulated with the selection from the top of the page)
ID Number
Transaction Amount
Transaction Date (defaulted to today's date)
1098-T Academic Year / Term (required when the charge is 1098-T eligible)
Use the spreadsheet toolbar to undo or redo changes in the spreadsheet.
If needed, use the Column Selector to update which columns are displayed and hidden.
Click Create MS charges. The MS charges detail pages opens for review and updates.