Data Privacy Requests
Important
Information and features vary according to the roles to which you belong and the permissions associated with those roles. For more information, contact your module manager or your campus support team.
The Data Privacy Requests page displays data privacy requests submitted by users and other constituents whose data is stored in your system. The requests are shown in the order they were received, and the table is filtered to pending requests by default. You can change how the data is filtered using the menu on the left side of the page. You can also sort any of the columns in ascending or descending order.
Included in the data privacy requests table are the requester's name, the request category, and the verification status. Click the plus sign next to the name to view additional information and make changes. New requests can be created by staff from this page or they may be received via an online form available on your Campus Portal.
Manage Data Privacy Requests
To access the Data Privacy Requests page and view the various requests, a user must have the Can manage data privacy requests permission turned on. The Common Processes role is required to manage these permissions.
Download Data
To download data privacy requests to an Excel file, a user must have the Can download data permission turned on.
Forget Data
A user must have the Forget Data permission turned on before they can use the Forget Data action to fulfill a request.
Caution
The Forget Data action permanently deletes and anonymizes data and cannot be reversed. For this reason, it's recommended that schools limit the number of users who have access to this permission.
Students, alumni, and other individuals who have records in Jenzabar One may submit a request to access the data your institution has on them. Failure to provide this access may violate the Family Educational Rights and Privacy Act (FERPA) if your school is in the US or the General Data Protection Regulation (GDPR) if your school is located in the EU.
To fulfill a data access request, use the Actions menu to Download data for the user. The system will generate a zipped folder that includes a text file for each table that contains records pertaining to the user who made the request.
Warning
If you receive a data access request from a student through a phone call or in person rather than through the J1 portal or an official school email account, it's wise to verify the person's ID before providing them access to any data. The verification tracking feature can be useful in these instances to ensure that data is only given to a person who has the right to access it. Verification occurs outside of Jenzabar One and the process can vary by intuition.
FERPA and GDPR regulations offer set guidelines that may require schools to delete and anonymize data in response to a request from a former student. The Forget Data Request feature facilitates that process.
Tip
Before attempting to forget a user's data, select Generate data report under the Actions menu to create a data report for the user. You can use the data report as a starting point to verify whether or not the person’s data can be anonymized easily. For example, if the person's information is only in the Admissions-related tables, you may be able to honor their request without doing additional research. However, if their data is in tables that are important to a variety of offices on campus, you should check with those other offices to see if there is any reason you cannot honor their request.
To fulfill a forget data request, use the Actions menu and select Forget data. Running the Forget Data option for a person removes data with personally identifying information (PII) that is not necessary to the running of the system and anonymizes any PII data elements for records that should not be removed from the system. The records that are not removed include, for example, course history information required for governmental reporting purposes.
Warning
Individuals who request to have their data forgotten should be warned that removing their data prevents them from accessing any of their data in the future. For example, a student would not be able to request a transcript to be sent to another institution after their data has been forgotten. Additionally, individuals should be notified that your school has a right to deny their request if there is a business reason to keep their data. A student who still owes money to your school, for example, can have their Forget Data request be denied.
Danger
The forget data process is permanent and cannot be reversed. Always ensure that this process is only run after you have verified the identity of the person making the request and warned them that their deleted and anonymized data cannot be recovered.
Upon completion of the process to forget a person's data, the status for the selected Forget Data request row will be marked Completed, and the Status Last Updated On and Status Last Updated By fields will be updated. If you click the Deny Request button, the selected Forget Data request will be marked Denied, and the Status Last Updated On and Status Last Updated By fields will be updated. In both of these scenarios, if you are viewing only the pending requests, the currently selected request will be removed from the list because its status will no longer be pending.
Individuals can submit requests to rescind their consent to your institution's use of their data. Your school can determine what consent types you wish to gather for the people whose data is in your system and which consent types apply to which groups of people. Consent types are created and managed using the Data Privacy Consent Definitions page under the Processes Hub.
Tip
If you choose to use online forms on your Campus Portal to collect consent information, you can create forms with varying consent types that would be presented to different groups of people (i.e. your students can be shown a different form than faculty and staff).
When updating a user's consent there are three options under the Requester Decision is based on the preferences of the individual who made the request. There are three options for this field: Declined, Granted, and No Decision Yet. You can select one of these options for each consent type. Once a Requester Decision has been selected, you cannot change these values. Granted indicates that the person has given your school permission to use their data in the manner defined by the consent type. Declined means that the person does not grant your institution permission to use their data for the specified consent type. Once a decision of Granted or Denied has been selected and saved, you cannot change the decision. This ensures that the history of the person's selection is preserved.
Once you select a Requester Decision, you'll be asked to enter a Processor Resolution, the school's response to the request. The are three options for this field. Pending indicates that a Resolution has not yet been made for a particular consent type. Approved means that the processer has approved the requester's decision for the consent type. Denied shows that the processer does not approve the requester's decision. Once a decision for a consent type has been approved or denied and saved, you cannot change the resolution, so be sure to verify the person's data as necessary and selected the appropriate resolution before saving your changes.
Note
If a consent type has been inadvertently saved with the wrong Requester Decision or Processor Resolution, you can create a new Update Consent request row for the consent type, which will put an end date on the previous consent type, thereby allowing the new consent type's values to override the previous decision.
Consent types associated with a specific request record for a person also have a start and end date, which allows you to collect the consent information from specific individuals on a periodic basis. An end date on a consent type indicates that the requester's decision for a particular consent type is no longer applicable because a newer request and decision for the consent type has been recorded in the system. If another consent type has been added since the request was made, you can use the Actions button to add consent types that are not listed in the original list.
Once you mark the last Consent Type as approved or denied and save the changes, the status for the selected Update Consent request row will be marked Completed, and the Status Last Updated On and Status Last Updated By fields will be updated. If you are viewing only the pending requests, the currently selected request will be removed from the list because its status will no longer be pending.
Consent Holds
When a Denied consent type is approved, a prompt appears allowing you to add a hold to the person's record. If there is a hold associated with the consent type based on the Data Privacy Consent Definitions setup, this hold will be selected by default. You then choose to apply the hold and/or the action list associated with the hold. Adding the hold can automatically block some processing of the person's data as required by the consent type. For example, if a student withdraws their consent for the school to use their student data, then a hold can block the student from registering for courses and block the registrar's office from generating a transcript for the student.
From the Core Processes hub, expand the Data Privacy menu and select Requests. Current data privacy requests are displayed in the Requests table. By default, only requests with a Pending status are displayed.
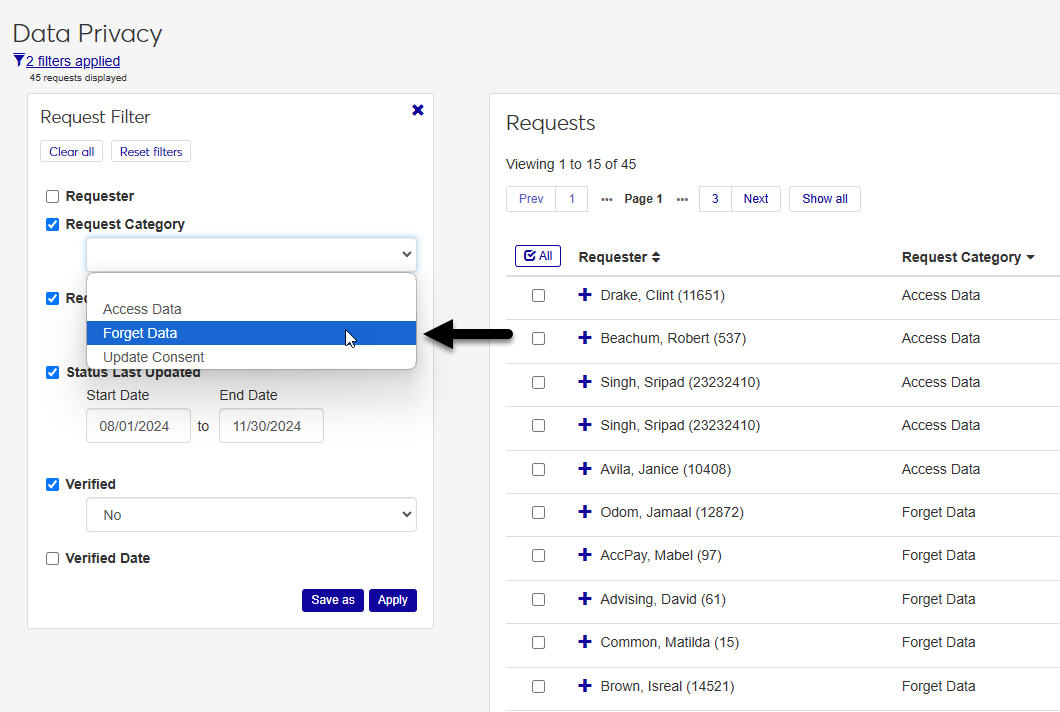
You can filter the table using the Request Filter menu to the left of the page. To add a new filter, click any checkbox and either select a value from the drop-down menu or type a value. Click Apply to update the list based on your selection.
You can remove filters by unchecking a filter that's currently checked. You can also click Clear all to remove all filters. Click Apply to see the changes in the table.
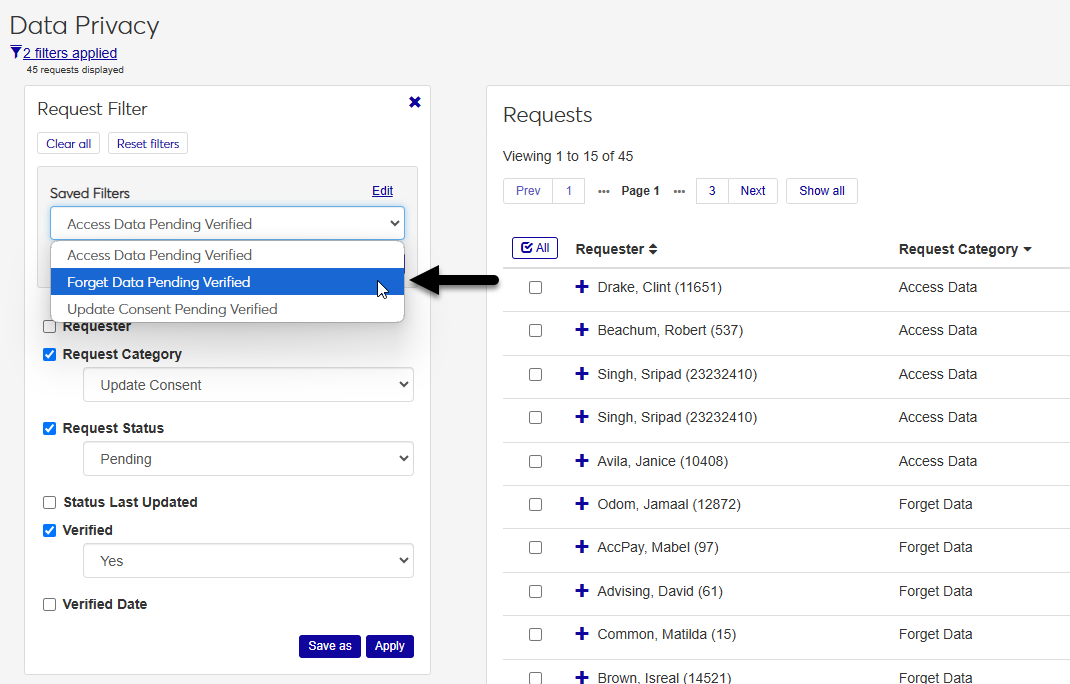
If you have a set of filters that you use often, you can save that filter set to make it easier to recall later. Select the filters you want to add and click Save as. For example you may want to see all pending requests that are unverified.
Name the filter set and check the Set as default box if you want this to be the first set of filters you see every time you return to the page. Click Save to complete the process and create the new filter set.
Once you have saved a filter, you'll be able to select it from the Saved Filters menu that will now be visible on the page. You can edit or delete a filter set you've created by clicking the Edit button.
The Reset filters button allows you to quickly return to the default filter state with the the Request Status filter turned on and the Pending option selected.
You can hide the filter box using the X in the upper right-hand corner of the box. To make the box visible again, click the filters applied link in the upper left-hand corner of the screen just under the Data Privacy section title.
The table data can also be sorted in ascending or descending order using the up and down arrows next to each column heading. Click the arrows once to sort in ascending order. Click the icon again to switch to descending order.
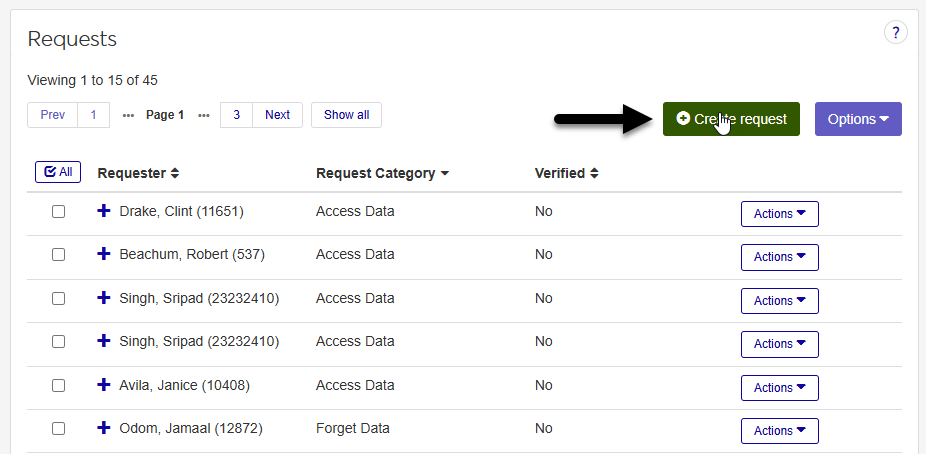
Click the green Create request button.
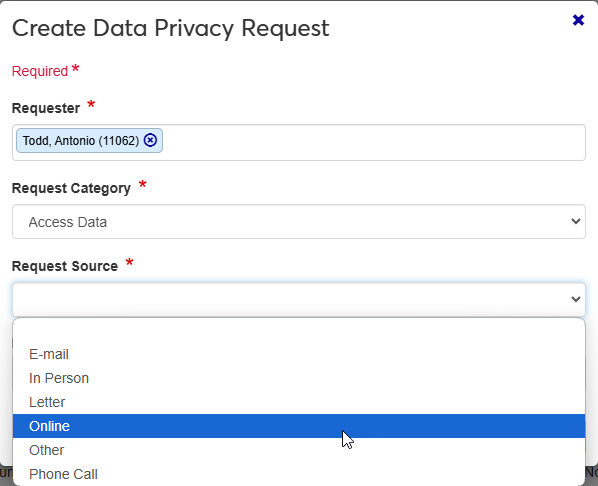
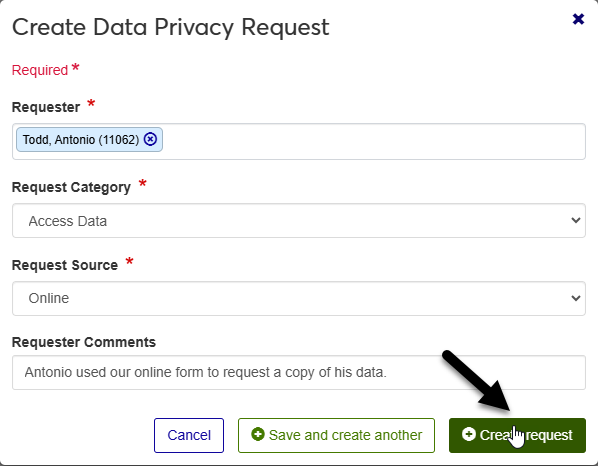
A new window titled Create Data Privacy Request will open. In the Requester field, begin typing the name of the person making the request. The field creates a list of search results as you type.
Once you've located the correct requester, click on the person's name to select them. If you select the wrong person by mistake, you can click the X to remove the name and search again.
Select a Request Category. The three options are: Access Data, Forget Data, and Update Consent. See the Types of Requests section above for more information on each of these.

Select a Request Source from the drop-down list. This specifies how the request was made.
Add optional Requester Comments. These can be helpful for other staff members if the requester provided an explanation for their request.
Click Create request if you only need to add one request at this time or click Save and create another if you would like to add additional requests.
Navigate to Data Privacy Requests under the Processes Hub.
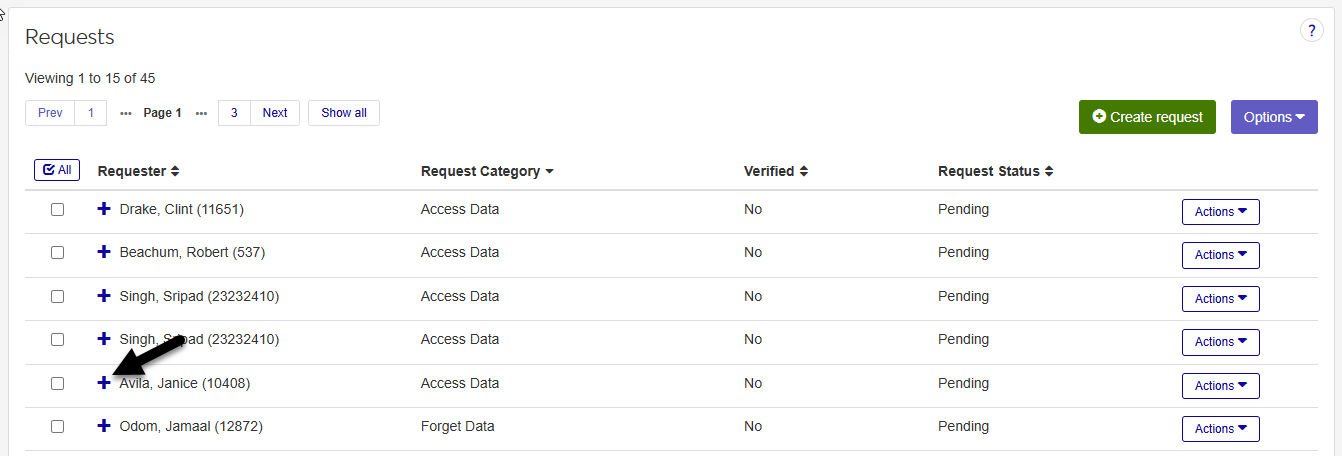
Locate the request you want to edit in the Requests table. You can use the request filters on the left of your screen to make this easier. You can also sort any column in ascending or descending order using the arrows next to the column title.
Once you've located the record that you want to edit, click the + button next to the user's name to expand the request record and view additional details.
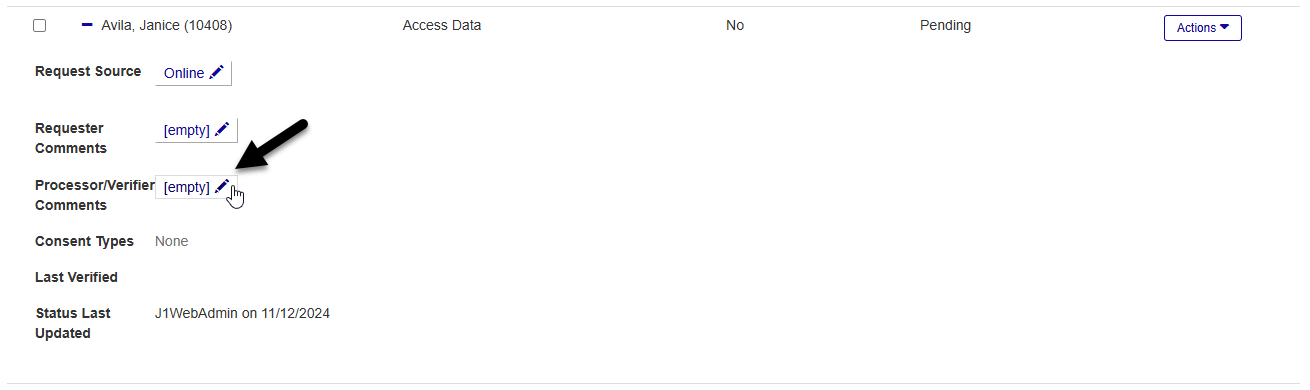
Click the edit icon next to the Request Source, Requester Comments, or Processor Verifier Comments values to add or change existing details. The request source tells you how the request was made. The requester comments convey additional information from the person making the request. The processor/verified comments field is typically used by staff members to add justification for why the request should or should not be fulfilled.
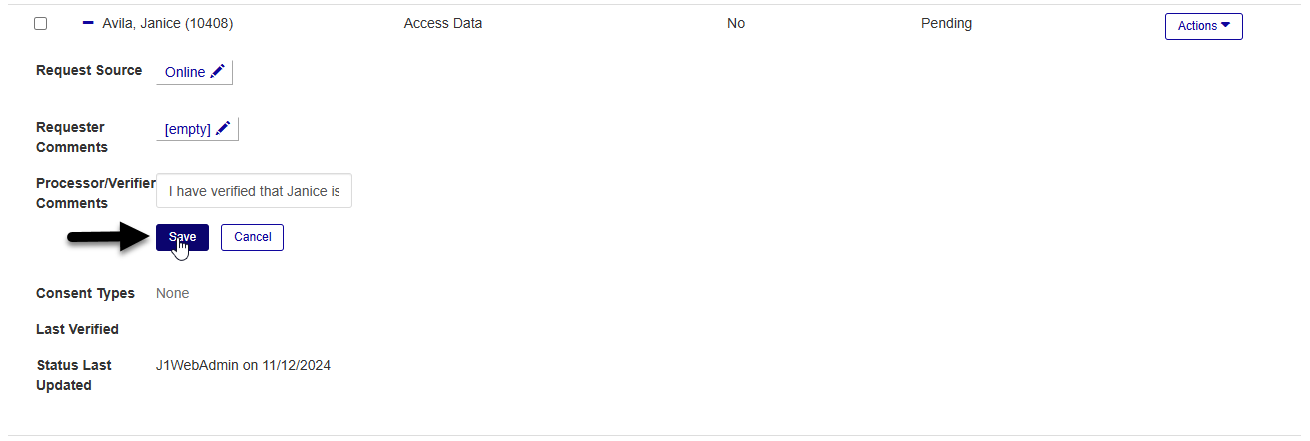
Once you've selected a new request source value or added/edited comments, click Save to save your changes.
Before fulfilling a data access request, ensure that you have verified the identity of the person who will be receiving the data. Verification occurs outside of Jenzabar One and the process can vary by intuition.
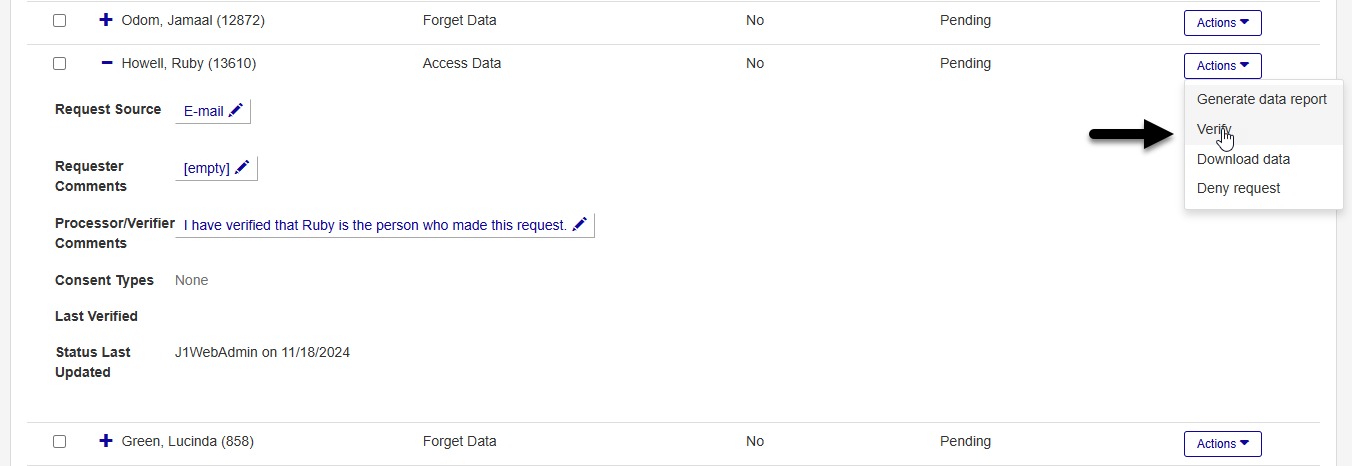
Once you've verified that the person making the request is the owner of the data or someone else who is authorized to access it, click the Actions button for the request you wish to fulfill and select Verified to verify the request. The J1 system won't allow you to move on to the next step until you have verified the request.
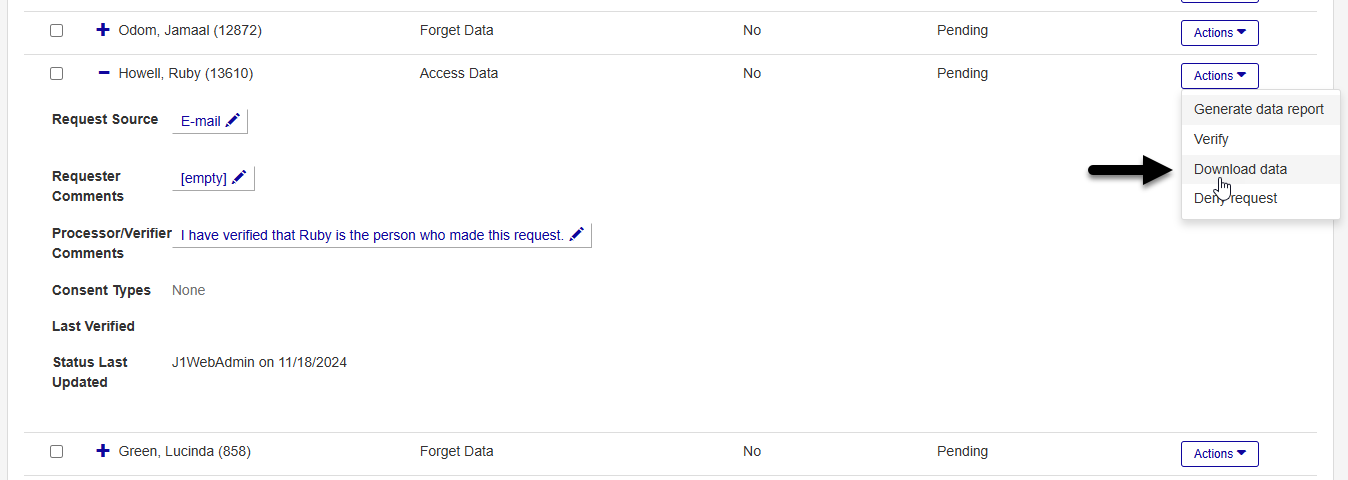
Click the Actions button again and select Download data. The system generates a zipped folder that includes a text file for each table that contains records pertaining to the user who made the request.
You'll see a warning on your screen reminding you to use a secure network to download and share the data and to keep any physical copies that you may print in a secure location. Click OK to continue.
Share the folder you downloaded with the requester. You can send them the files through their school account or other verified email account.
The request is automatically marked as Completed and disappears from your list if you're viewing only pending items.
Before fulfilling a forget data request, ensure that you have verified the identity of the person who will be receiving the data.
Once you've verified that the person making the request is the owner of the data or someone else who is authorized to access it, click the Actions button for the request you wish to fulfill and select Verified to verify the request. The J1 system won't allow you to move on to the next step until you have verified the request.
Click the Actions button and then click Forget Data.
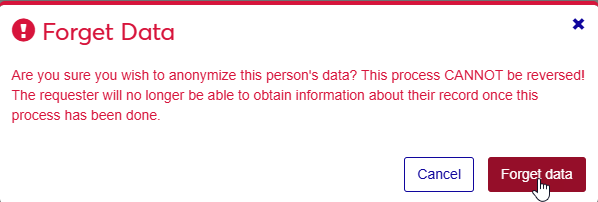
You'll see a warning on your screen informing you that this process cannot be reversed. Do not continue the process unless you are absolutely sure that the data being anonymized will not be needed in the future.
Danger
Once data has been deleted and anonymized using the Forget Data, it cannot be recovered.
Click Forget Data to finalize the process.
All data with personally identifying information (PII) that is not necessary to the running of the system will now be removed. Any PII data elements for records that should not be removed from the system will be anonymized, meaning the identifying information is replaced so the individual who made the request is not tied to these records in any way.
The request is automatically marked as Completed and will disappear from your list if you're viewing only pending items.
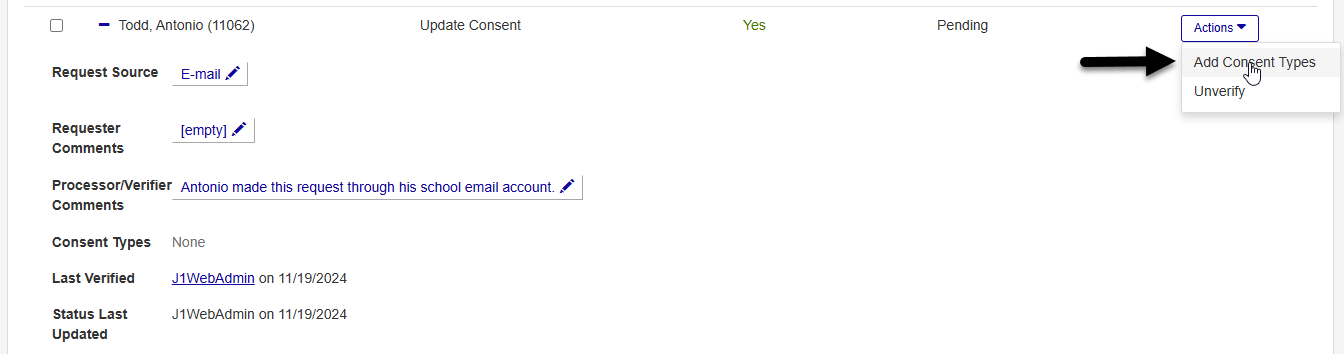
When update consent requests are added through the Processes Hub, they do not contain any consent type data, which is needed to fulfill the requests. To add this, click on the Actions menu for the requests you want to fulfill and select Add Consent Types.
In the Add Consent Types window, choose whether you want to add a Consent Group or a Consent Type.
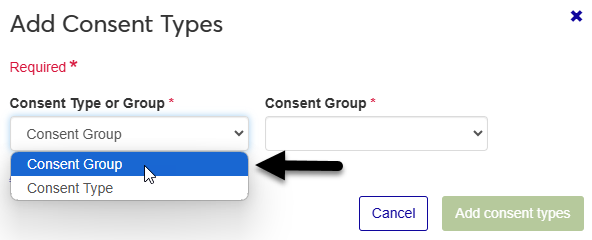
Tip
Consent groups combine multiple consent types into one set, so you can make bigger consent changes without having to select a large number of individual consent types.
Select an option from the Consent Group menu or the Consent Type menu.
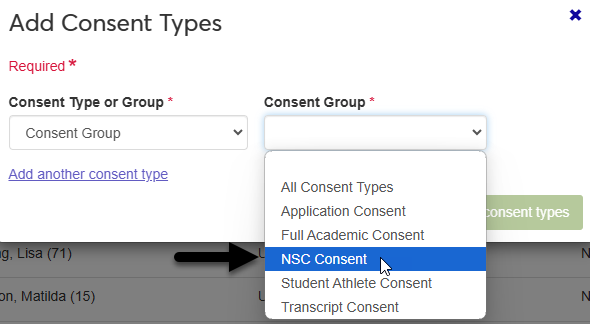
If the user wants to update their consent for more than one consent group or type, click Add another consent type and repeat the process.
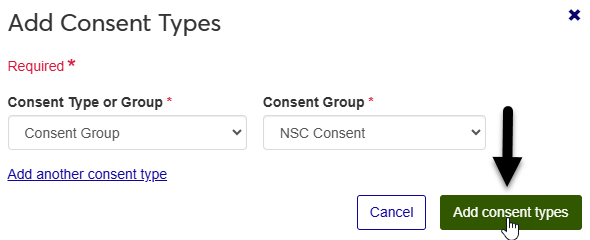
Click Add consent types when you've selected all the types that you want to update.
Back in the Requests table, click the + button to expand the request details.
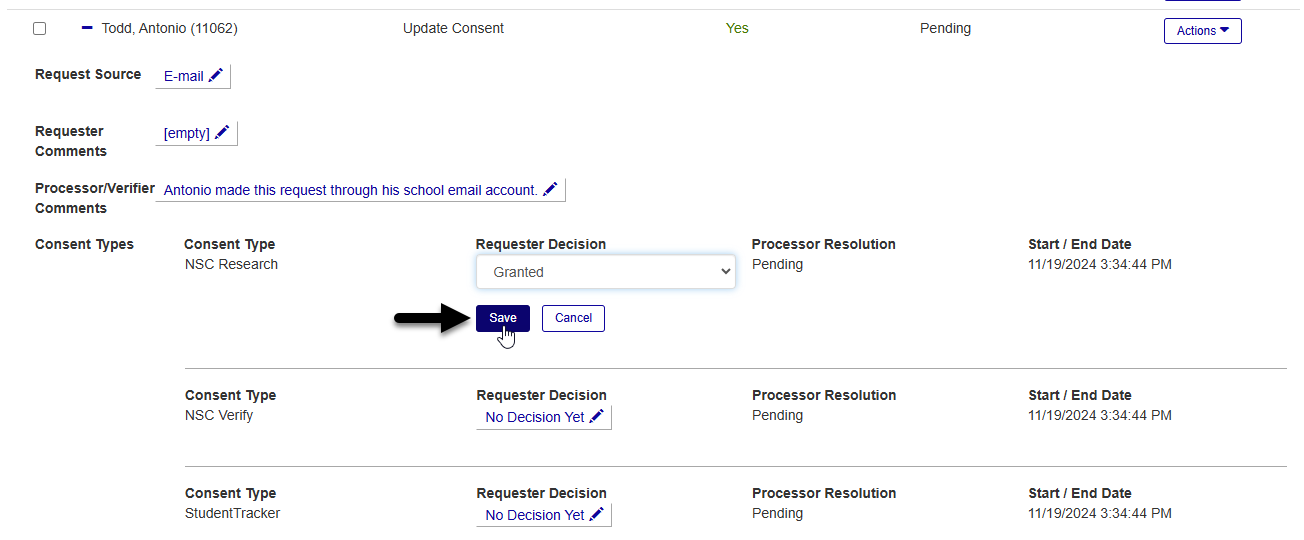
Locate one of the Consent Types that you added. Click the edit icon in the Requester Decision column.
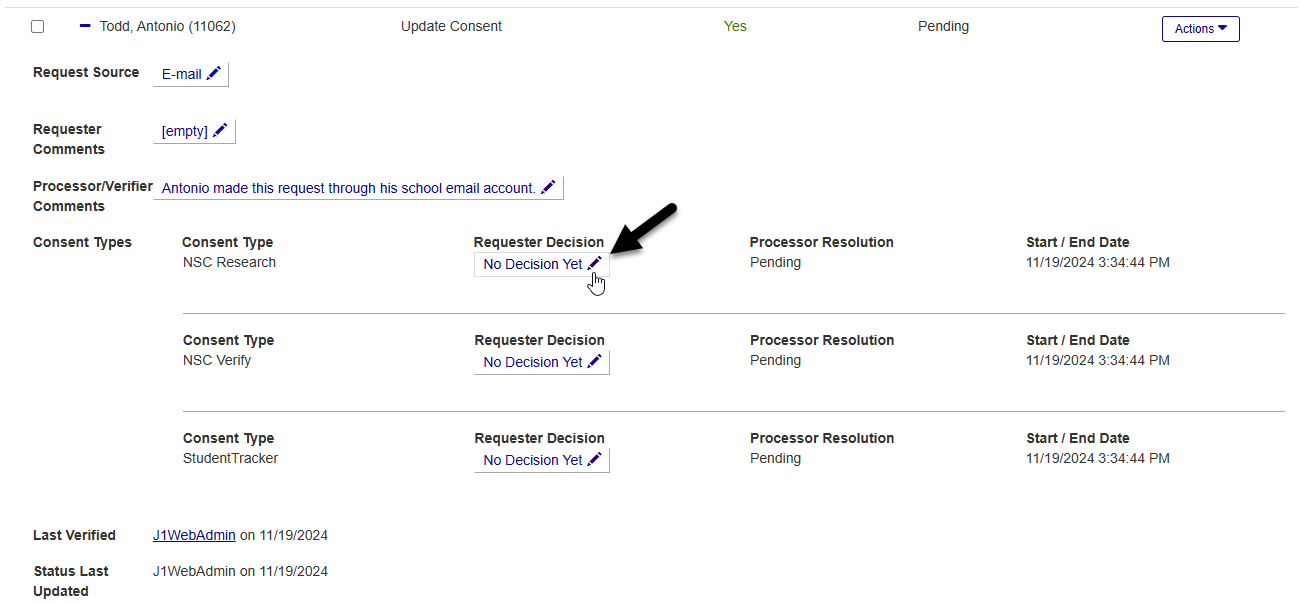
Select Declined if the user does not consent to this type of data being stored in Jenzabar One or Granted if the user grants their consent for it to be stored.
Click Save to save the selection.
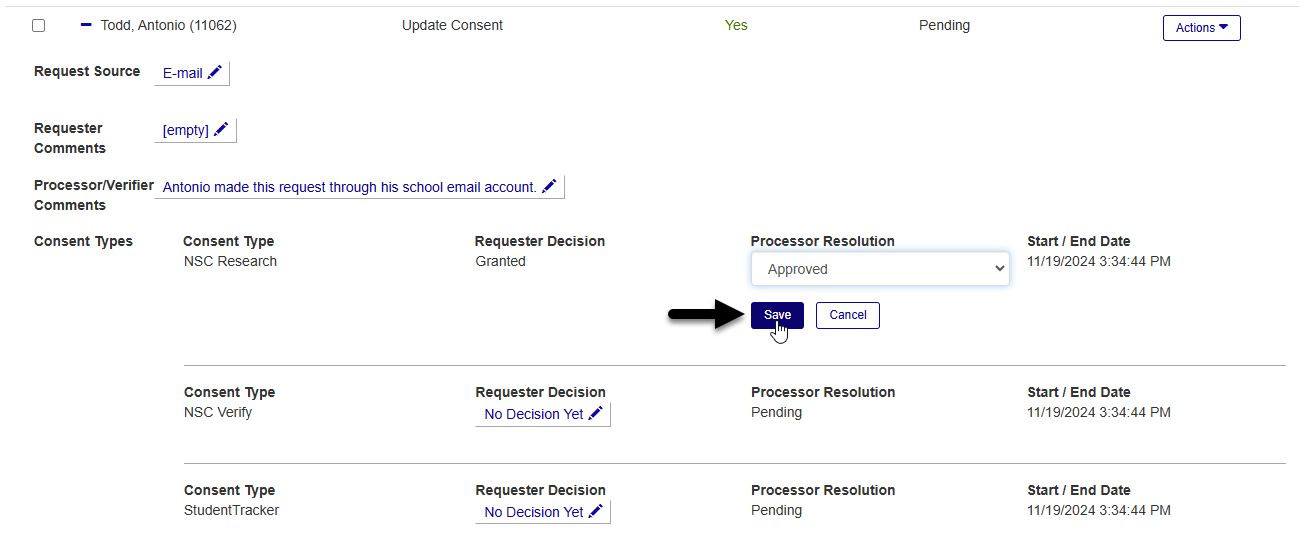
In the Processor Resolution column, select Approved to process this change or Denied if the request cannot be fulfilled.
Click Save to save the selection.
If there is a hold linked to the consent type, you'll be offered the option to add that hold when you approve a consent request. To add the hold, update the Start Date and Time and click Add. Or click Cancel if you don't want to add the hold at this time.
Repeat the process until all consent type changes have been made.
The request will automatically be marked as Completed and will disappear from your list if you're viewing only pending items.
Once an update consent request has been completed, the requester decision and processor resolution fields cannot be altered. If changes were made in error, create a new request to reverse them.
Some Jenzabar One users may wish to have a record of data privacy requests that they can work with outside of the system or share with other staff members. The J1 system makes this easy to accomplish. Begin by navigating to Data Privacy Requests under the Processes Hub.
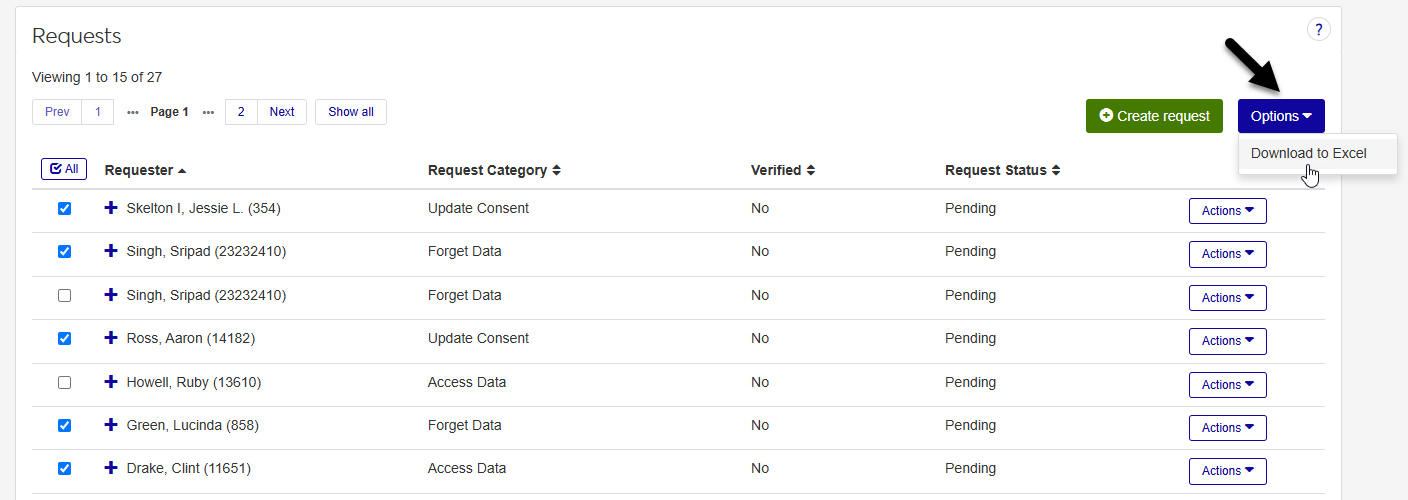
Select the request records that you wish to export using the checkboxes in the Requests table. Keep in mind that you can filter this table using the Request Filter menu on the right. The Check All box at the top of the checkbox column makes it easy to make mass changes. It applies every page displayed with the current filter set.
Once you've selected the request records that you wish to include, click the Options menu in the upper right-hand corner of the table and select Download to Excel.
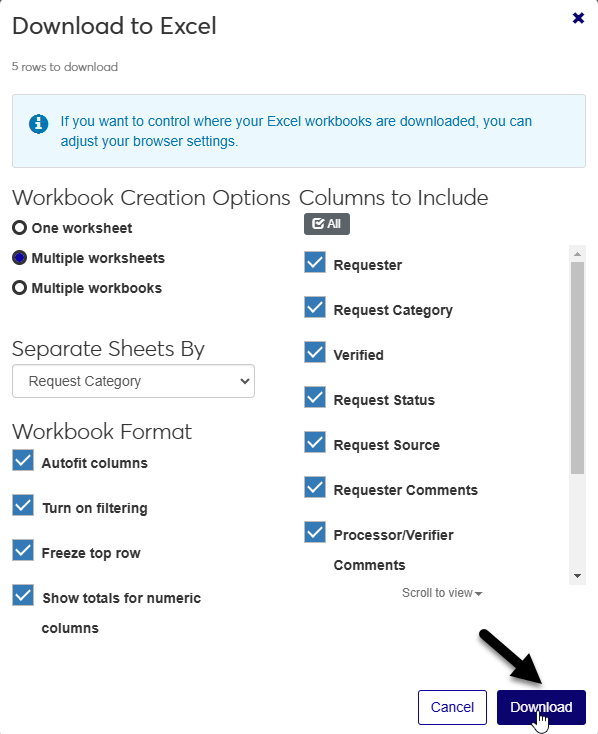
A new menu window will open, offering you the option to customize your spreadsheet.
In the Workbook Creation Options menu, choose whether you want the spreadsheet to have One worksheet, Multiple worksheets, or Multiple workbooks. A workbook is the spreadsheet file itself. Worksheets are the tabbed pages in the spreadsheet that you can switch between from the bottom left of your Excel window.
If you chose the multiple worksheets or multiple workbooks option, choose a column to separate the Separate Sheets By. For example, if you choose Request Category, every request with the same request category will be included in one worksheet or workbook and requests with a different category will be grouped together in additional worksheets or workbooks.
The Workbook Format options offer helpful additions to the spreadsheet that make it easier to use and save you time. If the Autofit columns box is checked, column sizes will automatically adjust to display the full text of the field with the most text. Check Turn on filtering to add the filter icon to each column in the spreadsheet and make it easy to filter. The Freeze top row setting keeps the column headers from moving when the spreadsheet data is sorted. The Show totals for numeric columns setting does not apply to this spreadsheet since there are no numeric columns. You can leave it checked or uncheck it and it will not change the file.
Finally, choose the Columns to Include. By default, all columns are included, but you can exclude any column that you don't need in the spreadsheet by unchecking the corresponding box. Use the Check All button to make mass changes.
Click Download to download the spreadsheet to your local computer.
To add comments to a request, click the + to expand the row. Then click the pencil next to the Processor/Verifier Comments field and add your comments.
No, you cannot delete an existing request. This is to preserve the history of users’ data privacy requests.
If you fulfill an update consent request that should have been denied, you can create a new request with the same consent types to reverse the changes. Or you can simply remove any holds that were added manually. Forget data requests cannot be reversed.
Consent types and groups are created and edited from the Consent Definitions page under the Data Privacy menu in the Processes Hub. Make sure that the consent type or group that you want to add is active and hasn't already been added to the request you're looking at.
CUST_DataPrivacy_Anonymize_Data_PRE is called at the beginning of the Jenzabar provided stored procedure before any deletes or updates occur for our standard tables, while CUST_DataPrivacy_Anonymize_Data_POST is called at the end of the standard anonymize process. Both PRE and POST SPs are passed the ID_NUM as the only parameter.