Course List
Important
Information and features vary according to the roles to which you belong and the permissions associated with those roles. For more information, contact your module manager or your campus support team.
Use this page to view course sections. You can navigate to this page either from the Hub options drop-down list on the Academic Department hub or by clicking View details on all courses on the Course Center block.
Courses appear 15 to a page. Above and below the list, you can navigate the pages or show all courses at once.
Filters
You can filter the list in several ways:
Taught by a particular instructor

Selected by a variety of filters and combinations
The Filter icon  opens the filter card.
You can select a saved filter or you can select various checkboxes, enter search phrases, and save your selections as a new filter.
Note
The Waitlisted option appears in the Enrollment Status drop-down list and in the quick filter above the list only if your school has waitlisting turned on in the J1 Desktop Registration Configuration window | Configuration Table tab | Exceeding Course Capacity group box.
Tip
Filter types include text fields, type-ahead fields, drop-down lists, radio buttons, and date pickers.
When you select your filter choices, you can apply them for the moment or save them to use anytime on this page and anywhere you can search for courses, such as the Course Center and My Course Center blocks, and the My Course List page.
When filters have been applied, the "filtered down" message shows you how many courses passed through the filters.
Views
Use the view drop-down list to select a view: Academic, Enrollment, or Schedule. Each view displays particular course attributes.
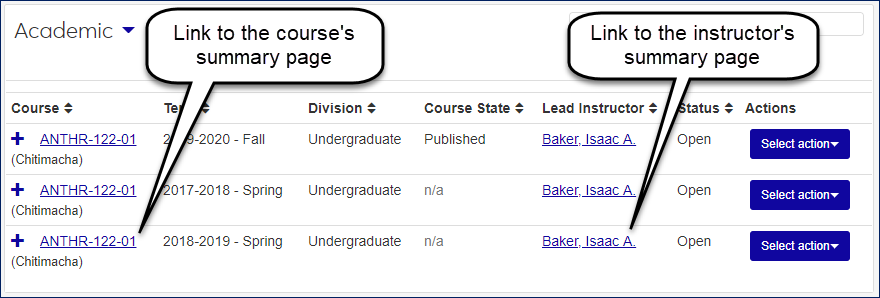
Academic View
See typical academic information such as division, course state, lead instructor, and enrollment status for each course. The information comes from the Section Master table, and is found in J1 Desktop on the Courses and Courses (Non-Traditional) windows | Course tab | Master 1 and Master 2 subtabs.
Course State
Course State describes the course's progress. It's calculated from several columns in J1 Desktop including these:
Term Start Date (Year Term Subterm window | Year/Term tab | Year/Term subtab)
First Begin Date (Courses window | Course tab | Master 1 subtab | Dates group)
Last End Date (Courses window | Course tab | Master 1 subtab | Dates group)
Show on Web (Courses window | Course tab | CRM/Web subtab | Web Controls group)
Canceled (Courses window | Course tab | Master 1 subtab)
Status [also known as Enrollment Status] (Student Registration window | Registration tab | Register subtab)
The following table shows the values in the Course State column.
Course State | Description |
|---|---|
Draft | The course is not yet displayed on the Campus Portal. It is scheduled for a future term, and Show on Web has 'None' selected. |
Published | The course is displayed for end users. It is scheduled for a future term, and Show on Web does not have 'None' selected. |
In Progress | The course has begun and has not yet ended. (That is, today's date is between First Begin Date and Last End Date.) |
Pending Completion | The course has ended (today's date is after Last End Date), but there are students whose Enrollment Status = C Current, but who have no grade. |
Completed | The course has ended (today's date is after Last End Date), and all students have one of these statuses: D Dropped or H History. |
Canceled | The Canceled checkbox is selected. |
More Details
Click the plus icon  to see more details:
Credit Hours
Clock Hours
Grade Type
Requirement (the advising requirement that the course fulfills)
Additional Faculty
Location (as in the J1 Desktop Courses window | Course tab | Master 1 subtab | Course group | Course Location column; not any of the Location columns on the Courses window | Schedule tab)
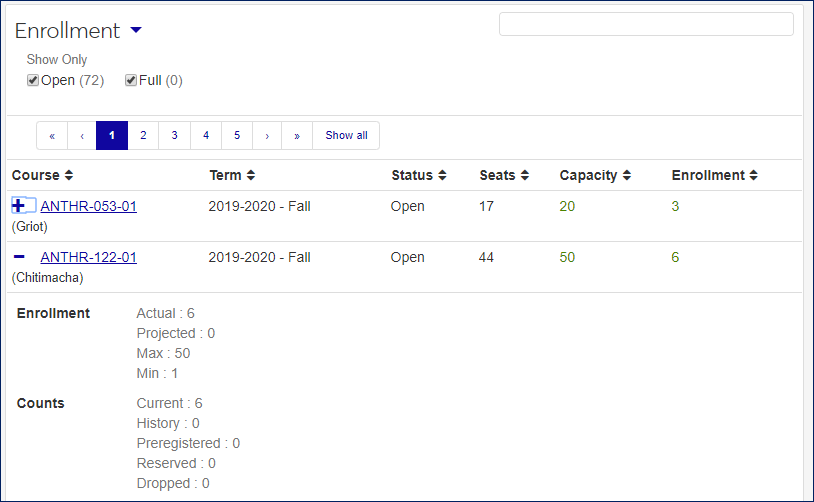
Enrollment View
See enrollment status, capacity, current enrollment, and seats available, as well as the number of students waitlisted for the course. The information comes from the Section Master table, and is found in J1 Desktop on the Courses and Courses (Non-Traditional) windows | Course tab | Master 1 and Master 2 subtabs.
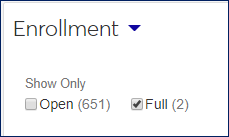
In addition to the Course Filter, you can also use the quick-filter checkboxes to filter by enrollment status.
Click the plus icon for details on actual vs. projected enrollment, maximum and minimum, preregistered, reserved, and dropped enrollments, as well as the current count and the history.
Schedule View
See the course meeting dates, days, and times, the location, and the faculty. The information comes from the Section Schedules table, and is found in J1 Desktop on the Courses and Courses (Non-Traditional) windows |Schedule tab.
In addition to the Course Filter, you can also use the quick-filter checkboxes to filter by days of the week.
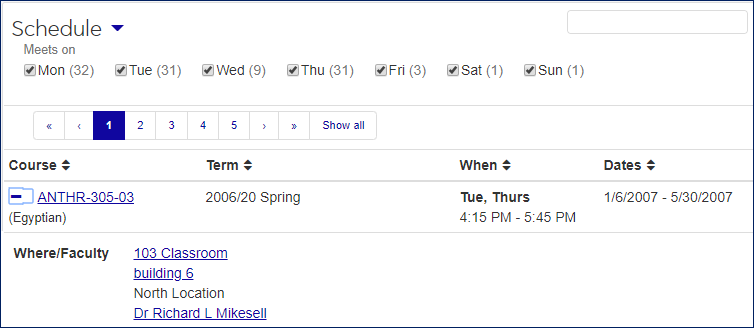
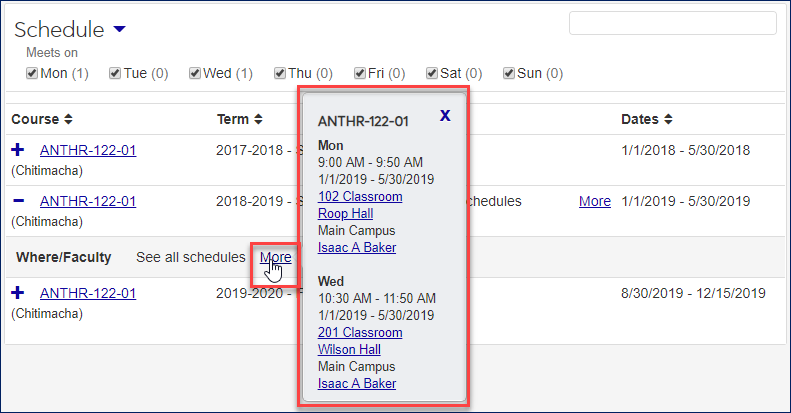
If the course has a complex schedule, the More link opens a pop-up with all the meeting times and places. The plus icon expands the course to any hidden columns such as Where/Faculty.
Links
Anywhere you see the course code, it's a link to the course's summary page. Likewise, the name of an instructor or student is a link to their summary page.
The Options drop-down appears in each view. You can select one or more courses generate a PDF reports:
Course List (Section List Report): Instructor, status, capacity, credits, prerequisites, grade scale, credit type, and load hours for each selected section
Roster: Rosters for each of the selected course sections
In the Academic view, the Actions drop-down appears in each course section's row. Use it for these options:
Download roster: Downloads as a spreadsheet
Generate roster PDF: Opens in a new browser tab
Manage attendance: Opens the section's Attendance page for you to report attendance
Manage grades: Opens the section's Grade Entry page
Manage textbooks: Opens the Manage Section Details page to the Textbooks tab where you can view, add, or remove textbooks
View roster: Opens the Course Roster page
Open the Academic Department hub.
In the Hub options drop-down list, select View course list.
Click the filter icon
.The course title appears as a link in several blocks and lists. Click the link. The course summary page appears.Select filter checkboxes, and enter search phrases.
Click Apply to execute your search.
Click Save as to give your search a name and save it. It will appear in the filter drop-down on several pages.
Tip
See the "Search for Courses and Sections" topic for more details.
In any view, select the checkboxes for some course sections.
Click the Options drop-down, and select Generate course lists PDF . The Section List report opens in a new browser tab.
Use your browser's controls to view, print, or download the PDF.
On a section's row, click the Actions drop-down, and select the Generate roster PDF button. The roster opens in a new browser tab.
Use your browser's controls to view, print, or download the PDF.
In any view, select the checkboxes for some course sections.
Click the Options drop-down, and select Generate rosters PDF . The roster report opens in a new browser tab.
Use your browser's controls to view, print, or download the PDF.
The course title or course code (such as BIOL 1001 02) appears as a link in several blocks and lists. Click the link. The section's summary page appears.
The instructor's name appears as a link in several blocks and lists. Click the link. The instructor's summary page appears.

In the Academic view, on a course section's row, click the Actions drop-down.
Select Download roster. The roster downloads as a spreadsheet.
In the Academic view, on a course section's row, click the Actions drop-down.
Select Manage textbooks. The Manage Section Details page opens to the Textbooks tab.
On the Textbooks tab, click the Expand icon
to see all the fields.To remove a textbook, click the Remove icon
 .
.To add a textbook:
Click the Add textbook button. The Textbooks pop-up opens.
Click the Show textbook search button.
You can use the Textbook Filter to narrow the list.
On the row of the textbook you want to add, click the Select button.
Click the Update button. The textbook is added to the section.
If no students are enrolled in the course section, the Download roster option is disabled. You can still generate a PDF of the roster from the Actions drop-down. And you can generate a PDF of rosters from all the selected course sections from the Options menu.